
30 Gorgeous Natural Hairstyles For Black Women That Showcase Beautiful Texture

Natural hair isn’t just a style choice—it’s a celebration of heritage, identity, and self-love.
I’ve watched the natural hair movement bloom into a beautiful expression of authenticity that empowers Black women everywhere.
From fluffy twist-outs to regal updos, these styles honor our unique textures while offering endless creative possibilities.
Ready to fall in love with some stunning natural hairstyle ideas that might just become your next signature look?
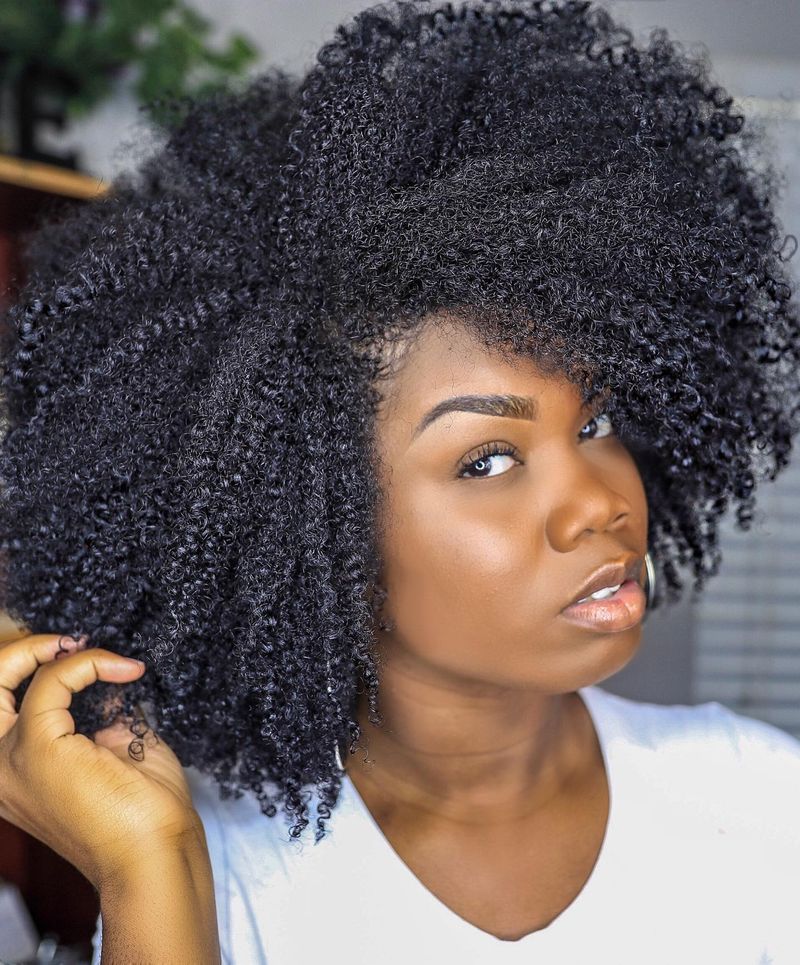
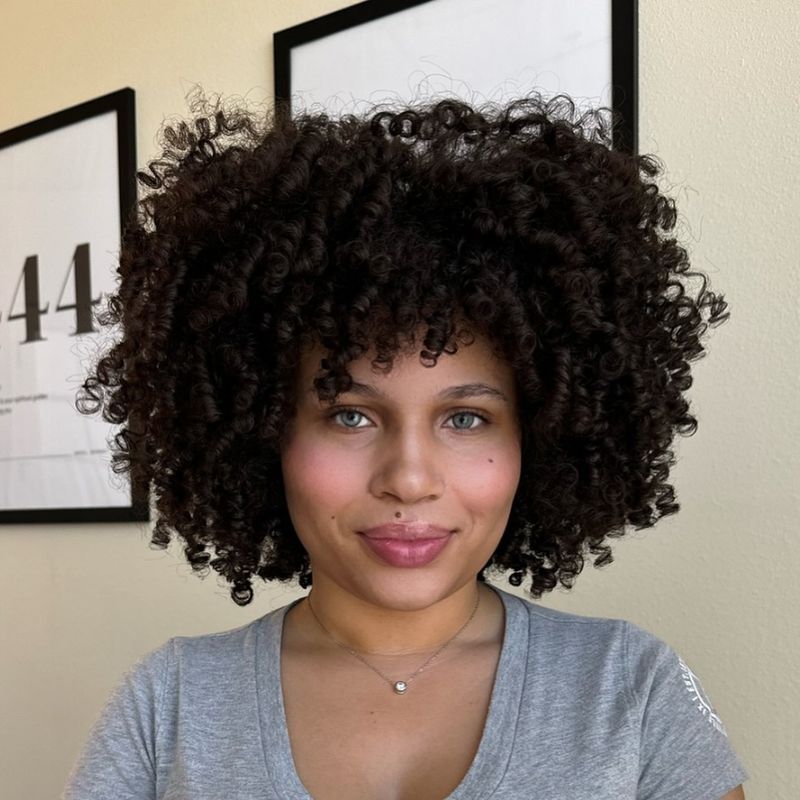
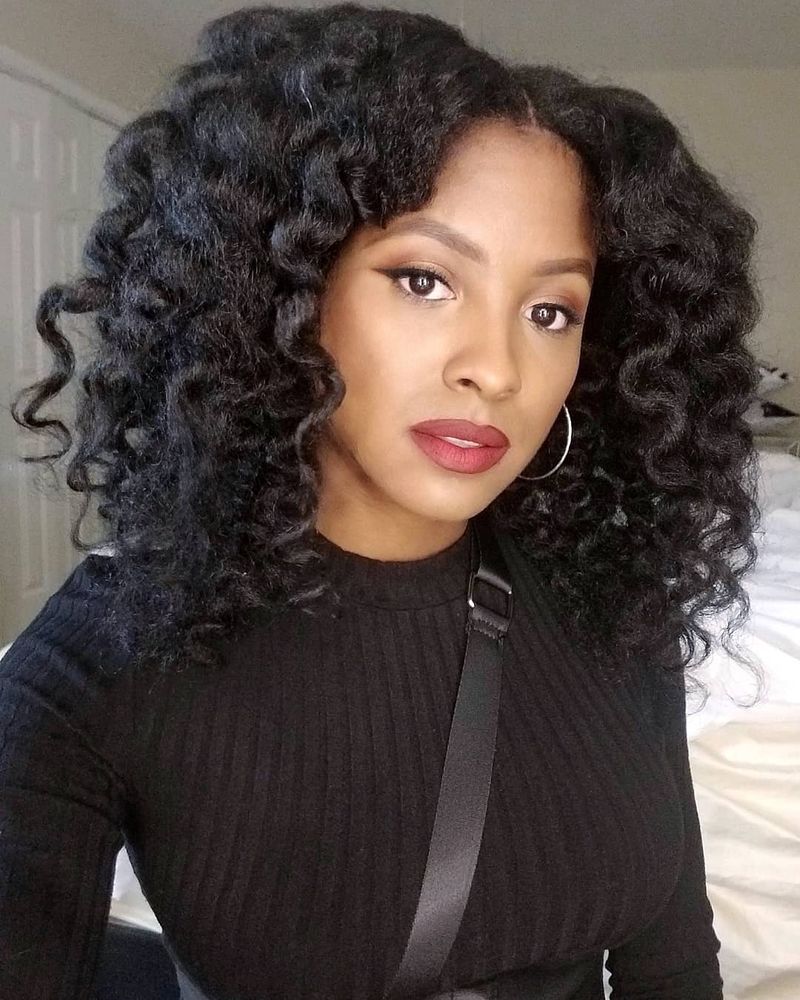
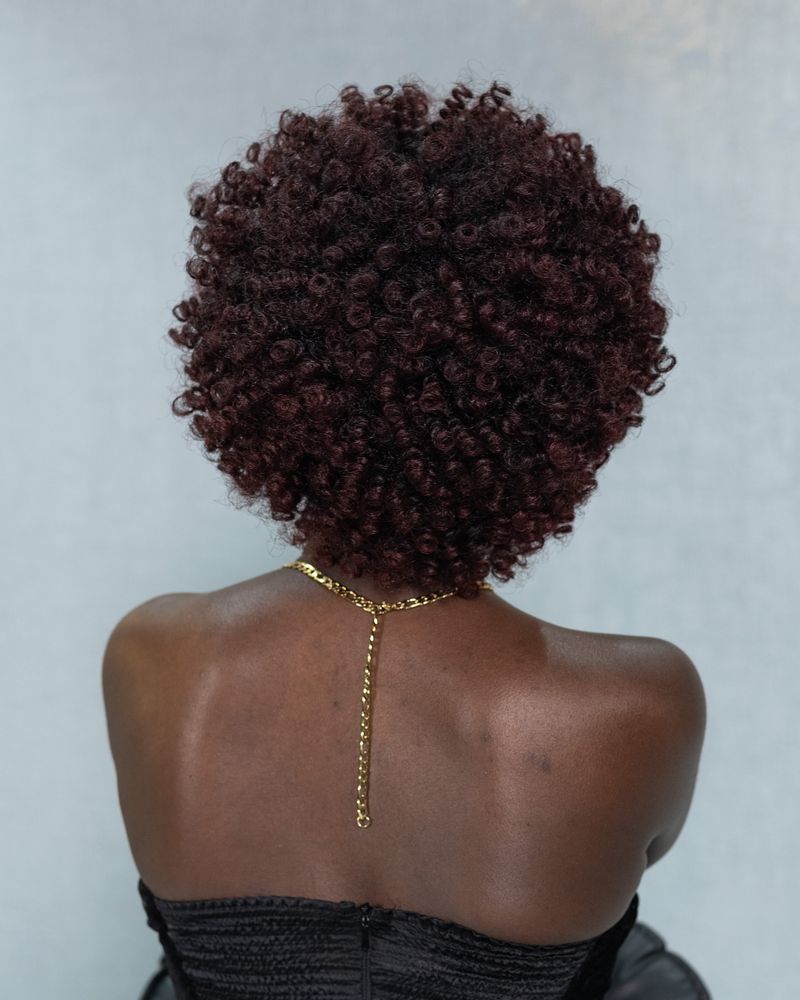
1. Classic Afro
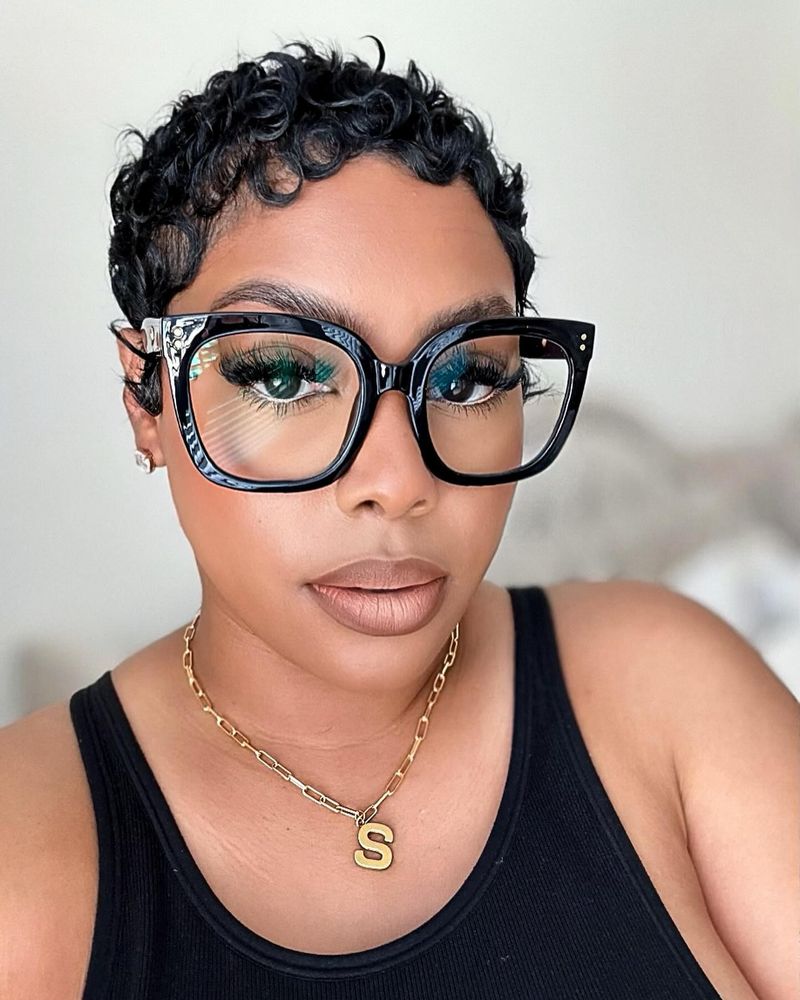
Nothing says ‘I embrace my roots‘ quite like a full, magnificent afro. My friend Monica rocked this style to her sister’s wedding and stole the spotlight from the bride (oops!).
The key to a stunning afro is moisture and gentle detangling. I start with damp hair, apply a curl-defining cream, and pick it out from the ends working toward the roots. The bigger, the better! For maintenance, sleep with a satin bonnet and refresh with a light mist of water and oil mix. Your afro can last days with minimal manipulation, making it both a statement and a practical choice.
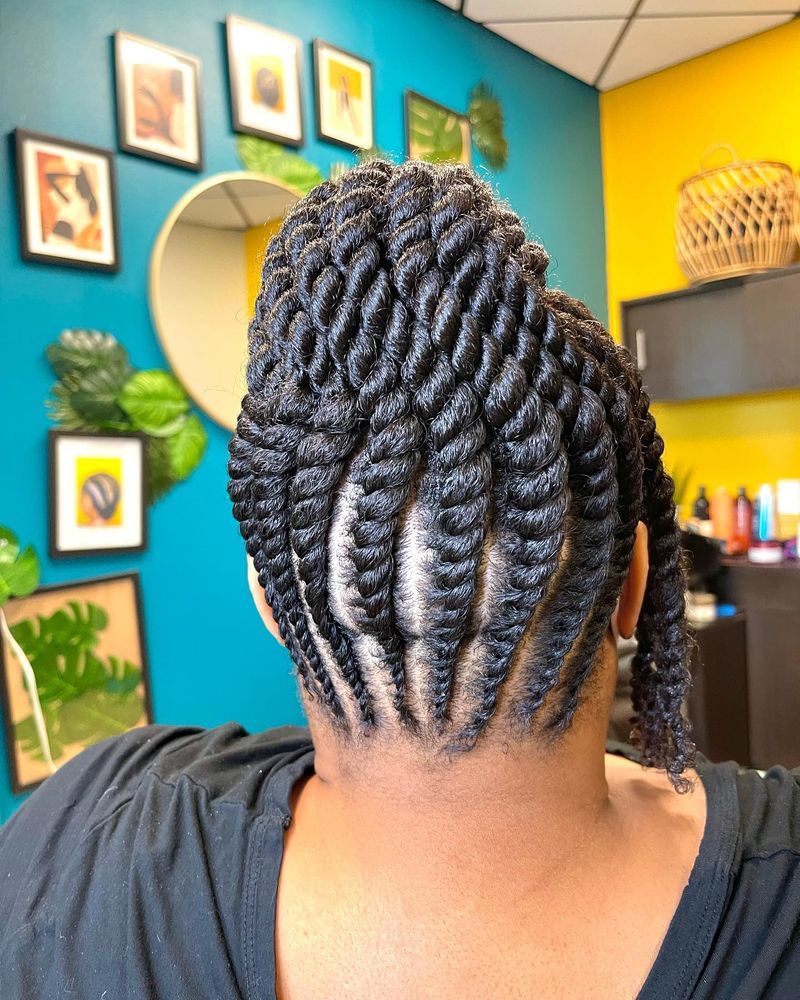
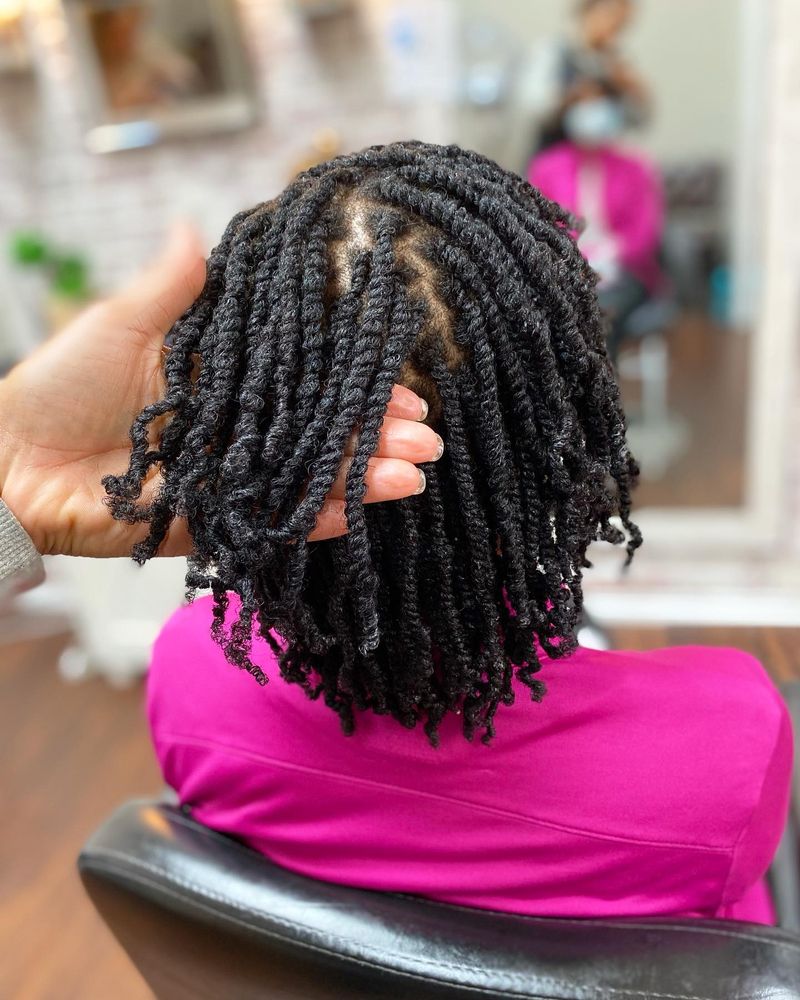
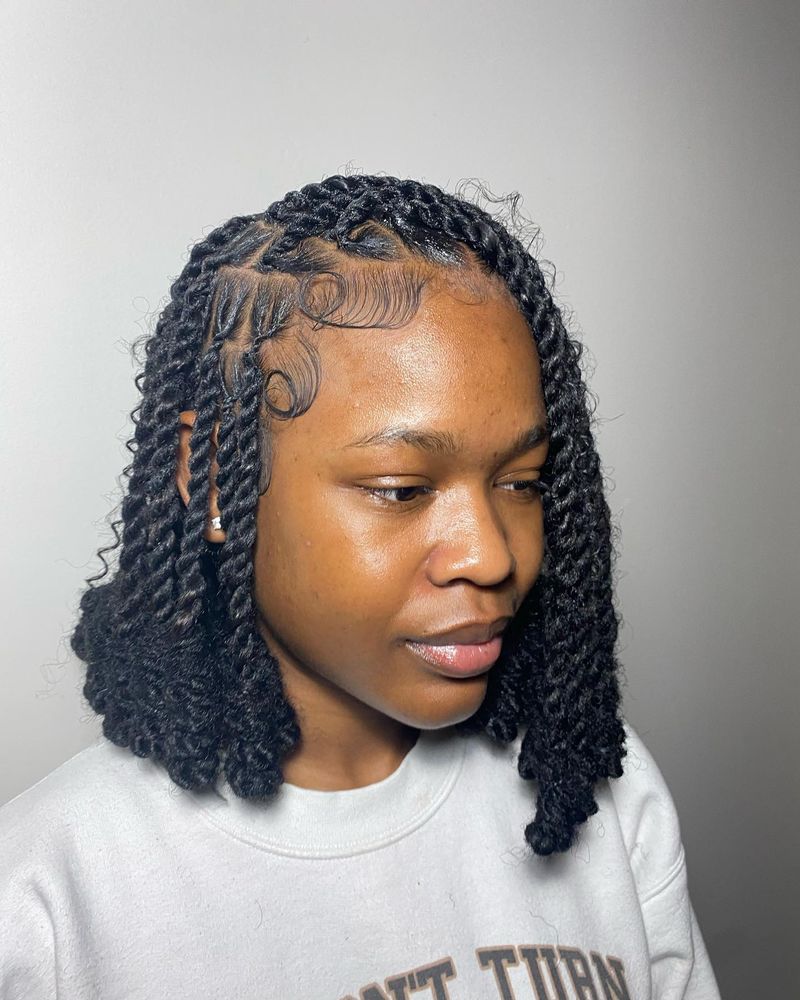
2. Two-Strand Twists

Two-strand twists saved my hair journey when I first went natural. They’re simple yet stunning, perfect for beginners and veterans alike. Start with freshly washed, moisturized hair sectioned into manageable parts. Take two strands and twist them around each other from root to tip. Smaller sections create tighter twists; larger ones produce a chunkier look.
My twists usually last two weeks before I unravel them for a gorgeous twist-out. They’re also fantastic for hair growth since they minimize manipulation and breakage. Plus, they work on any length from short crops to waist-length locks.
3. Bantu Knots
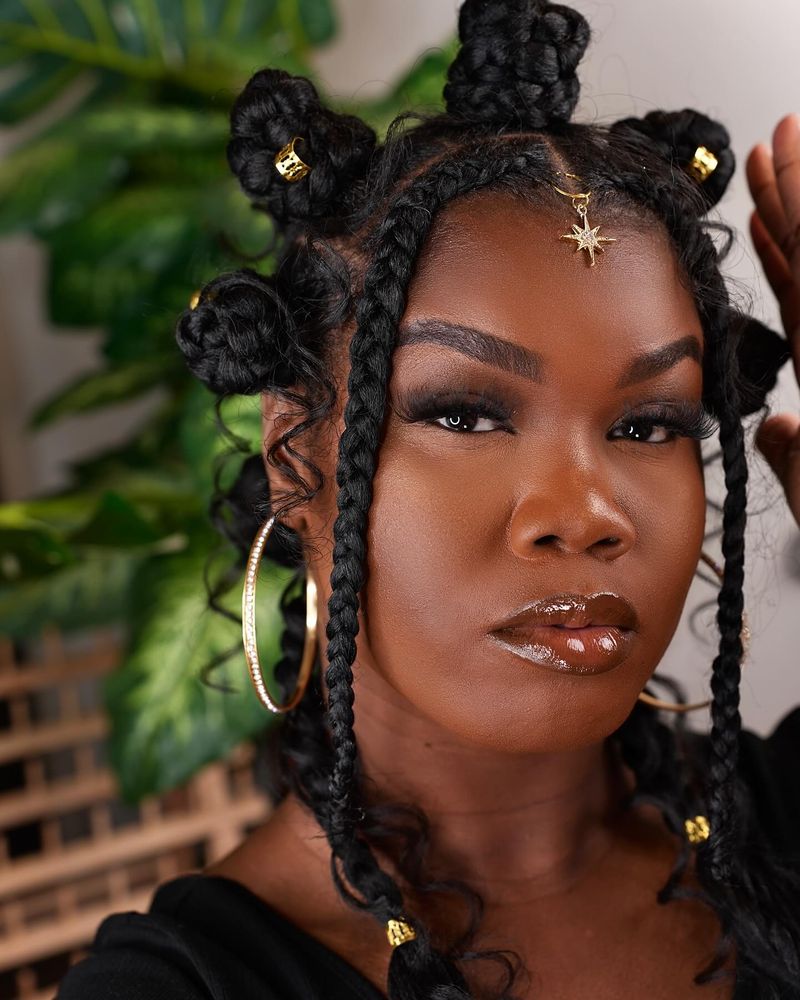
Bantu knots trace back centuries in African culture, and I’m thrilled they’ve made their way into mainstream fashion. These cute little coiled buns pack serious style punch!
Creating them requires sectioning clean hair, twisting each section tightly, then wrapping it around itself to form a knot. Secure with bobby pins if needed. My trick? Apply edge control around each section for that super-sleek finish. Wear them as a bold protective style or unravel after a day for killer defined curls. They’re perfect for second or third-day hair when you need a refresh that delivers both protection and style.
4. Wash-and-Go
My go-to for busy mornings is the wash-and-go – the closest thing to natural hair freedom! Despite its name, achieving the perfect one takes practice.
The magic happens in the shower with soaking wet hair. I apply leave-in conditioner, curl cream, and gel using the praying hands method, then scrunch upward. Diffusing cuts drying time, but air-drying gives me more defined results.
Everyone’s wash-and-go looks different based on their curl pattern – that’s the beauty of it! Mine lasts about three days before needing refreshing. For second-day hair, I pineapple at night and fluff with oil-coated fingers in the morning.
5. Flat Twist Updo
My flat twist updo saved me during a weeklong conference when I needed a polished look that could withstand long days. The style combines elegance with practicality. Unlike regular twists, flat twists lay against the scalp similar to cornrows but use a two-strand twisting technique. I create multiple flat twists going upward, then tuck and pin the ends into a gorgeous crown.
What makes this style special is its versatility. You can customize the direction of twists, add accessories, or leave some curls free at the top. It protects ends from breakage while keeping you looking professional for up to two weeks.
6. Pineapple Puff
The pineapple puff saved my third-day curls more times than I can count! This playful style takes just minutes but delivers major impact.
Simply gather your hair at the crown of your head, secure with a satin scrunchie or band, and fluff for volume. Leave the front edges out for a face-framing effect. My secret weapon is a touch of mousse on the edges for extra definition.
Beyond its cuteness factor, this style prevents curl crushing while you sleep. It works on various lengths – even my friend with a tapered cut rocks a mini version. For special occasions, wrap a colorful scarf around the base or add decorative pins.
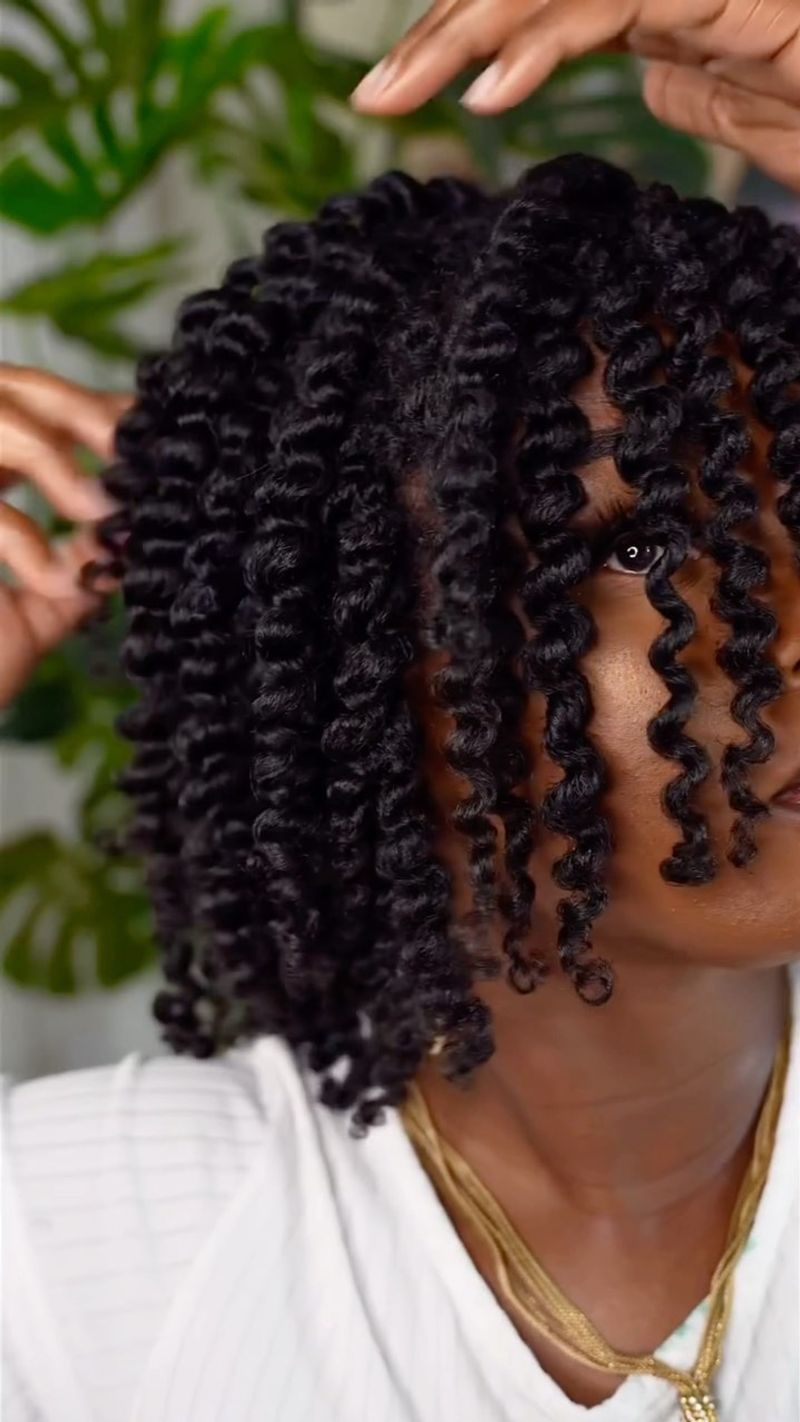
7. Twist-Out
My twist-out journey began after a disastrous heat-styling incident that left my ends damaged. Now it’s my signature look for special events!
The process starts with two-strand twists on damp, product-laden hair. After drying completely (patience is key!), I unravel each twist, separate the curls gently, and fluff at the roots. Oil on fingertips prevents frizz during separation.
What makes twist-outs magical is how they showcase your natural texture while creating defined curl patterns. The style typically lasts 3-5 days if protected at night. For maximum volume, I twist in the opposite direction of my natural growth pattern.
8. Finger Coils
Finger coils turned my short TWA phase into one of my most creative hair periods. These springy spirals define each curl individually for amazing texture. The technique is simple but time-intensive. Apply styling product to small sections of damp hair, then twist each section around your finger from root to tip. The smaller the sections, the tighter the coils.
Unlike other styles, finger coils showcase your actual curl pattern rather than creating a new one. They’re perfect for newer naturals still learning their texture. My coils typically last a week with careful preservation at night. For a fun variation, try coiling just the top while keeping the sides short.
9. Braid-Out
Braid-outs give me those gorgeous waves that make people ask if I’ve used a crimping iron. The secret? Just some simple braids and patience! I section freshly washed hair, apply styling cream, then create multiple braids. Three-strand braids give more defined waves than twists. After drying completely overnight, I unravel carefully and separate each wave.
The magic of braid-outs is their versatility. Chunky braids create loose waves; tiny braids make tighter crimps. My favorite trick is braiding the front sections going backward for volume at the roots. This style typically lasts longer than twist-outs – sometimes a full week with proper nighttime protection.
10. Tapered Cut
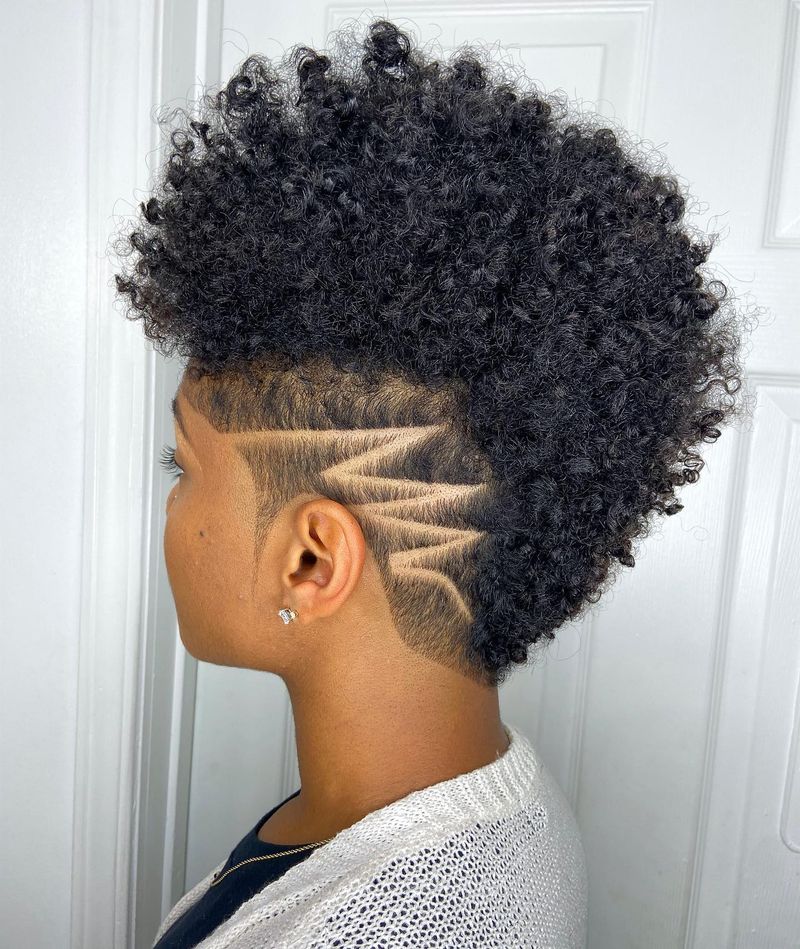
My tapered cut phase ranks among my boldest hair moments. This style keeps length on top while gradually shortening toward the nape and sides – creating that perfect mushroom-like shape.
Finding a stylist who understands natural hair cutting techniques is crucial. The beauty of a tapered cut lies in its low maintenance yet high style factor. I simply refresh with water, apply styling product, and finger-coil or sponge the top for definition.
This cut works beautifully for multiple curl patterns and face shapes. It grows out gracefully too, transitioning into a cute asymmetrical style. For extra flair, I sometimes add color to the longer top section while keeping the sides natural.
11. Flexi Rod Set
Flexi rod sets transformed my hair game when I wanted bouncy curls without heat damage. Those bendable foam rods create the most perfect spirals!
The process involves wrapping sections of damp hair around flexi rods, securing the ends, and allowing to dry completely. Larger rods create looser curls; smaller ones give tighter spirals. Setting lotion or foam provides hold without crunchiness.
My sets typically last 5-7 days with proper nighttime care. What makes this style special is its versatility – as days progress, it transforms from springy spirals to a voluminous curly fro. For a modern twist, I leave the roots straight and only curl from mid-shaft to ends.
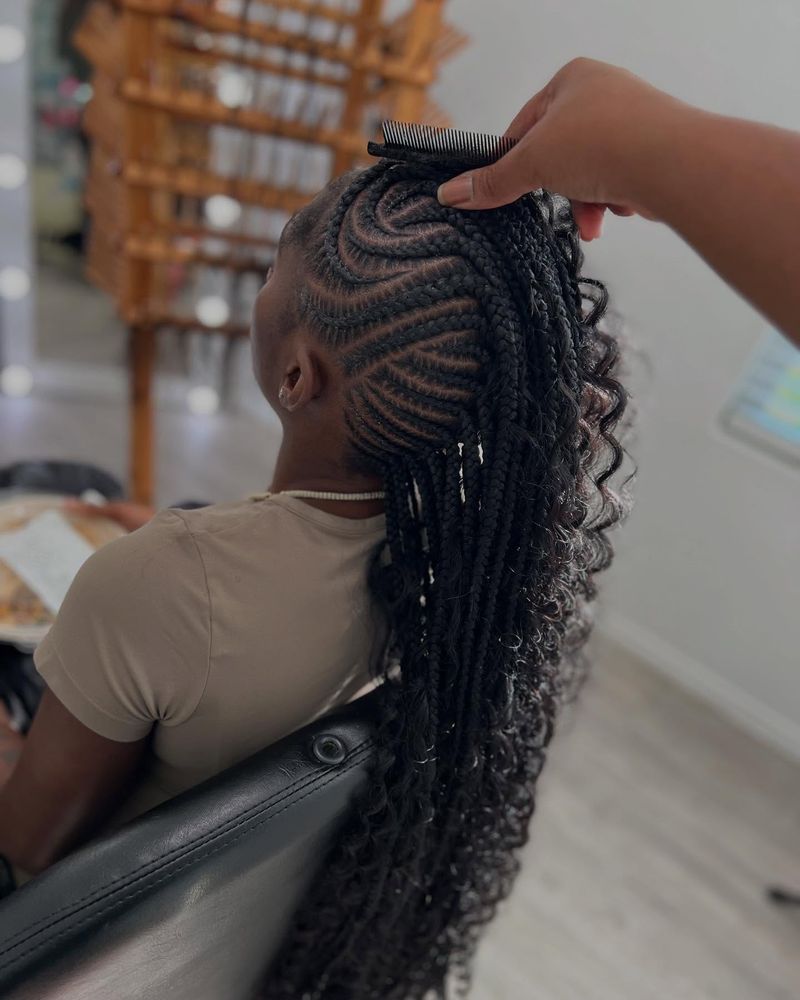
12. Halo Braid
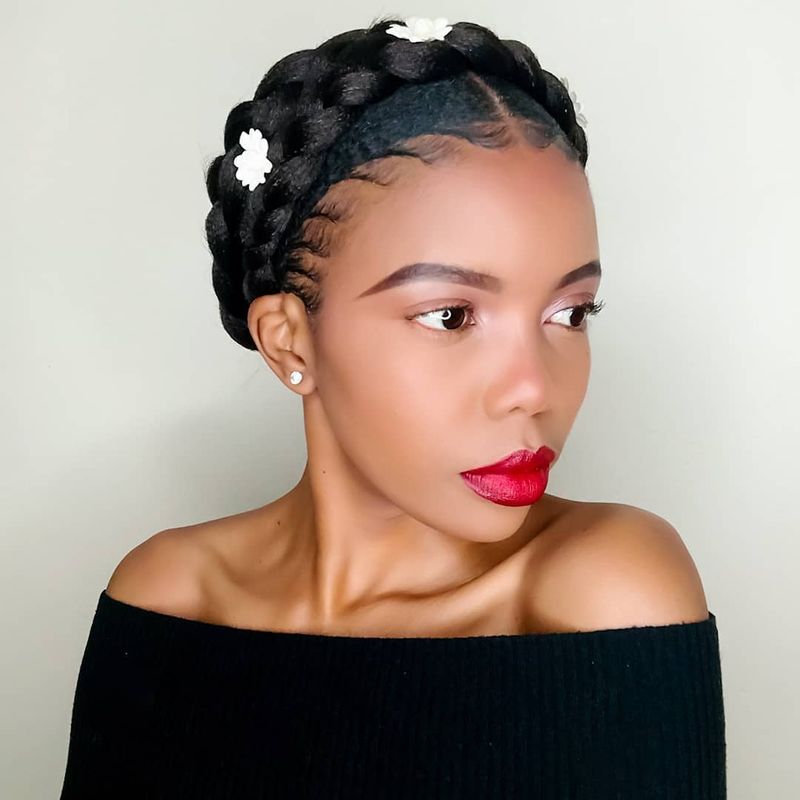
Halo braids became my summer savior during a particularly humid vacation in Miami. This regal style keeps hair completely off the neck while creating a beautiful crown-like effect.
Creating it requires sectioning the hair around the perimeter of your head and braiding it in a circular motion. The key is maintaining consistent tension throughout. For thinner hair, adding braiding hair creates fullness.
Beyond its practical benefits, the halo braid connects deeply to African heritage and royalty. It lasts up to two weeks with proper care and edge maintenance. My favorite variation adds small decorative braids or twists around the crown for extra dimension.
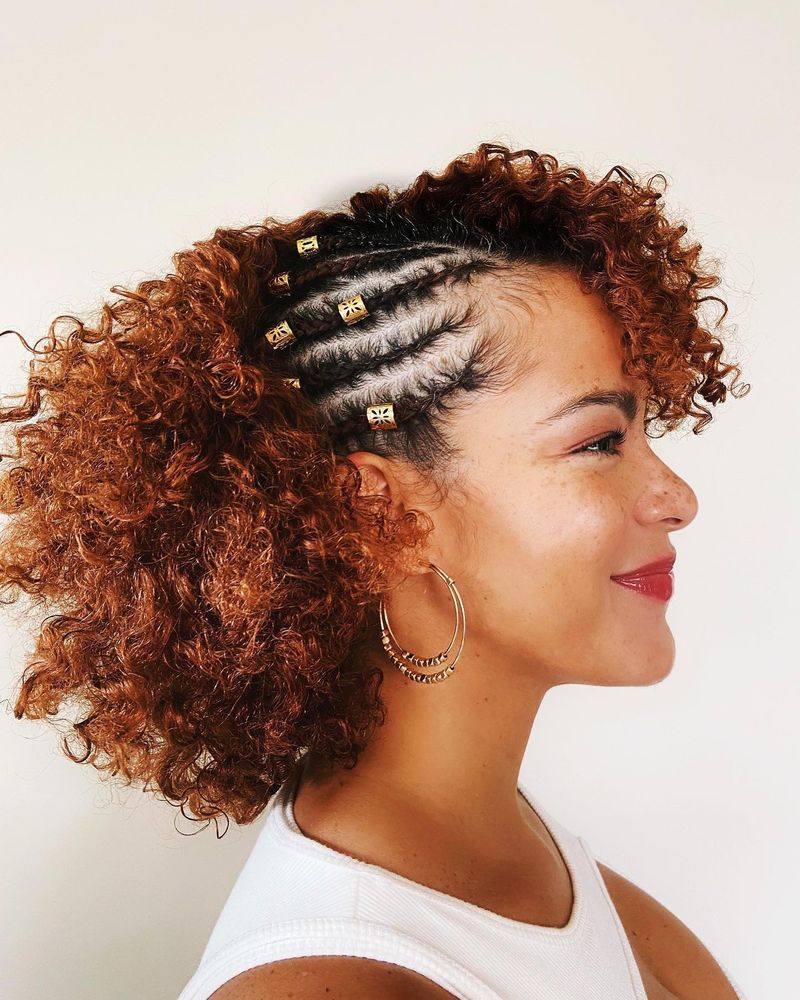
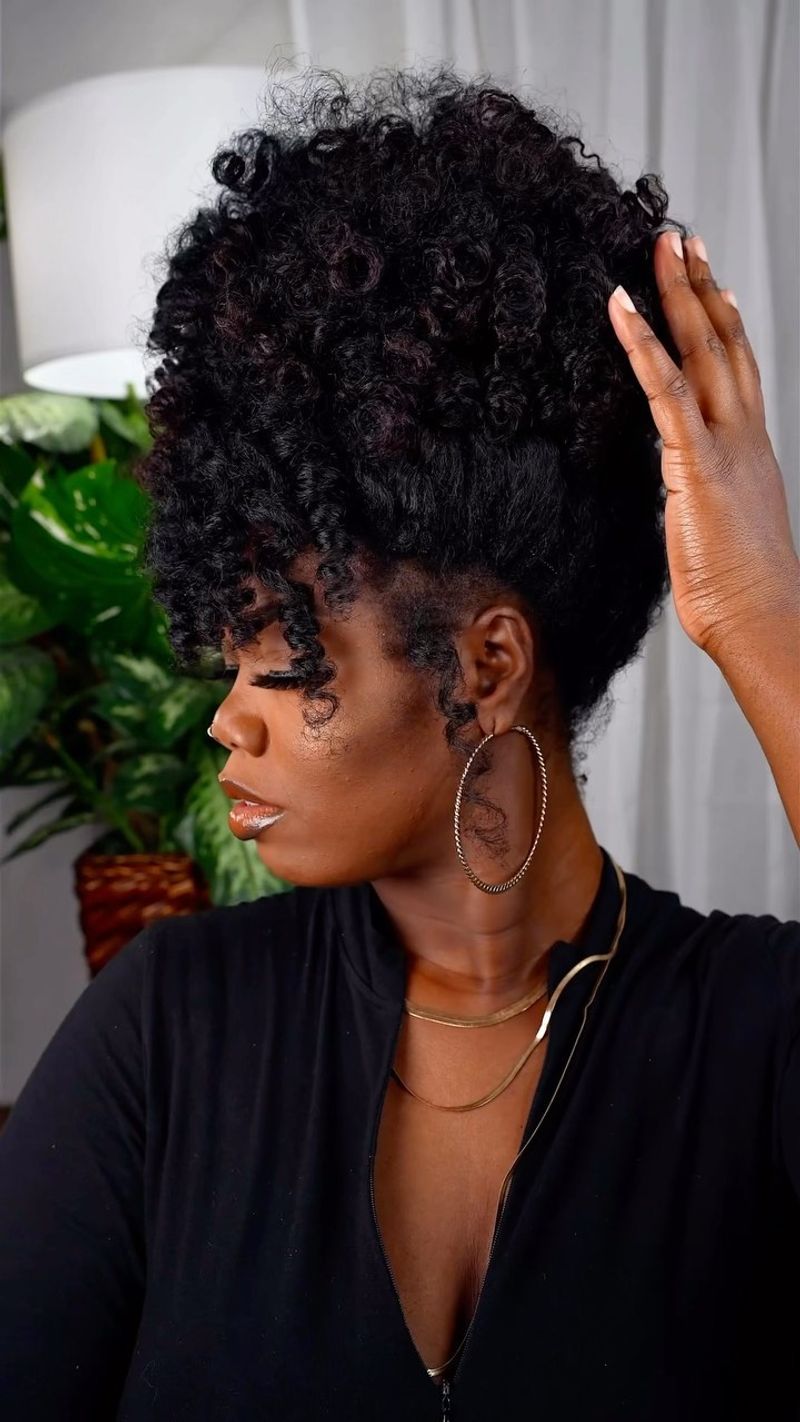
13. Curly Frohawk
My curly frohawk phase started as an experiment but quickly became a conversation starter everywhere I went! This edgy-yet-elegant style balances boldness with feminine flair.
Creating it requires flat twisting or braiding the sides of your hair upward, while leaving the middle section free to form a mohawk-inspired strip of curls. Bobby pins secure any loose sections. Adding colorful hair jewelry elevates the look for special occasions.
The beauty of this style is its adaptability to different hair lengths and textures. It works equally well on TWAs and longer curls. For extra height, I sometimes use a pick at the roots or add small puffs along the center instead of leaving curls loose.
14. Stretched Twist-Out
Stretched twist-outs changed my natural hair game when I wanted length retention while still showcasing my texture. This variation adds an extra step that makes all the difference.
The process begins like a regular twist-out, but before twisting, I gently stretch each section using the banding method or by blow-drying on low heat. This pre-stretching creates a longer, fuller result when unraveled.
What makes this style special is how it showcases length while maintaining beautiful texture. It’s perfect for marking hair growth milestones! The style typically lasts 4-5 days and transitions beautifully into a puff or updo when it begins to lose definition.
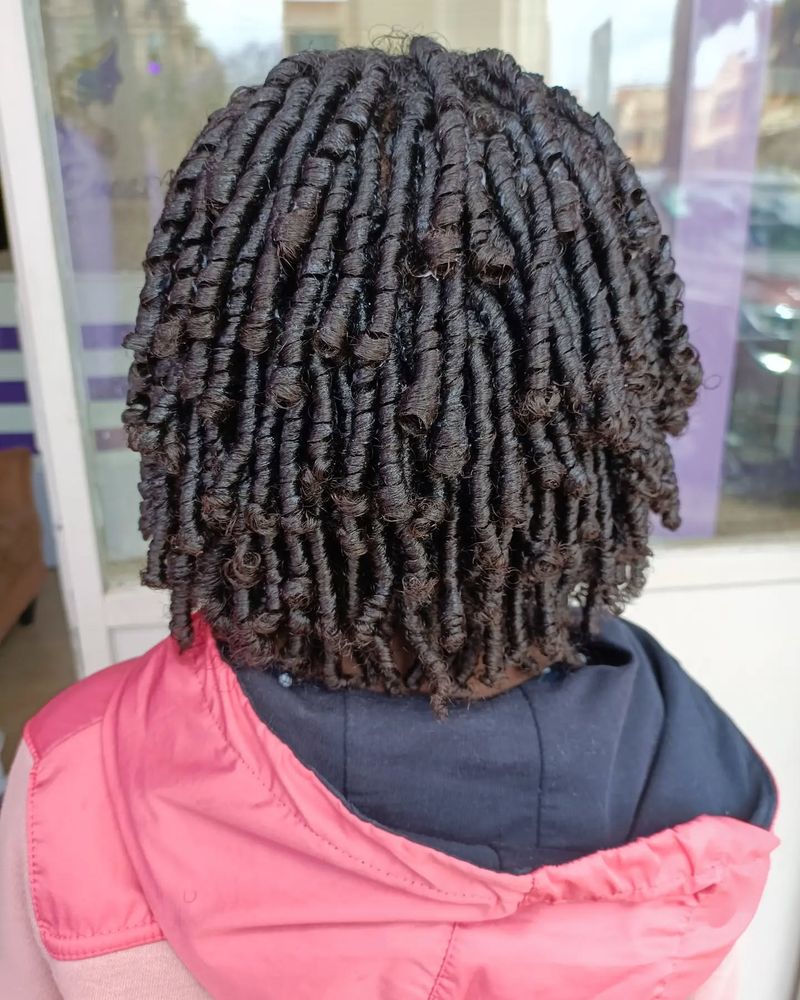
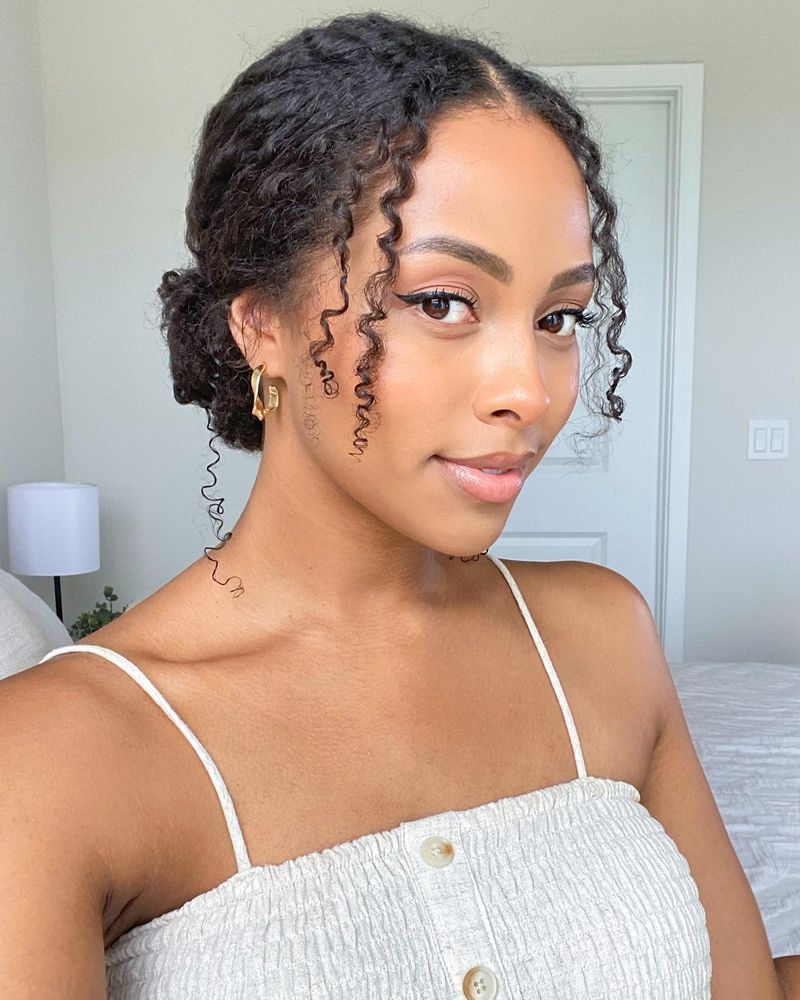
15. Mini Twists
Mini twists saved my hair during grad school when time for styling was limited but I still wanted to look put together. These tiny two-strand twists offer versatility and protection.
Creating them requires patience – sectioning hair into small parts and twisting from root to tip. The smaller the sections, the longer the style lasts. A good leave-in conditioner and light oil keep them moisturized.
Unlike chunky twists, mini twists can last 3-4 weeks with proper care. They move like natural hair, can be styled in updos, ponytails, or left loose. My favorite aspect is how they protect every strand while allowing easy access to my scalp for cleansing. They’re truly the ultimate low-maintenance protective style.
16. Perm Rod Set

Perm rod sets deliver those perfect uniform curls that make everyone think you spent hours at a salon. The secret lies in those small cylindrical rods!
The technique involves wrapping small sections of damp hair around perm rods, securing them, and allowing to dry completely. Setting foam or lotion helps the curls maintain their shape. Different rod sizes create varied curl patterns – I mix sizes for a more natural look.
My sets typically last a week with nighttime protection. What makes this style special is its transformation over days – from tight, uniform curls to a fuller, more relaxed look. For modern appeal, I leave out the baby hairs and create a deep side part.
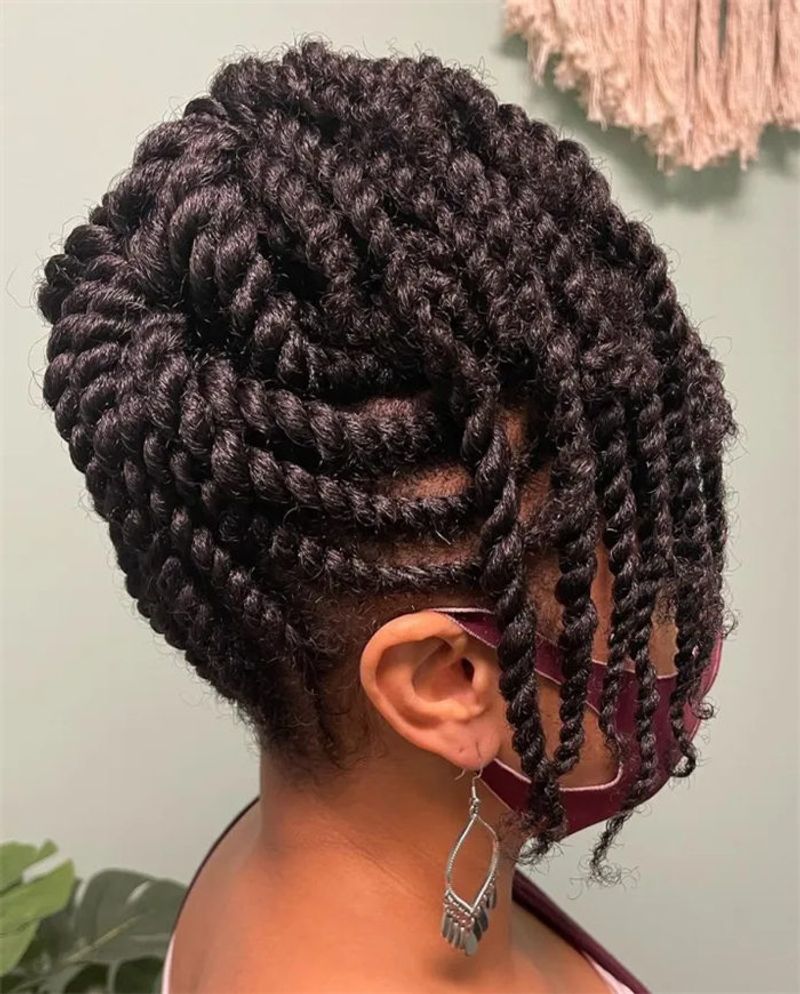
17. Chunky Twist Crown
My chunky twist crown became an instant hit at my cousin’s wedding – elegant enough for formal events yet simple enough to create at home. This regal style combines protection with sophistication.
To create it, I make large two-strand twists around my head, then wrap and pin them into a crown formation at the top. The key is securing each twist firmly while maintaining a natural-looking shape. Decorative pins add a touch of glamour.
What makes this style special is its timeless appeal and protective benefits. It keeps ends tucked away while creating a striking silhouette. For variation, I sometimes leave a few twists hanging in the back or incorporate braided sections among the twists.
18. Side-Swept Fro
My side-swept fro emerged from a happy accident when I was growing out a tapered cut. Now it’s my go-to asymmetrical style that frames my face perfectly!
Creating it requires picking out your natural hair to maximum volume, then using a wide-tooth comb to direct most of the volume to one side. A strong-hold gel helps maintain the shape. For special occasions, I add a decorative clip on the less voluminous side.
The beauty of this style is how it combines the boldness of an afro with the sophistication of an intentional shape. It works wonderfully for different face shapes and hair lengths. My favorite part? It transitions beautifully into a pineapple puff when I need a change.
19. TWA (Teeny Weeny Afro)
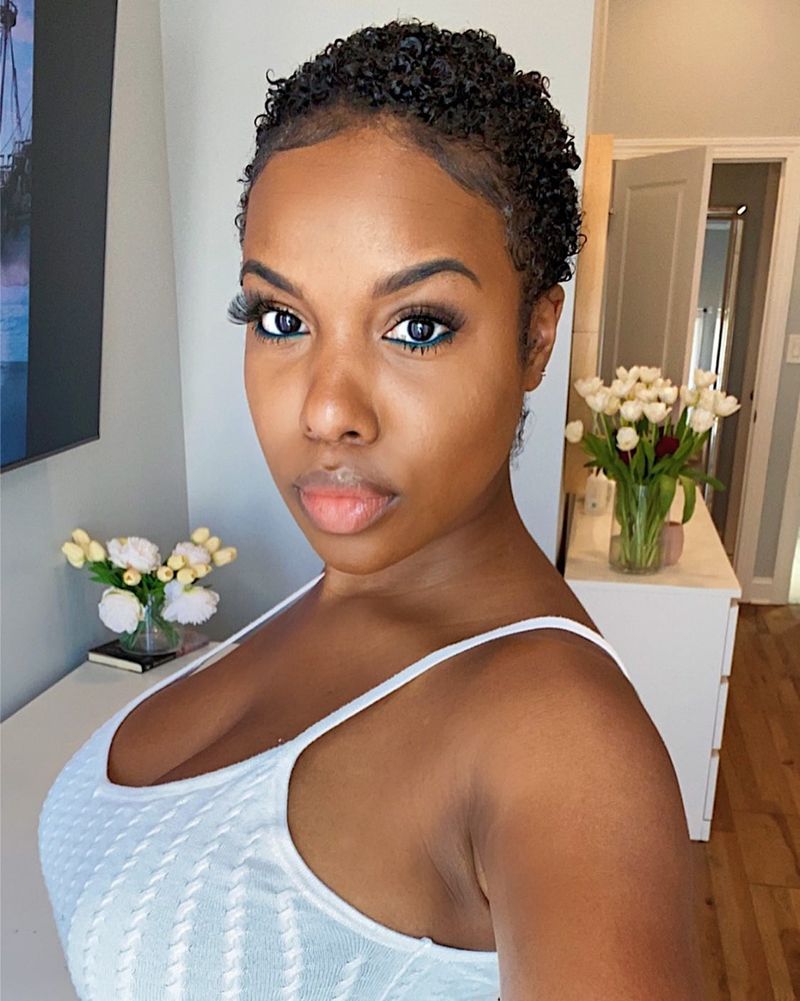
My TWA phase taught me to appreciate my facial features and embrace minimalism. This super-short style highlights natural curl patterns while requiring minimal maintenance.
Maintaining a TWA simply involves regular moisture, gentle cleansing, and occasional shape-ups to maintain the desired length. For definition, I apply curl cream and use a soft sponge in circular motions to create tiny coils.
The beauty of the TWA lies in its versatility despite the short length. It can be worn sleek and close to the scalp or picked out for volume. My favorite styling trick is creating a sharp side part for an asymmetrical look that adds dimension. Plus, it’s the perfect canvas for bold earrings and makeup!
20. Rod Set
Rod sets transformed my styling routine when I wanted vintage-inspired curls without heat damage. The technique creates uniform spirals with incredible longevity.
Creating the look involves sectioning damp hair, applying setting product, and wrapping each section around smooth rods. The smaller the rod, the tighter the curl. Drying completely is crucial – I sleep with them overnight or sit under a hooded dryer.
What makes rod sets special is their versatility throughout the week. Days 1-2 give springy, defined curls; days 3-5 offer a fuller, more relaxed look. For a modern twist, I sometimes only rod the ends while stretching the roots, creating a tapered curl effect.
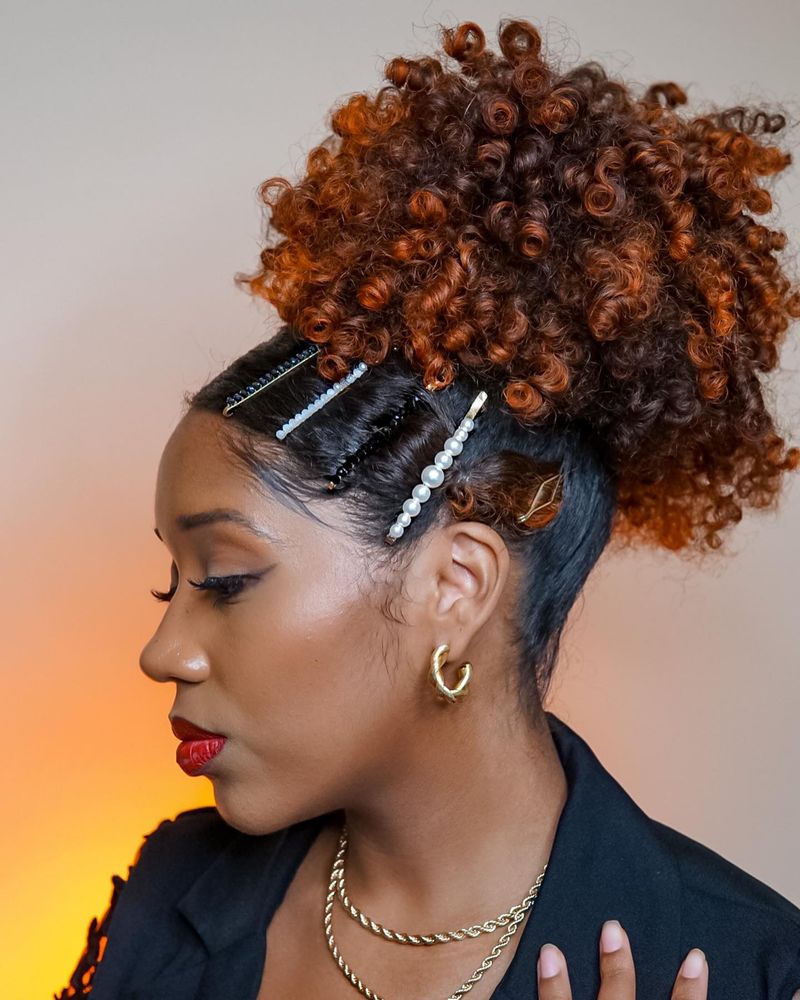
21. High Bun with Curls
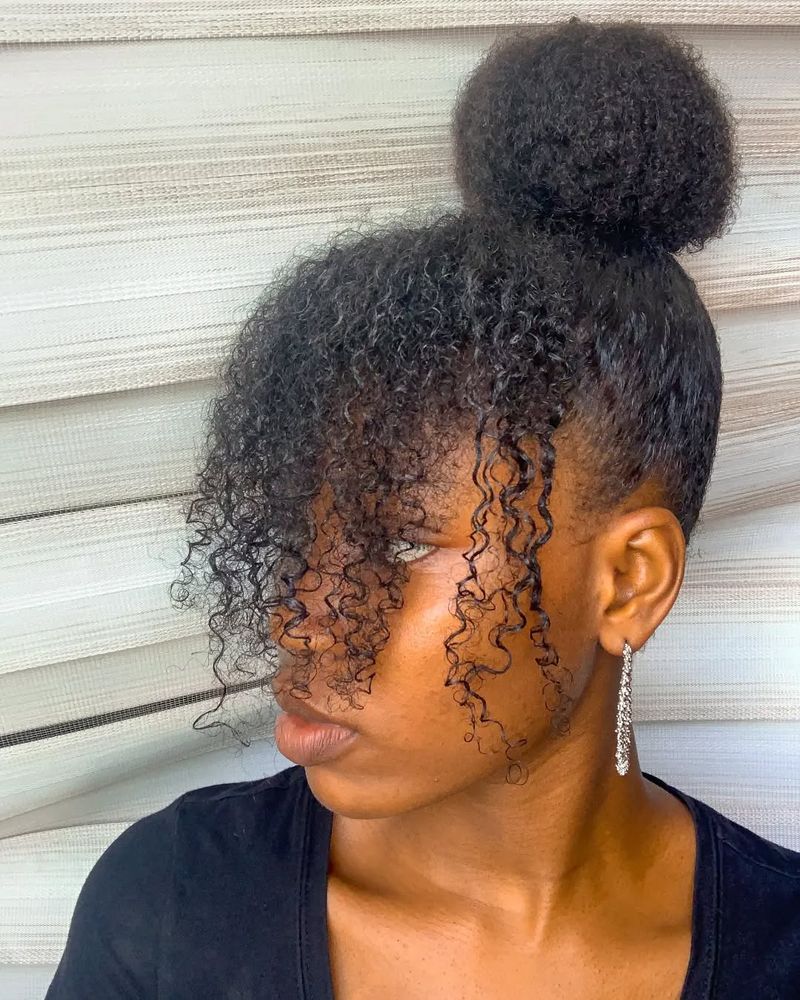
My high bun with curls became my signature office style – professional enough for meetings yet showcasing my natural texture. It’s the perfect balance of polished and playful.
Creating it involves gathering most of your hair into a high ponytail, twisting it around itself to form a bun, and securing with pins. The magic happens when you leave the front and side sections out to frame your face with curls.
What makes this style special is its adaptability for different occasions. For casual days, I leave the curls loose and messy; for formal events, I define them with curl cream. It works on various lengths as long as your hair can form a small bun at the top.
22. Sponge Curls
Sponge curls revolutionized short natural hair styling with their quick application and impressive results. My brother’s barber introduced me to this technique that creates uniform coils in minutes.
The method uses a special textured sponge with holes or grooves that you rub in circular motions over short natural hair. The friction creates tiny, defined coils. It works best on hair between 1-3 inches long with tight curl patterns.
What makes this style amazing is its simplicity – just apply light oil or curl cream, then sponge in circular motions. The look lasts several days with minimal refreshing. It’s especially popular for tapered cuts where the longer top can be sponged while keeping the sides neat.
23. Bantu Knot-Out
Bantu knot-outs gave me those perfect spiral curls for my college graduation photos! This heatless method creates stunning definition that turns heads.
The process involves creating several Bantu knots on damp, product-laden hair, allowing them to dry completely, then carefully unraveling. Fewer knots create larger curls; more knots produce tighter spirals. Oil on fingertips prevents frizz during separation.
What makes this style special is its unique curl pattern – tight at the roots with looser spirals at the ends. It typically lasts 3-4 days with proper nighttime protection. For a modern variation, I sometimes only knot the top while leaving the sides stretched for an undercut effect.
24. Braided Mohawk
My braided mohawk phase started when I wanted the edginess of a shaved style without the commitment. This head-turning look combines braiding techniques with natural texture for maximum impact.
Creating it involves braiding the sides of your head flat against the scalp, while leaving the middle section free or styled into a puff or twist-out. The contrast between the sleek sides and textured middle creates that distinctive mohawk effect.
What makes this style versatile is how it can be adjusted for different settings. For work, I keep the middle section more controlled; for weekends, I let it expand to its full glory. The braided sides typically last 1-2 weeks while the middle section can be restyled daily.
25. Curly Updo with Flat Twists
My curly updo with flat twists became my go-to for summer weddings – elegant enough for formal occasions while keeping my neck cool. This style combines sleekness with natural texture.
Creating it involves flat twisting the sides of your hair upward, then gathering your curls into a loose, pinned updo at the crown. The contrast between the structured twists and free-form curls creates visual interest. Decorative pins add a touch of glamour.
What makes this style special is its ability to work on various hair lengths and textures. Even shorter bobs can achieve a version with smaller twists and a tiny puff. It typically lasts 3-5 days with minimal refreshing needed.
26. Natural Fro with Side Part

My natural fro with a deep side part transformed my everyday style from basic to bold with minimal effort. This classic look frames the face beautifully while showcasing natural volume.
Creating it simply requires picking out your afro to desired fullness, then using a rat-tail comb to create a defined side part. The deeper the part, the more dramatic the effect. A touch of pomade keeps the part crisp throughout the day.
What makes this style timelessly elegant is how it balances the organic nature of an afro with the intentional structure of a sharp part. It works wonderfully for different face shapes – I position my part to highlight my best features. For special occasions, I add a decorative clip or tuck one side behind my ear.
27. Twist-and-Pin Updo
My twist-and-pin updo saved me during a surprise rainstorm before an important presentation! This elegant style keeps hair secure while creating a sophisticated silhouette.
The technique involves creating several two-strand twists, then pinning them in various directions to form an updo. No specific pattern is needed – the beauty comes from the organic arrangement. Bobby pins that match your hair color keep everything secure.
What makes this style perfect for special occasions is its romantic, slightly undone quality. It works on various lengths – even shoulder-length hair can achieve a smaller version. For formal events, I add small accessories like pearl pins or tiny flowers scattered throughout the twists.
28. Two-Strand Twist Bob
My two-strand twist bob phase combined the classic silhouette of a bob with the texture of twists. This shoulder-skimming style offers protection with shape.
Creating it involves making medium-sized two-strand twists throughout your hair, focusing on maintaining even length around the perimeter. The key is cutting or styling the twists to follow a bob silhouette – shorter at the back and angled toward the front.
What makes this protective style special is how it mimics a traditional bob without heat styling or actual cutting. It typically lasts 2-3 weeks with proper maintenance. For a modern twist, I sometimes add color to the ends or incorporate a few braids among the twists.
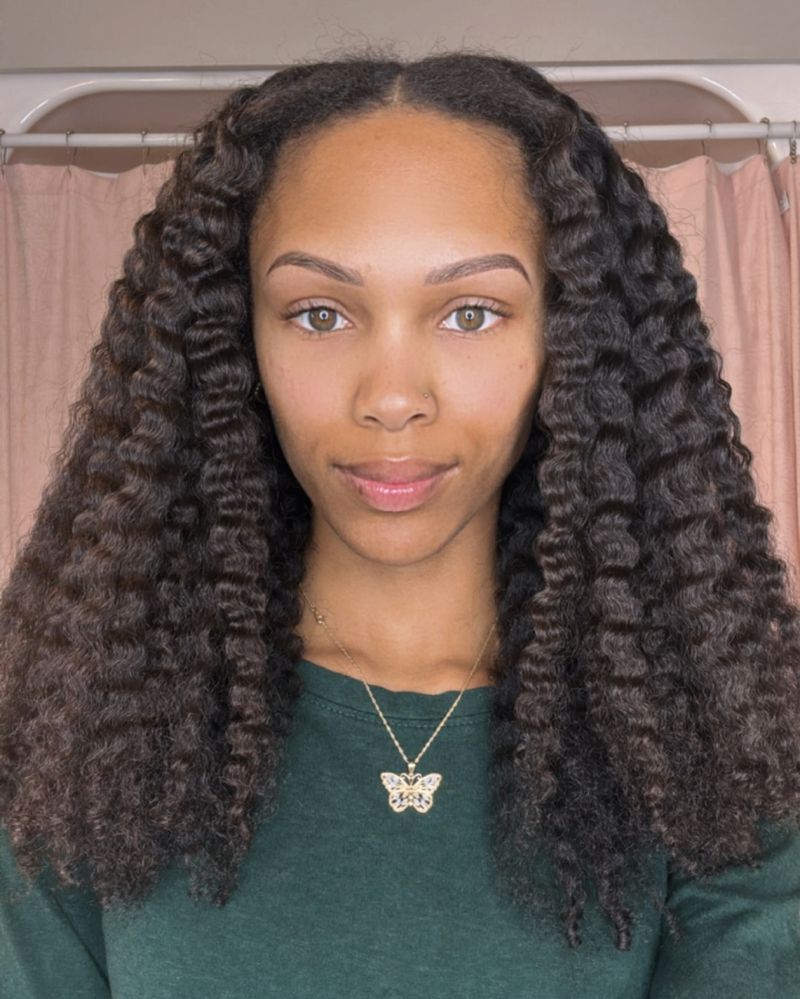
29. Soft Blowout with Texture
My soft blowout with texture became my signature look for job interviews – polished yet still celebrating my natural hair. This style stretches curls without completely straightening them.
The technique uses low heat and tension from a round brush or blow dryer attachment to elongate curls while preserving some texture. A heat protectant is non-negotiable! The result is voluminous hair with movement and body.
What makes this style special is how it showcases length while maintaining character. It’s not bone-straight but softly stretched, giving the best of both worlds. It typically lasts until your next wash, though humidity may cause some reversion. For special events, I add loose waves with a large-barrel curling iron.
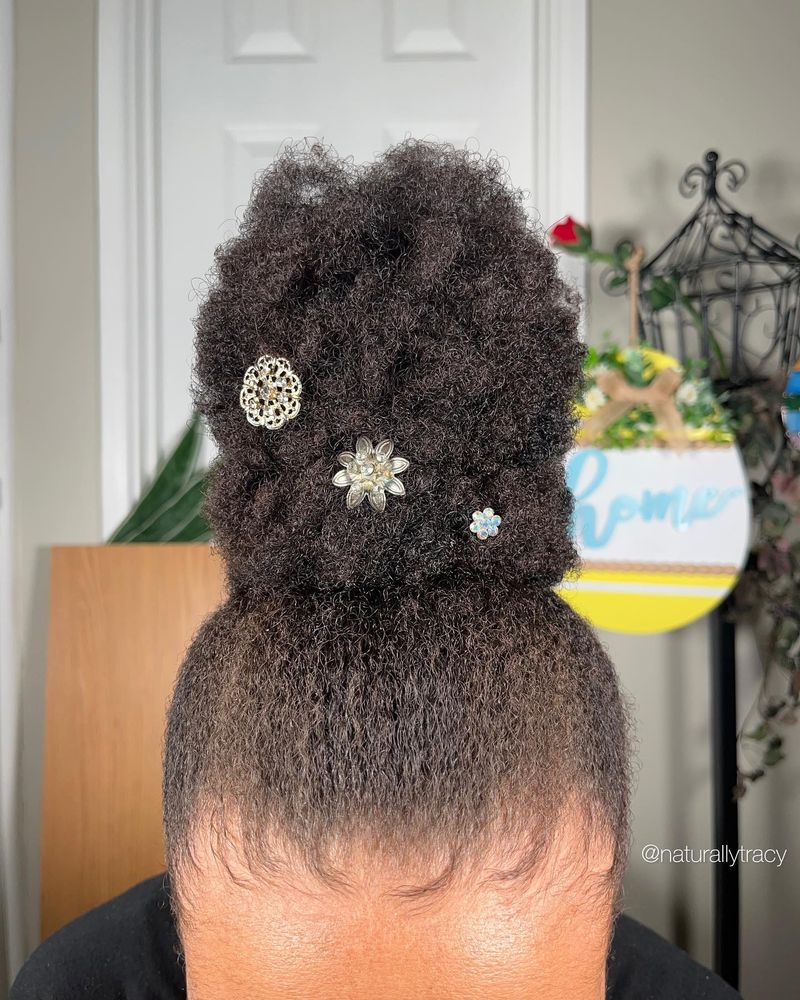
30. Fro with Hair Jewelry
My fro with hair jewelry phase started during festival season and quickly became my favorite way to elevate a simple afro. This adorned style turns everyday hair into a statement piece.
The technique simply involves picking out your natural hair to desired fullness, then strategically placing hair cuffs, rings, thread, or decorative pins throughout. No specific pattern is required – the beauty comes from the personalized placement.
What makes this style special is how it transforms a basic afro into something ceremonial and celebratory. It connects to African traditions where hair adornment signifies special occasions or status. My favorite combination uses gold cuffs concentrated on one side for an asymmetrical effect.