
11 Effortless Nail Designs That Look Super Stylish
I’ve always believed that beautiful nails shouldn’t require a professional degree or hours of your time.
After trying countless nail designs over the years, I’ve gathered my favorite quick-yet-stunning options that make my hands look put-together without the headache.
These simple techniques create that ‘wow’ effect while being totally manageable at home with basic tools.
Perfect for busy mornings or last-minute plans when you want your nails to shine without the stress!
1. Micro French Tips
Forget the traditional thick white line – micro French tips create that barely-there elegance that elevates any outfit. I started doing these when regular French manicures felt too obvious for my minimalist style.
The secret is using a thin nail art brush or even the edge of a makeup sponge for the perfect delicate line. The ultra-thin white edge makes fingers look longer and more graceful without screaming “I just got my nails done!”
My favorite twist is using a pale pink or beige base rather than clear, which gives a softer, more modern finish. The best part? Small chips are nearly invisible, so this style lasts longer between touch-ups than most designs I’ve tried.
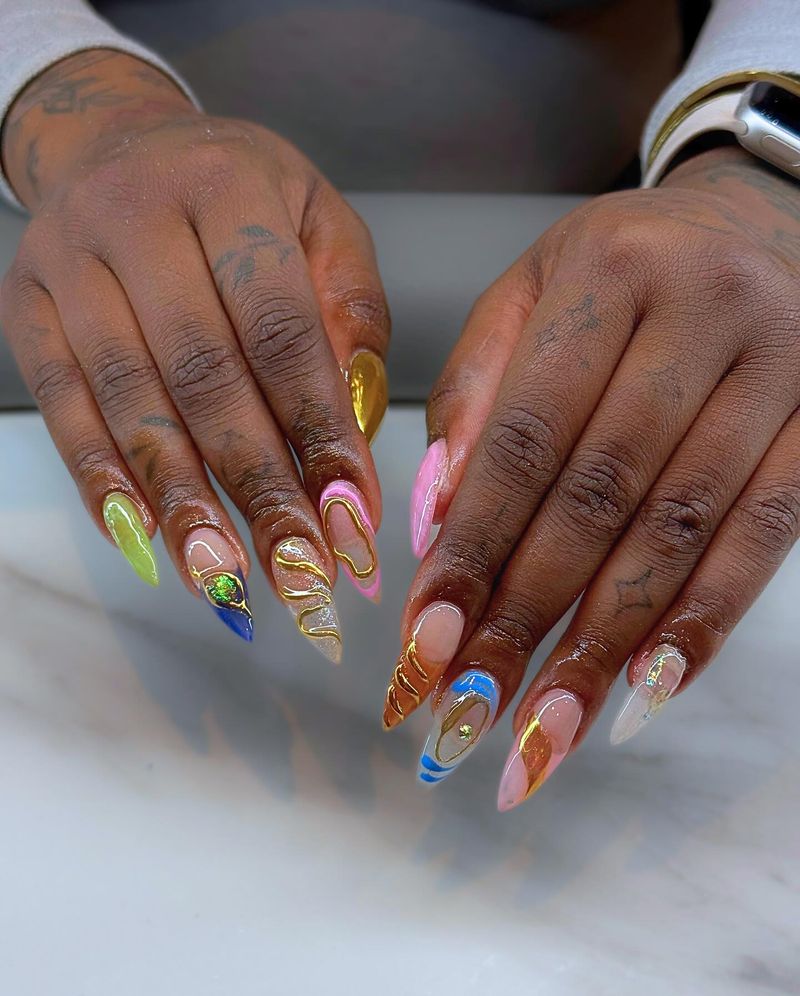
2. Natural Nails with Gold Foil Accents
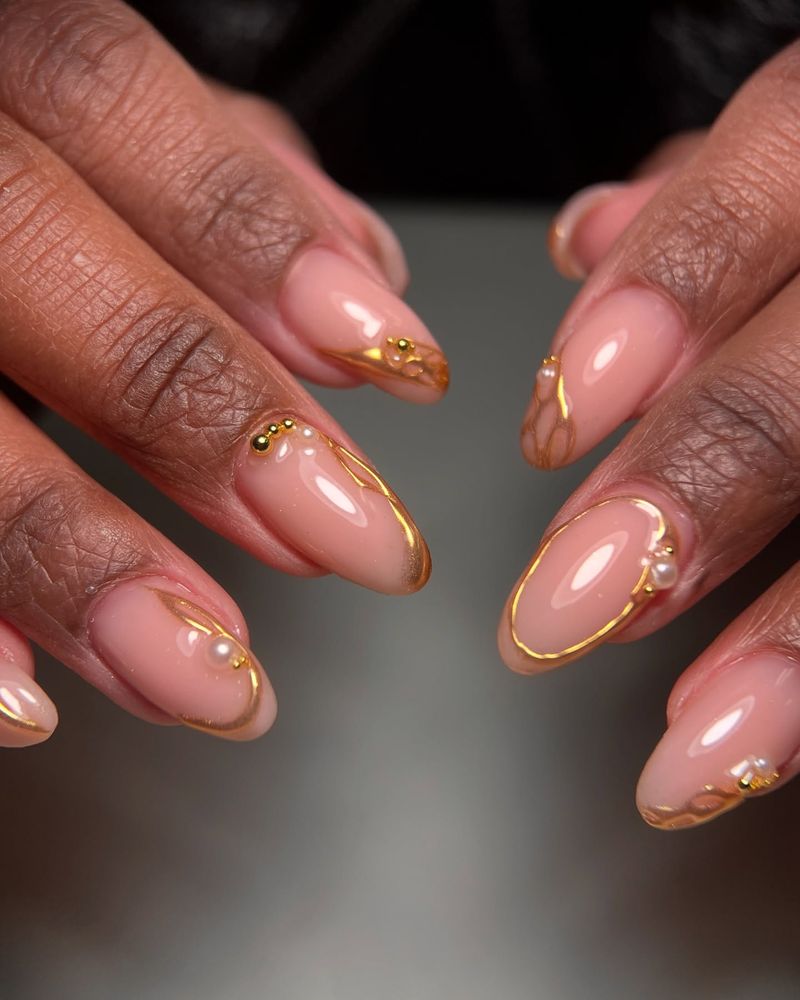
Gold foil transforms basic natural nails into something magical without requiring artistic talent. My friends always ask if I visited a salon when I wear this look, but it’s shockingly simple to create at home.
Start with a neutral polish base – I prefer sandy beige or soft pink tones that match my skin undertones. Once dry, press small pieces of gold foil randomly onto the nail using a clear topcoat as adhesive. The foil creates an instant luxe effect that catches the light beautifully.
For extra staying power, seal everything with two layers of topcoat. This design works for both short and long nails, and the random placement means no two nails look exactly alike.
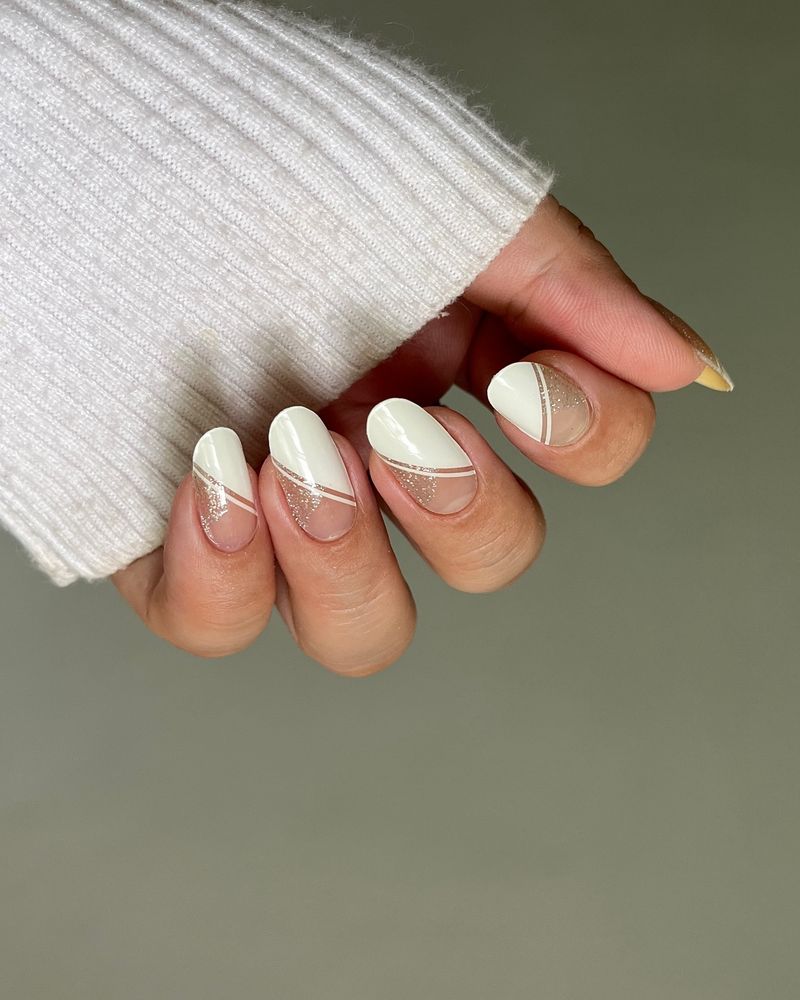
3. Minimalist Line Art
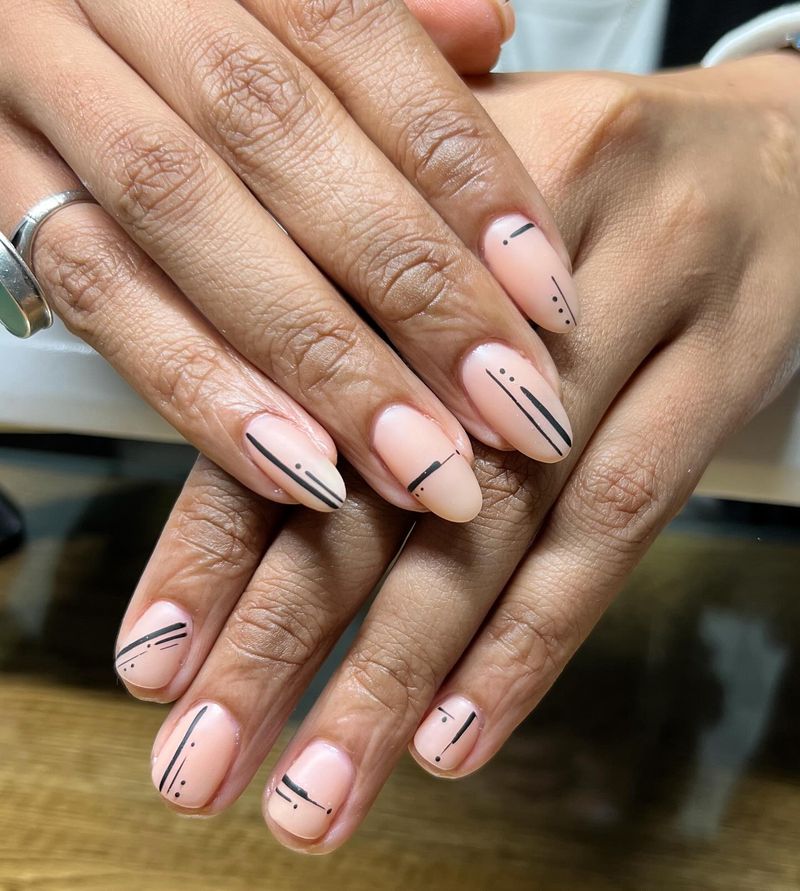
Line art nails became my go-to when I wanted something beyond plain color but lacked steady hands for detailed work. The beauty lies in their imperfection – slightly wobbly lines actually add character!
I start with a solid base (usually cream or pale pink) and add 1-3 thin black lines using a fine nail pen or a toothpick dipped in polish. The lines can be straight, curved, or geometric – there’s no wrong way to do this. My personal favorite is a single diagonal line across each nail.
The contrast between the clean base and bold line creates visual interest without overwhelming the eye. Even my nail-biting friends can rock this look on shorter nails, which isn’t true for many fancier designs.
4. Tiny Dot Clusters
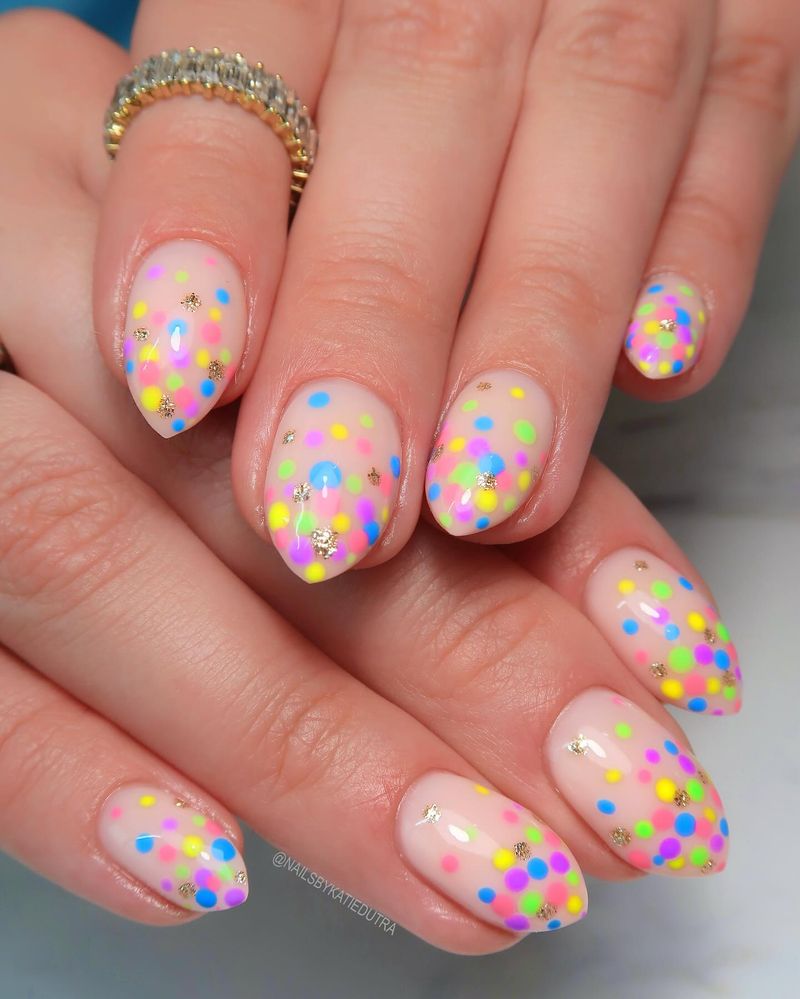
Dot clusters remind me of confetti and instantly brighten my mood. Unlike complex nail art, these playful specks need zero precision – the random placement is what makes them charming.
I apply a sheer pink or clear base first, then create tiny dots using a bobby pin or dotting tool. The trick is grouping dots in little clusters rather than spacing them evenly. Try mixing dot sizes and colors for more dimension – I love combining white, gold, and one color that matches my outfit.
This design grows out beautifully since the dots aren’t placed near the cuticle. I often keep this look for over a week, adding an extra dot or two if any chips appear – much easier than starting from scratch!
5. Negative Space Geometric Shapes
Negative space designs completely changed my nail game when I discovered them. Instead of covering the entire nail, I leave parts untouched, creating modern shapes that feel both edgy and sophisticated.
The half-moon at the base is my everyday choice – I simply place a paper hole reinforcer at my cuticle and paint above it. For triangular designs, I use small pieces of tape to block off sections before applying polish. The untouched portions create breathing room that makes the design feel intentional rather than busy.
Clear base coat is essential to protect the bare portions while giving them a subtle shine. This technique works beautifully with both bright colors and neutrals, though I find deep wines and navy blues create the most striking contrast.
6. Pearl-Topped Elegance
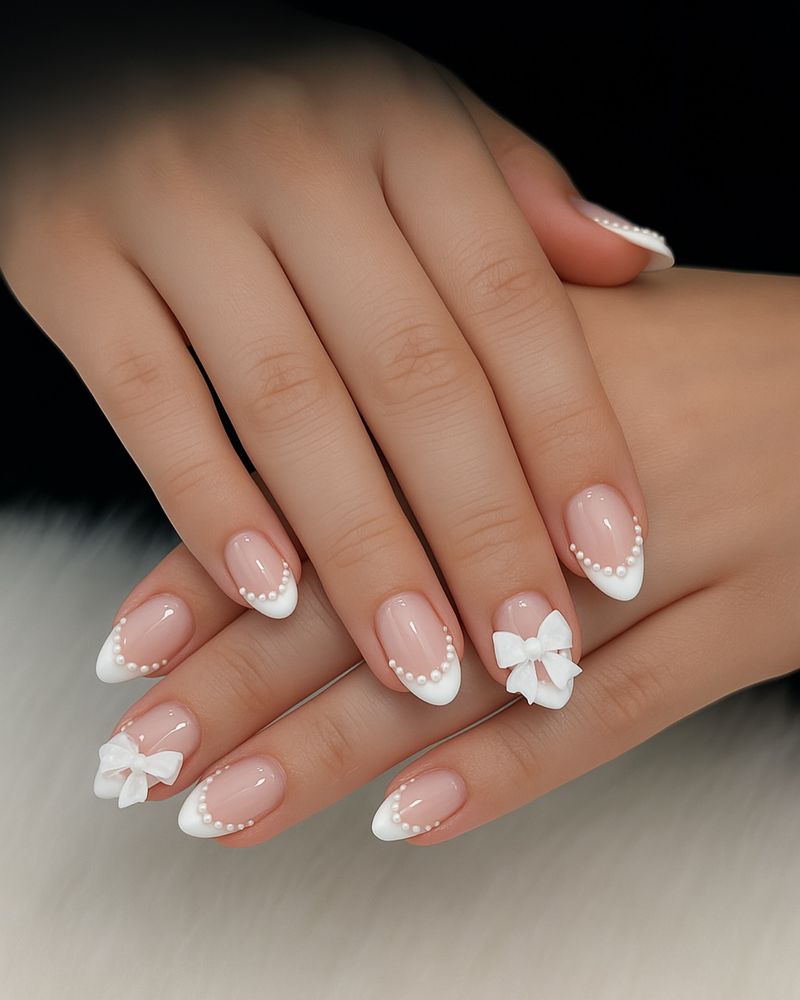
Adding tiny pearl accents instantly elevates plain nails to special-occasion status. I stumbled upon this technique before my cousin’s wedding and received more compliments than on my dress!
The approach couldn’t be simpler – apply your favorite neutral polish (I prefer sheer pinks or milky whites), then place 1-3 small pearl beads on each nail while the topcoat is still tacky. Place them near the cuticle for a subtle effect or in the center for more drama. The dimensional quality of real pearls catches light in a way flat nail polish never could.
For secure attachment, gently press each pearl into a dot of clear nail glue rather than polish alone. This design lasts surprisingly well through typing and daily activities if sealed properly.
7. Soft Ombré Fade
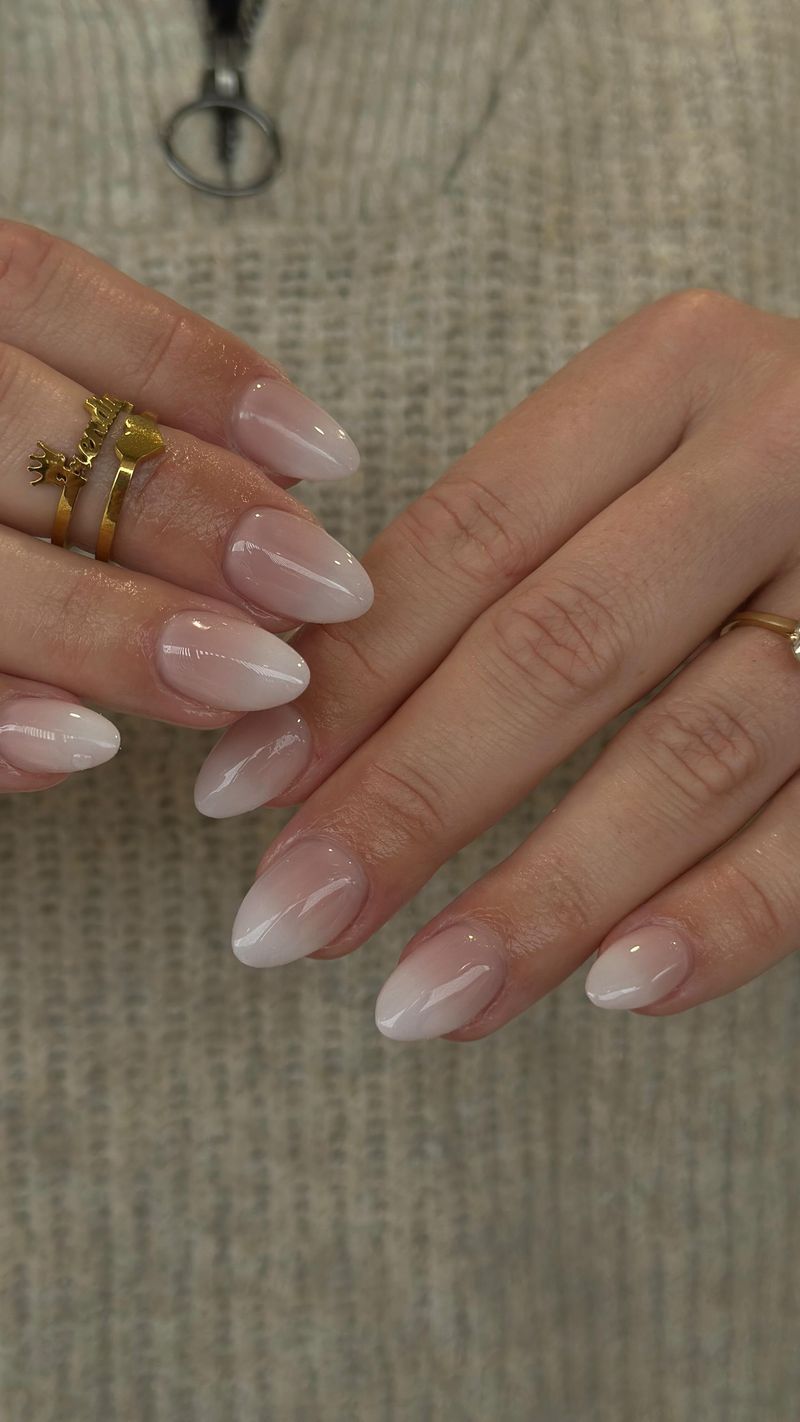
Ombré nails look complex but can be created with just a makeup sponge and two polish colors. My nail technician friend taught me this trick, and I’ve never looked back.
I paint the lighter shade as a base, then dab a makeup sponge loaded with both colors onto the nail, concentrating the darker shade at the tip. The sponge naturally blends the colors, creating that coveted gradient effect. For a subtler look that works in conservative settings, try natural-to-white or pink-to-natural transitions.
Unlike precision designs, ombré looks better slightly messy and imperfect. Each application turns out slightly different, giving your nails a unique watercolor quality. This technique also cleverly disguises growth at the base, extending the life of your manicure by several days.
8. Matte Natural with Glossy Tips
The contrast between matte and glossy finishes creates visual interest without adding color or complexity. I discovered this technique accidentally when I ran out of matte topcoat midway through a manicure!
Paint your entire nail with a natural or neutral shade, then apply matte topcoat over the whole surface. Once dry, add a thin strip of regular glossy topcoat just along the tips. The juxtaposition of textures catches the light in unexpected ways, making even the simplest color look intentional and fashion-forward.
This look works particularly well on longer nails where the textural difference is more noticeable. For extra dimension, try a slightly darker glossy tip over a lighter matte base – the subtle tonal shift amplifies the textural contrast.
9. Single Accent Nail with Shimmer
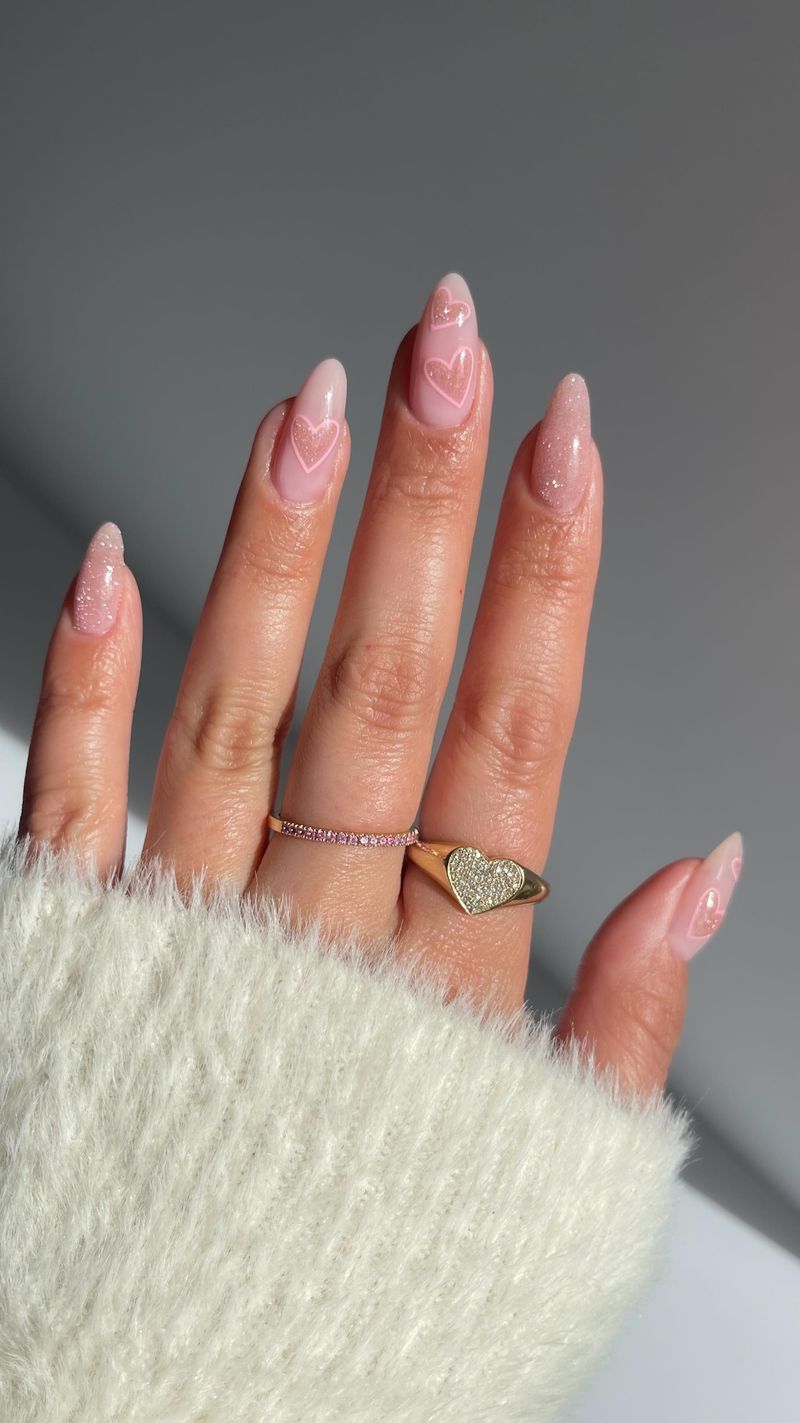
Sometimes one standout nail creates more impact than a complex design across all ten fingers. My go-to for important meetings is nine nails in sophisticated natural with one ring finger featuring subtle shimmer.
The key is choosing complementary tones – I pair creamy beige with champagne shimmer or soft pink with rose gold sparkle. The single accent adds personality without looking unprofessional or overwhelming. For extra dimension without the mess of glitter, look for polishes with fine shimmer particles rather than chunky glitter.
This approach also saves time – you only need to perfect one nail! When I’m really pressed for time, I’ll even apply a clear shimmer topper over one already-painted nail for an instant update that dries quickly.
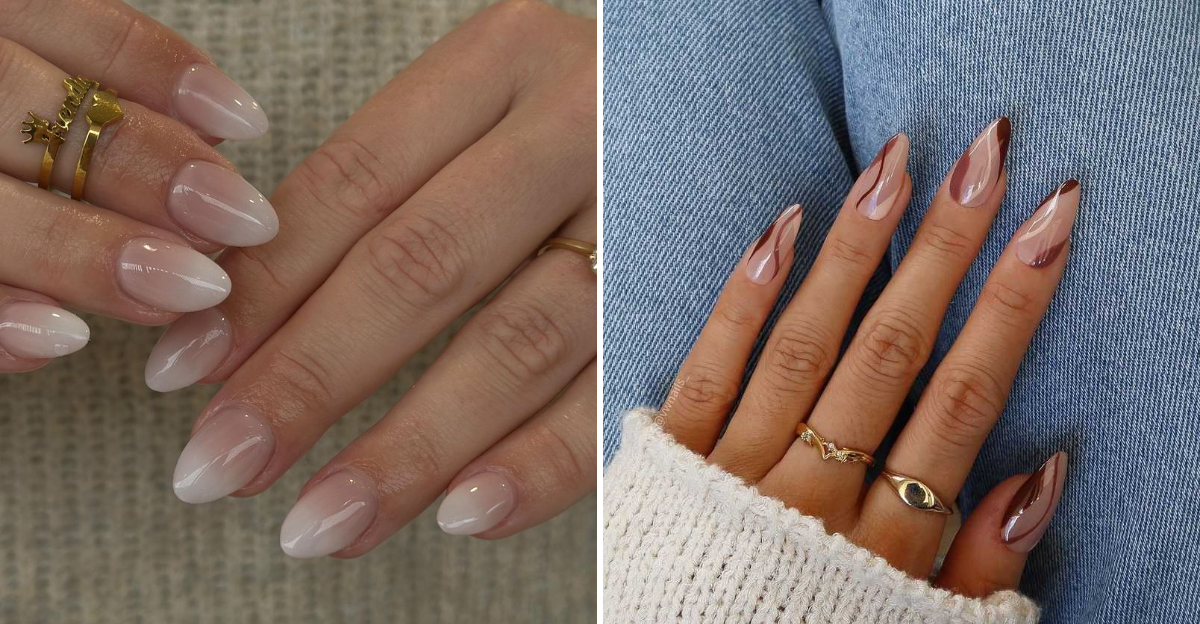
10. Abstract Swirl Designs
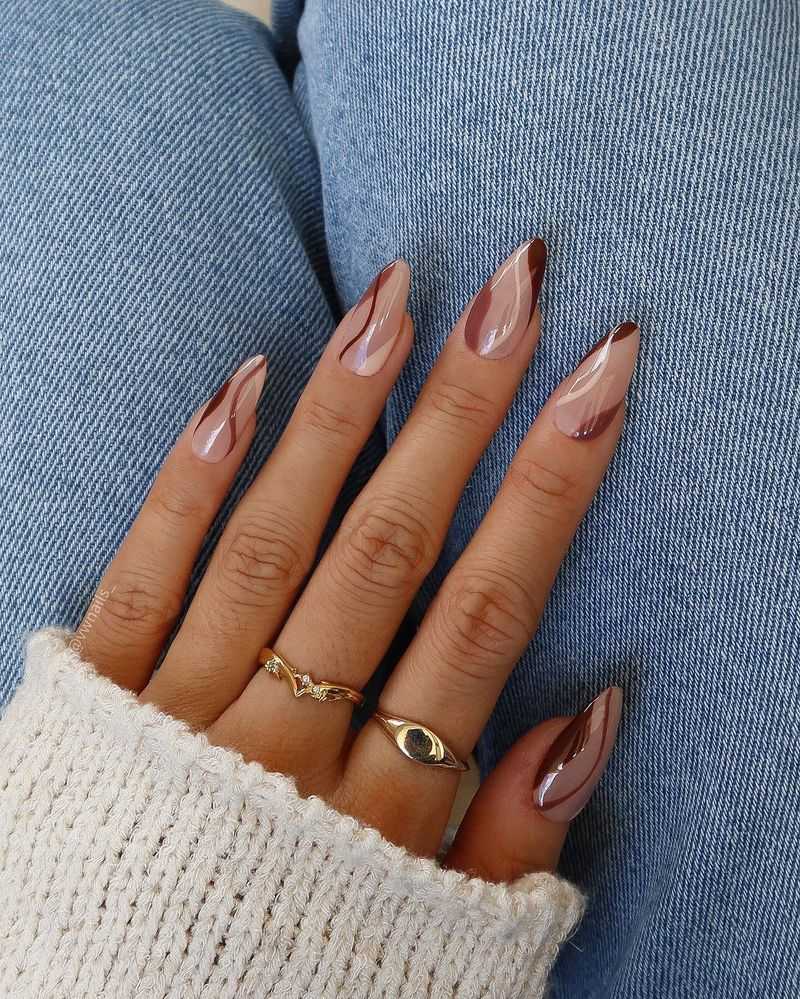
Abstract swirls look impressive but require zero precision – perfect for nail art beginners like I was. The organic, flowing patterns are actually more forgiving than geometric designs because imperfections add to their artistic quality.
I start with a light base color, then use a thin brush or toothpick to create loose, curved lines in a contrasting shade. My favorite combinations are white swirls on pale blue or terracotta curves on cream. The trick is keeping your hand relaxed and embracing the natural movement – overthinking ruins the spontaneous feel.
For a more subtle take, try tone-on-tone swirls using colors just a few shades apart. This creates dimension without high contrast, perfect for work environments where flashier nails might raise eyebrows.
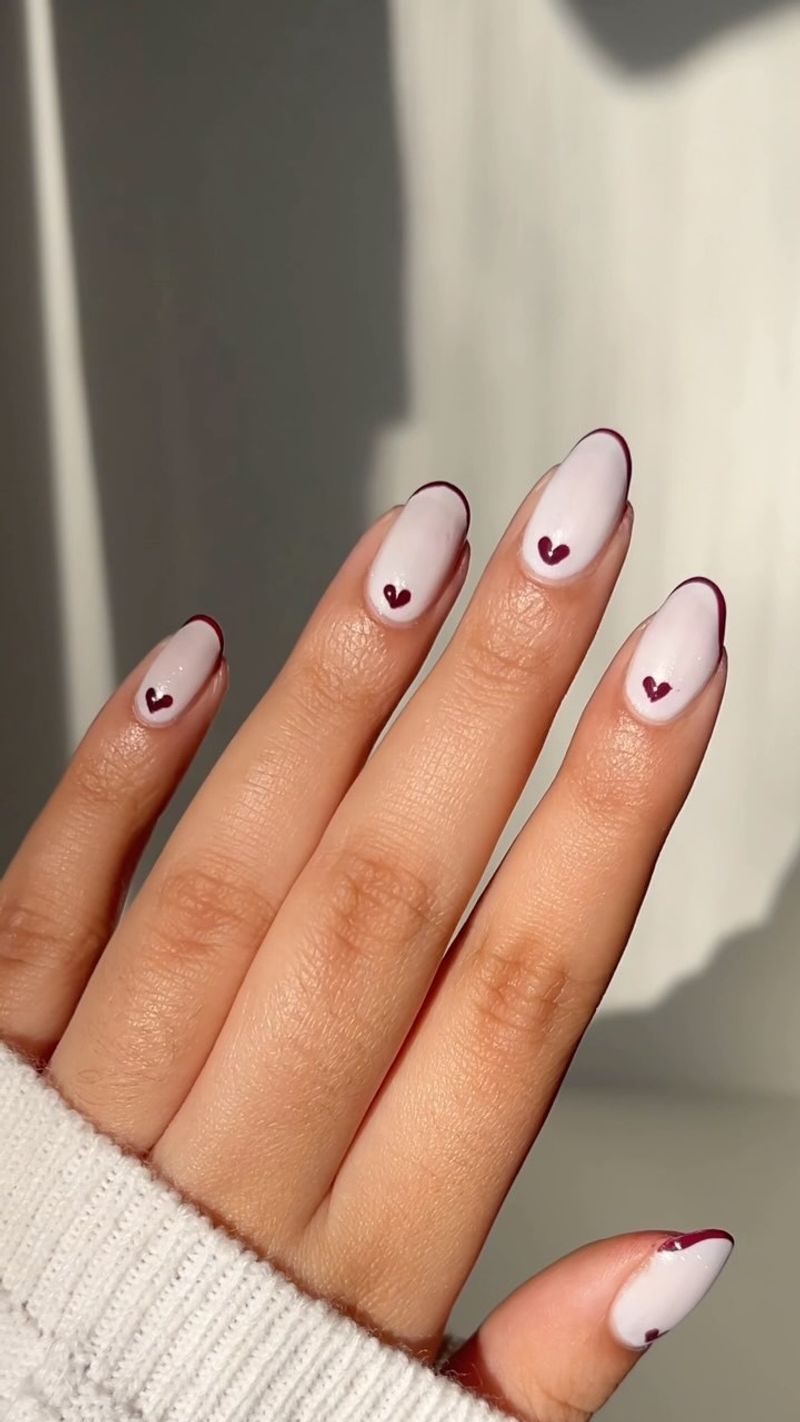
11. Classic Milky Nails with a Twist
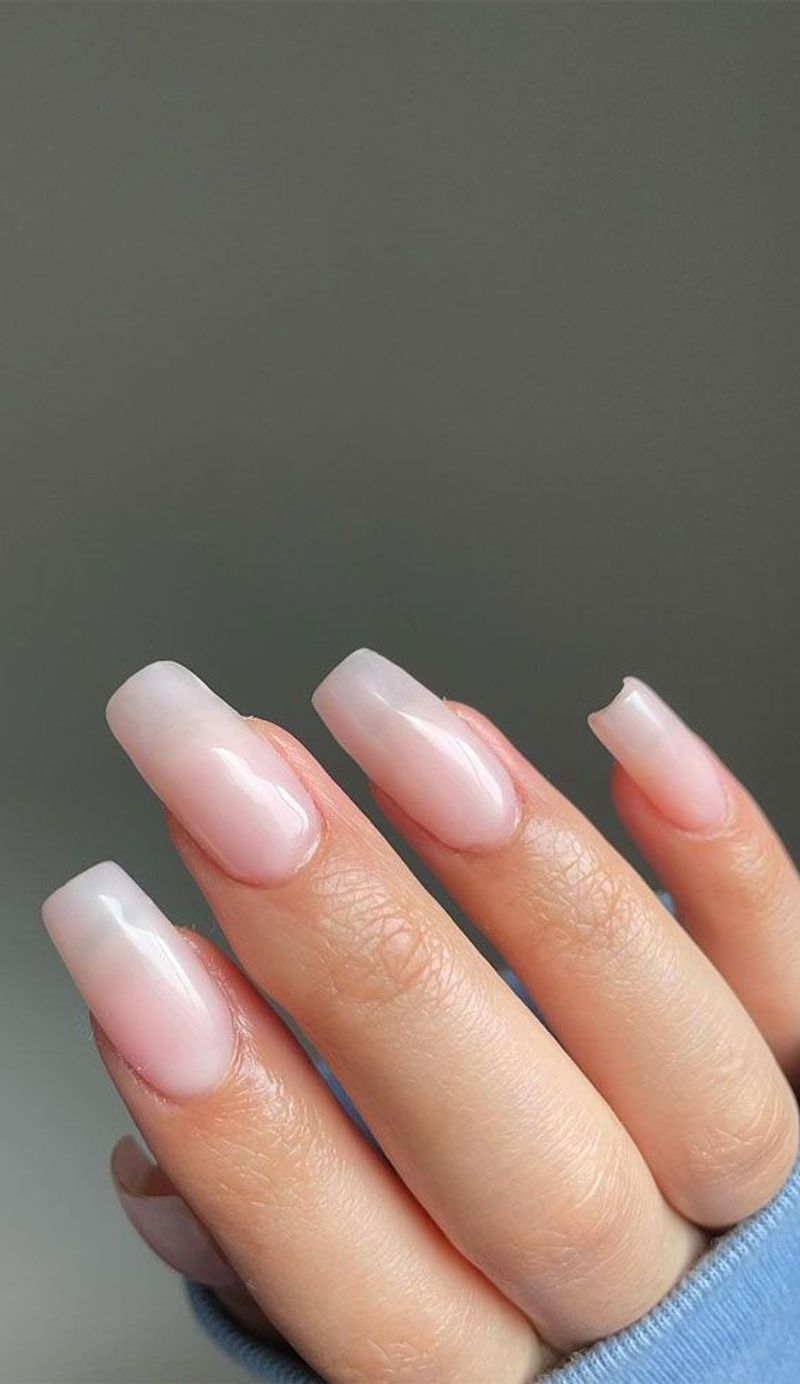
Milky nails have been my reliable standby for years – that translucent, cloudy white that’s softer than stark opaque polish but more polished than clear. My twist? Adding the faintest hint of color to the milky base.
I mix a drop of colored polish (usually pale pink, lavender, or mint) into clear or sheer white polish to create a custom milky shade with subtle personality. The result looks expensive and intentional while remaining neutral enough for any outfit or occasion. Just one drop is enough – you want a whisper of color, not a statement.
This technique also smartly disguises yellowing in natural nails while still letting them breathe more than opaque colors. Two thin coats provide the perfect level of coverage while maintaining that coveted translucent quality.