
25 Colorful Nail Ideas For Every Style
Nails speak volumes about personal style.
I’ve always seen them as tiny canvases for self-expression—whether you’re heading to work, a party, or just want to feel good.
After years of experimenting with colors and designs, I’ve gathered these ideas that work for everyone from beginners to nail art enthusiasts.
Ready to transform your fingertips into something special?
1. Rainbow French Tips
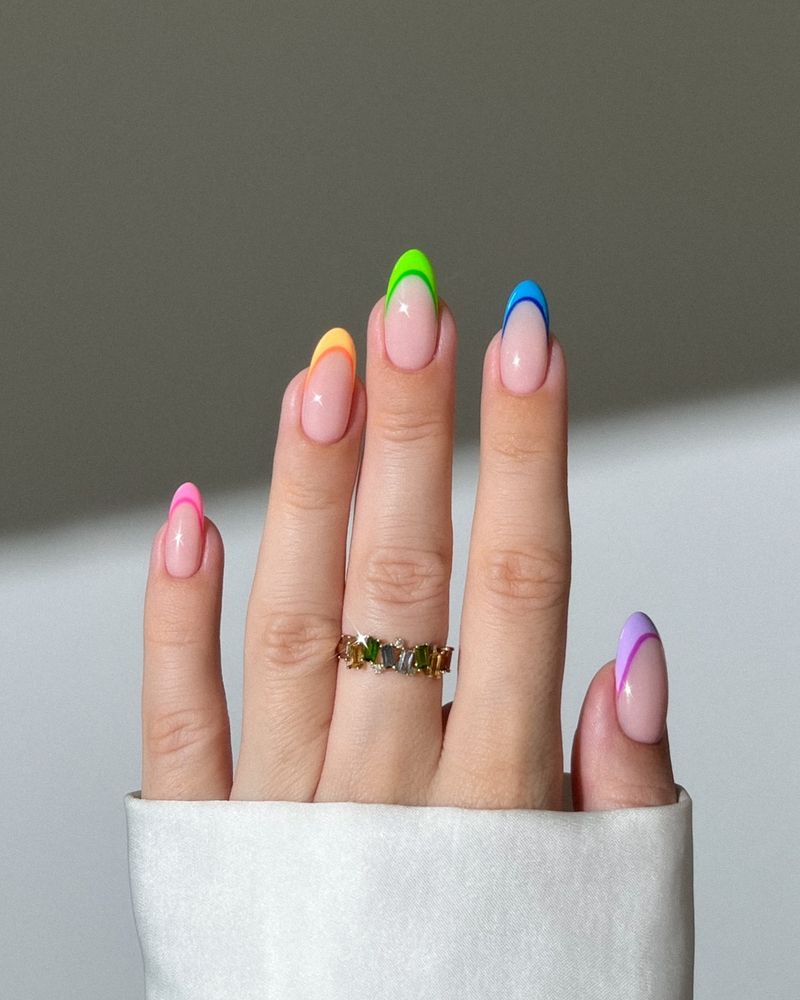
I tried these last summer and got compliments for weeks! Instead of the classic white tip, paint each nail with a different color of the rainbow. The beauty is in the simplicity—just a thin line of color at the tip. For beginners, use tape as a guide to create clean lines. The rest of the nail can be clear or a soft natural shade that makes the colors pop.
This style works for any nail length, but looks extra striking on longer nails. Pro tip: Apply a white base under the colored tips to make them really stand out. It’s perfect for those who want something fun without going over-the-top.
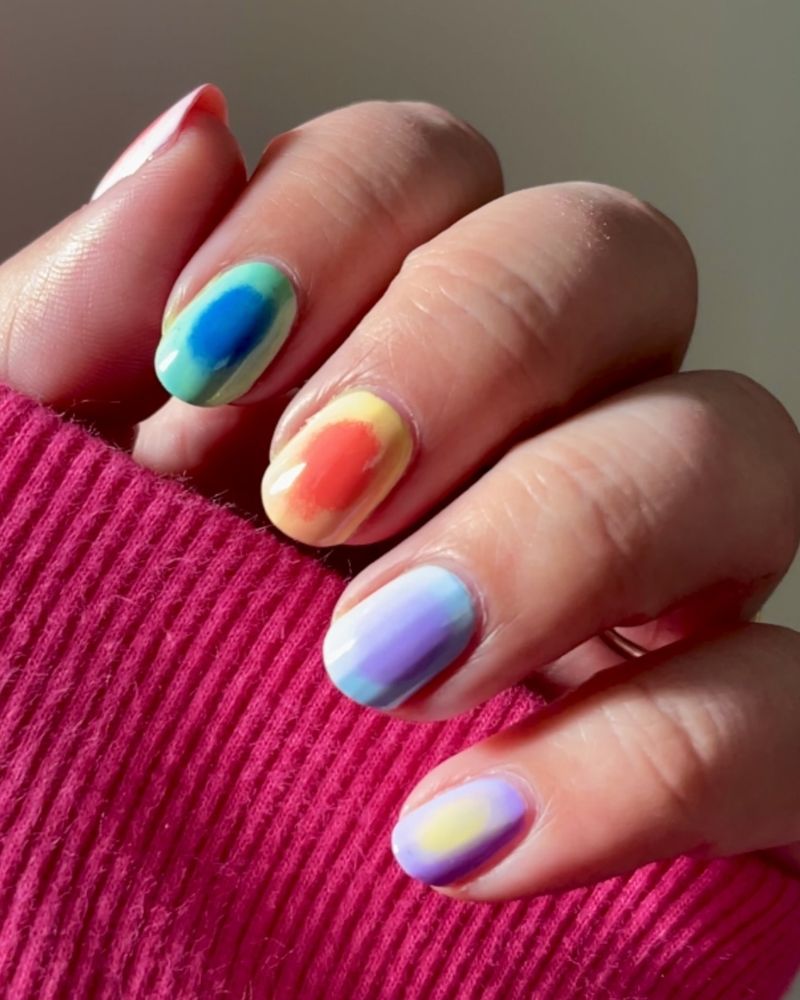
2. Pastel Ombré Nails
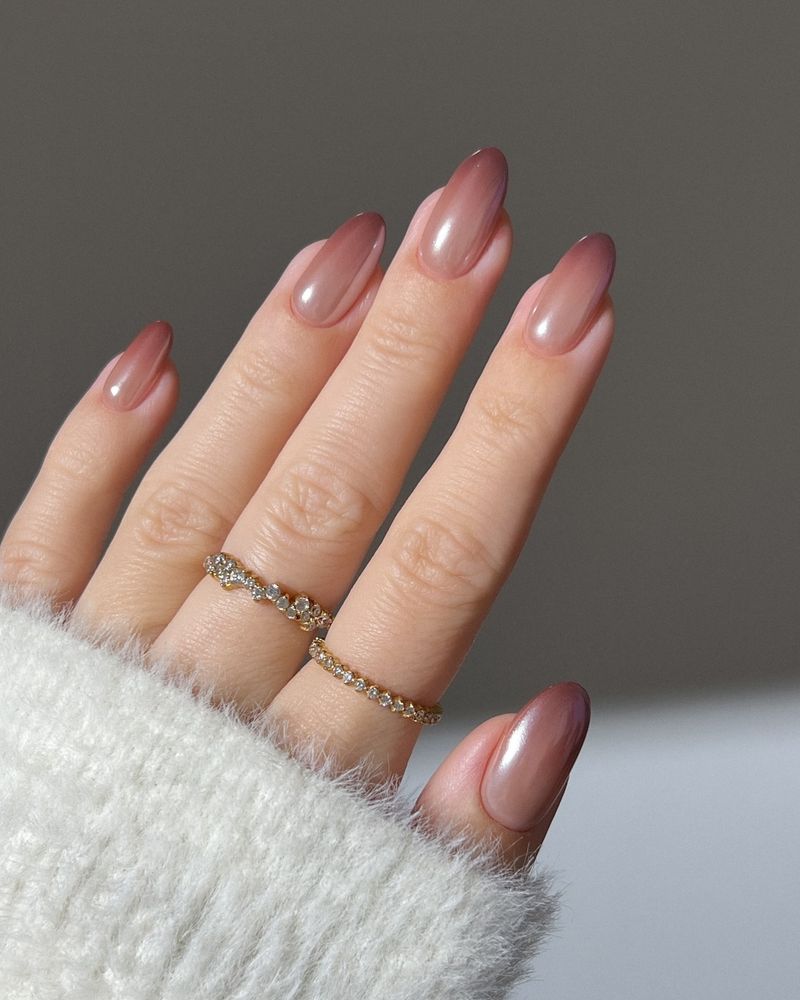
My go-to for spring! Pastel ombré creates a dreamy, cloud-like effect that softens any outfit. Each nail transitions from one pale shade to another—think baby blue melting into lavender or soft pink fading to peach. You’ll need a makeup sponge and 2-3 complementary colors. Paint the colors in stripes on the sponge, then dab onto nails for that perfect blend.
The key is using light pressure and building up the color gradually. What I love most is how forgiving this technique is. Any little mistakes blend right in! It’s sophisticated enough for a work meeting but playful enough for weekend brunches.
3. Multicolor Swirl Designs
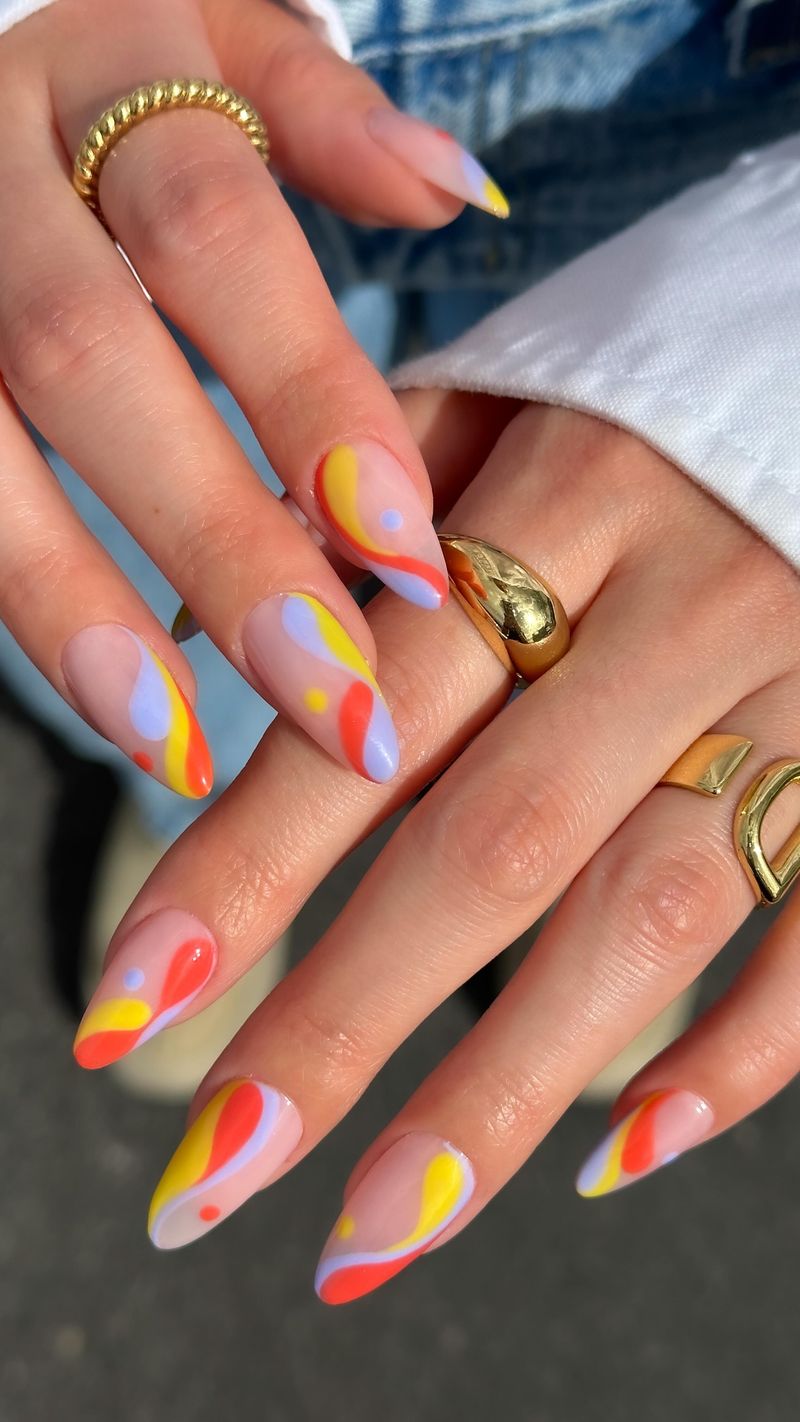
Got 15 minutes? That’s all you need for these swirls! I created these for my sister’s birthday using a thin nail art brush and 3-4 bright colors. The trick is to place small dots of each color close together, then drag a toothpick through them to create the swirl pattern. No artistic skills needed here—the more random the swirls, the cooler they look!
Each nail becomes a mini abstract painting. I usually pick colors from the same family (all warm or all cool) for a cohesive look. These swirls always catch people’s attention. My favorite combo is turquoise, cobalt, and teal on a white base, but any colors work beautifully together.
4. Color-Block Nails
Clean lines and bold sections of color make this style a standout. I wore these to an art gallery opening, and they perfectly matched the modern paintings! The secret is using striping tape to create crisp divisions between colors. Start with a base coat, then place tape in geometric patterns across your nails.
Paint different sections with contrasting colors, remove the tape while the polish is still slightly wet, and seal with a top coat. My favorite approach is using three complementary colors per nail. The best part? You can make them as simple or complex as you want. For an office-friendly version, try navy, gray, and white blocks.
5. Neon Gradient Nails
Summer nights call for something electric! Neon gradients create an eye-catching effect that literally glows under blacklight. I created these for a beach party last year using hot pink, neon yellow, and electric blue. Unlike subtle ombré, neon gradients are all about that wow factor.
Apply a white base first—it’s essential to make the neons pop. Then use the sponge technique to blend the colors horizontally across each nail. Fair warning: friends will grab your hands to get a closer look! These nails photograph amazingly too. For extra drama, add a matte top coat to create contrast with the bright colors.
6. Abstract Rainbow Art
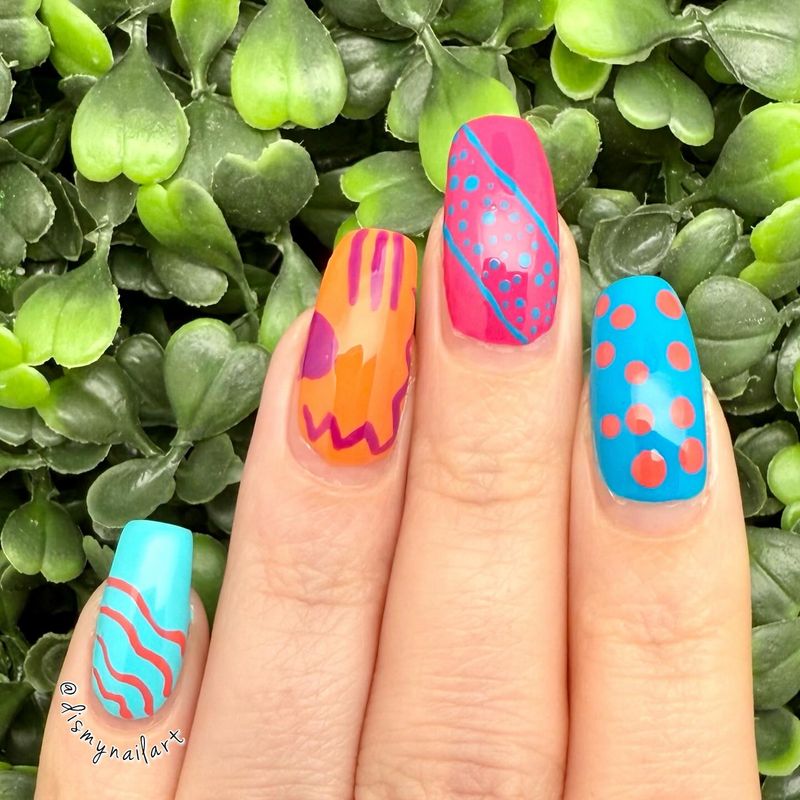
After watching a painting tutorial, I tried recreating the technique on my nails—and haven’t stopped since! Abstract rainbow art has no rules. Just grab 5-7 colors and create random brush strokes, dots, and lines across a white or black base. The key is not overthinking it.
I use a mix of brushes, dotting tools, and even the polish brush itself to create different effects. Some nails might feature bold strokes while others have delicate specks of color. What makes this style special is that no two nails are ever the same. It’s perfect for those who hate precision work but love artistic expression. Plus, chips are practically invisible among all those random patterns!
7. Candy Stripe Nails
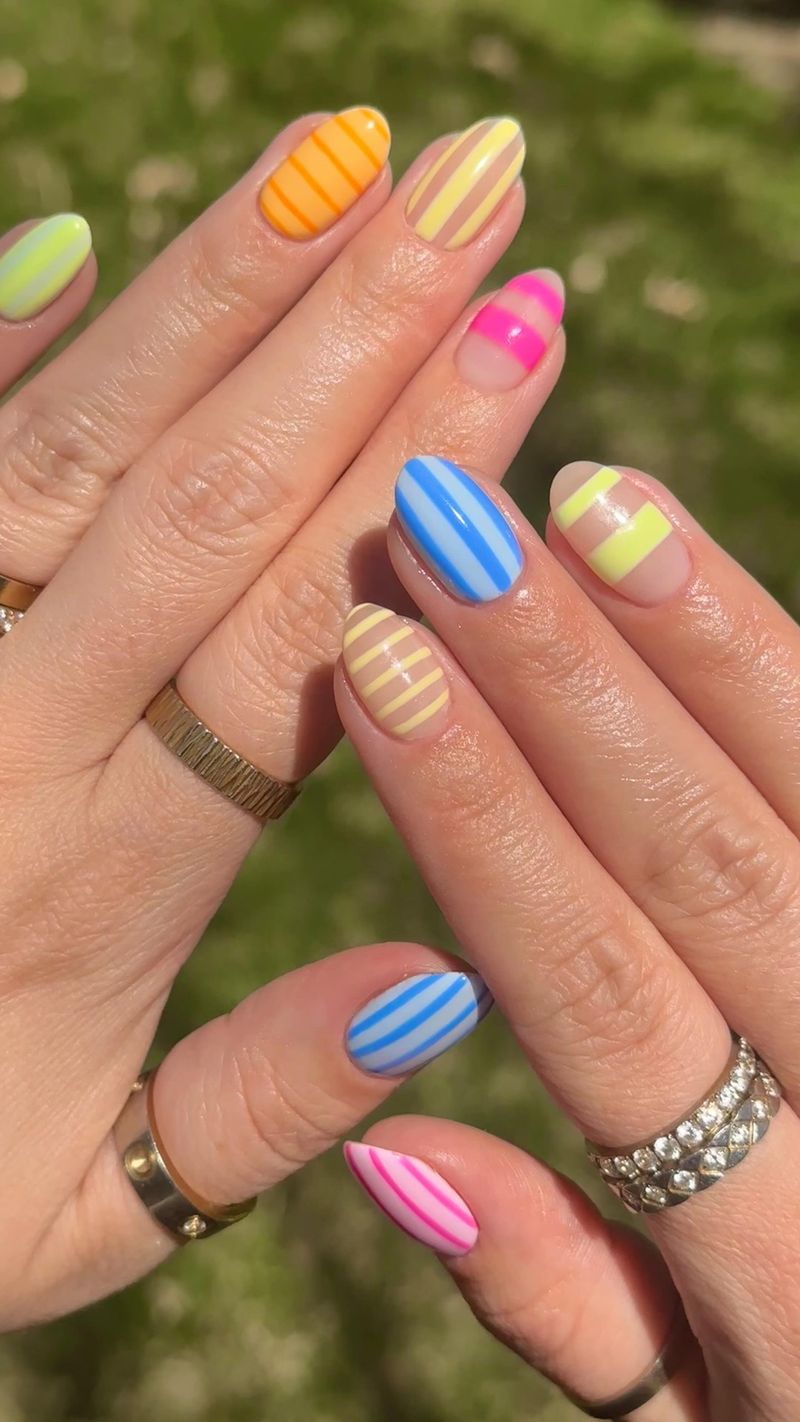
Remember those old-fashioned candy sticks? That’s exactly what inspired me to try these playful stripes. They’re surprisingly easy to create with a thin striping brush or striping tape. Start with a solid base color—white works great, but pale pink or blue adds a fun twist.
Then add thin, evenly-spaced lines in candy colors like red, pink, green, or blue. The secret to neat stripes? Go slow and steady, and don’t overload your brush with polish. These nails always make me smile! They’re perfect for holidays, birthdays, or anytime you need a mood boost. For a more grown-up version, try metallic stripes on a natural base.
8. Two-Tone Split Nails
Sometimes the simplest ideas make the biggest impact. Split nails divide each nail into two distinct color sections—either horizontally, vertically, or diagonally. I created these for a job interview when I wanted something polished but interesting. The technique couldn’t be easier. Paint half your nail one color, let it dry completely, then use tape to block off that section while you paint the other half.
My go-to combo is navy and coral for a sophisticated look. What’s great about split nails is how customizable they are. You can use contrasting colors for drama or similar shades for subtlety. They work on any nail length and shape, making them universally flattering.
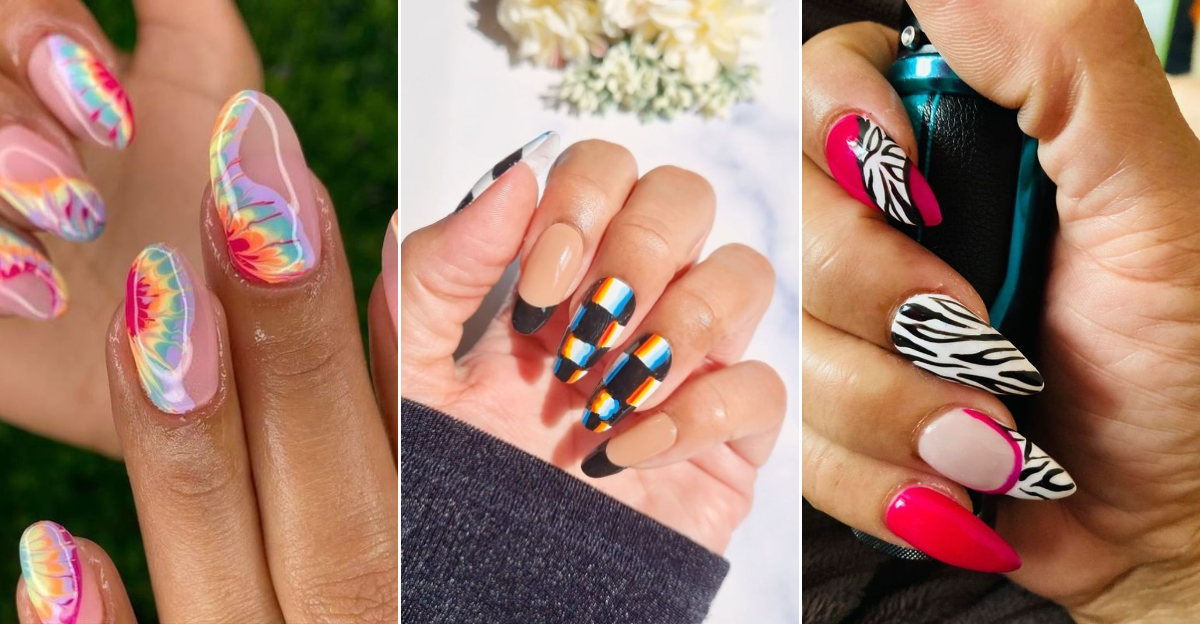
9. Tie-Dye Nail Design
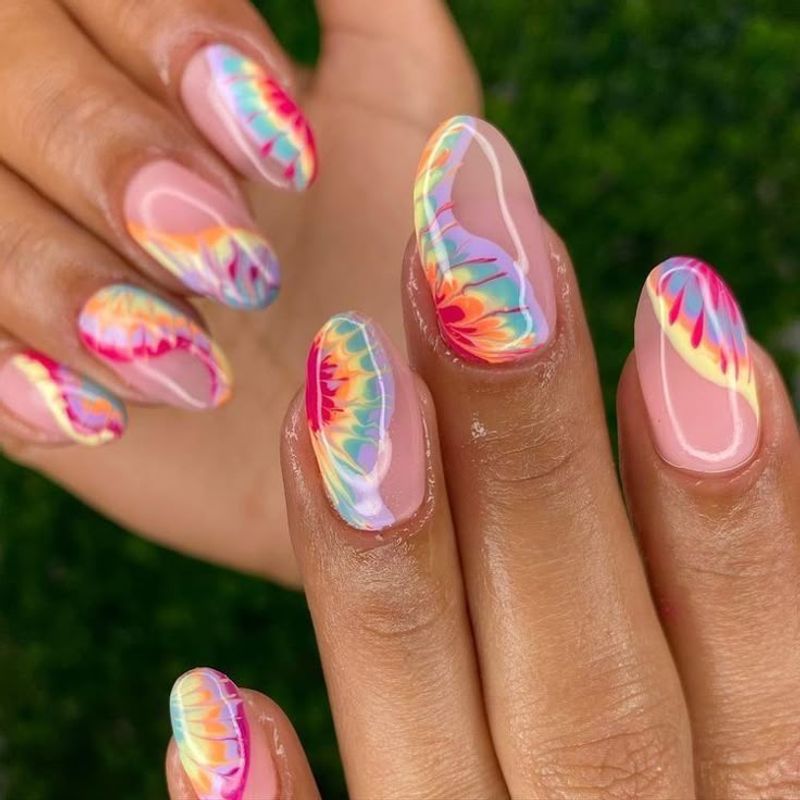
Channeling my inner hippie with these groovy nails never gets old! Tie-dye designs bring that carefree festival vibe to your fingertips. Unlike real tie-dye, these don’t require any special tools—just polish and a plastic sandwich bag. Drop small dots of different colors close together on the plastic, then smoosh your nail into the polish. Each press creates a unique swirled pattern.
I love using bright colors against a white background for that authentic tie-dye look. The beauty of this technique is its imperfection. No two nails will look exactly alike, and that’s the point! It’s perfect for summer, music festivals, or anytime you want to express your free-spirited side.
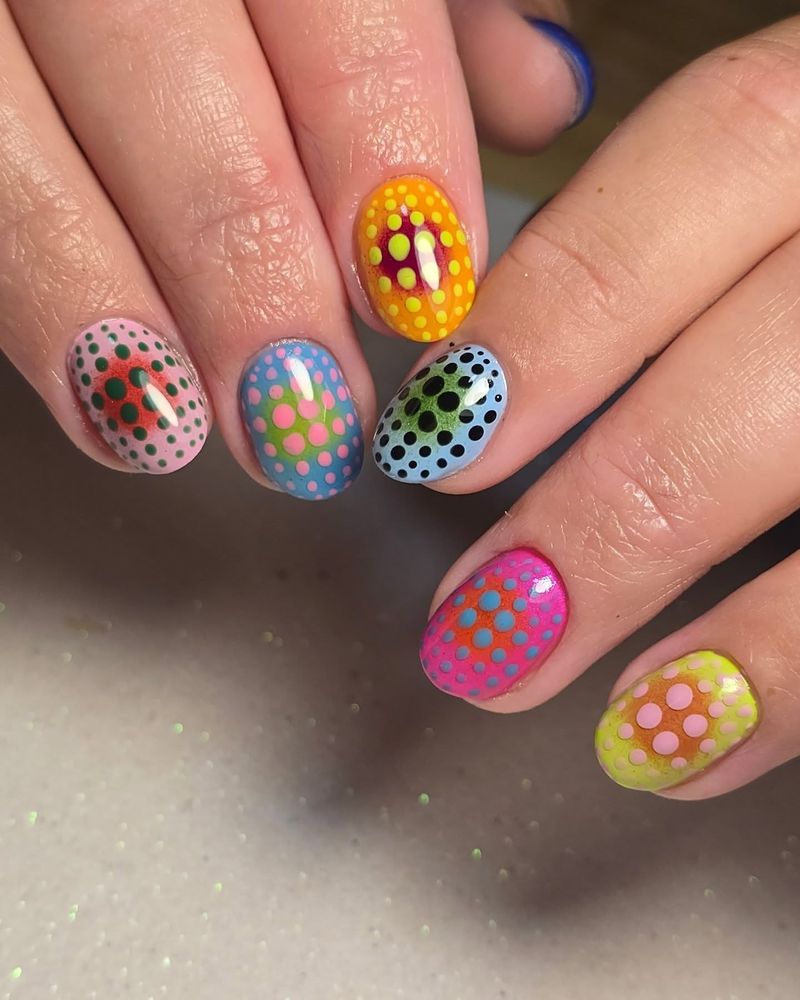
10. Bright Polka Dots on Natural Base
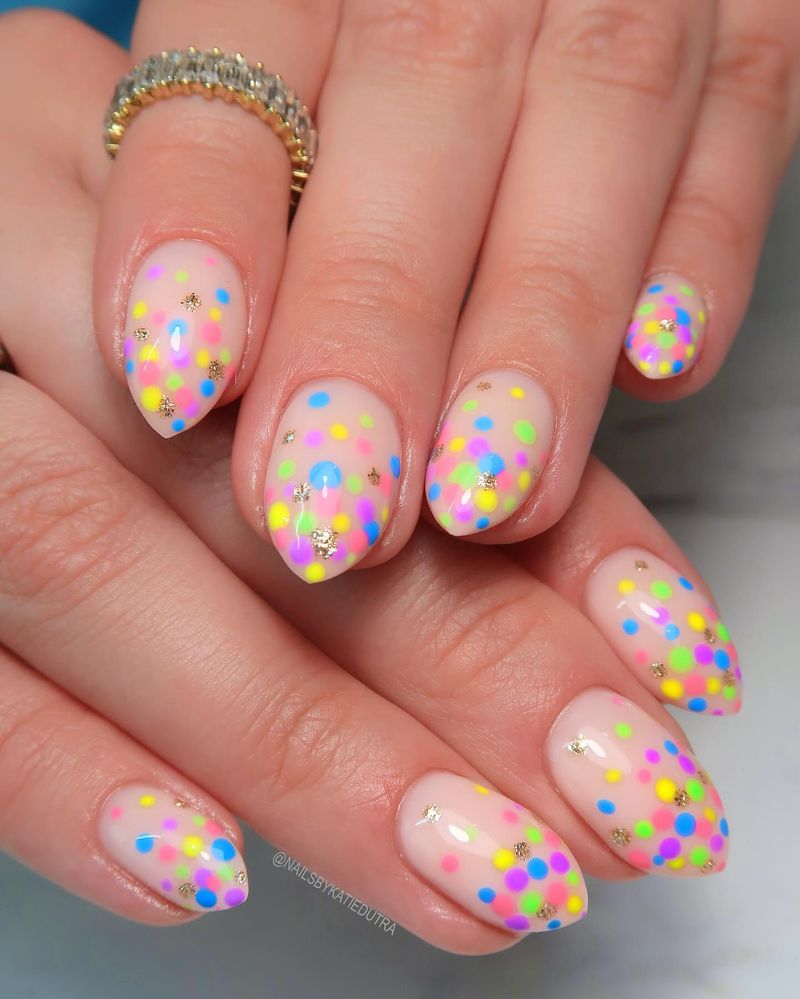
Never underestimate the power of polka dots! This classic pattern gets a modern update when bright, multicolored dots are scattered across a neutral base. I wore these to a friend’s wedding and they complemented my outfit perfectly without stealing the show. Creating even dots is easy with a dotting tool or the round end of a bobby pin.
Vary the dot sizes and colors for a playful look, or keep them uniform for something more refined. My favorite approach is random placement rather than perfect rows. The natural base makes this look office-appropriate while the colorful dots add personality. It’s the nail equivalent of a business suit with a fun patterned tie!
11. Ombré Glitter Tips
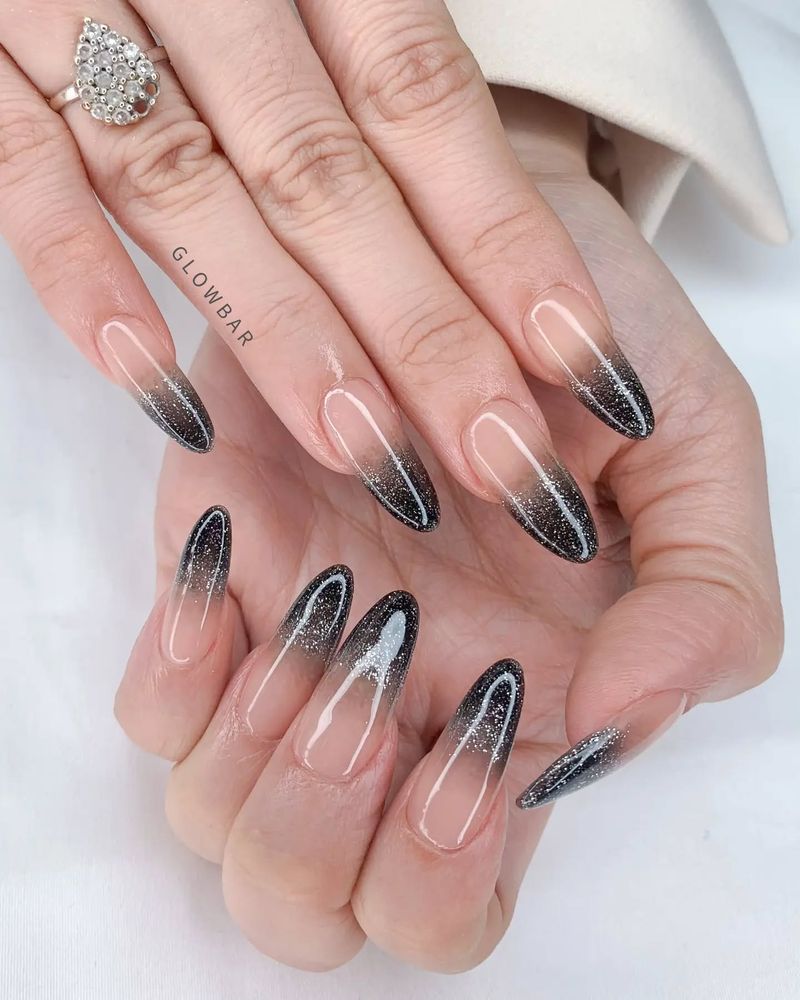
For those special occasions when you want to sparkle! Ombré glitter tips create a gorgeous gradient from your natural nail to full-on sparkle at the tips. I created these for New Year’s Eve, and they caught the light beautifully. Start with a natural or clear base, then apply glitter polish starting at the tip, gradually working down while using less pressure.
The result is concentrated glitter at the tips that fades as it reaches the middle of the nail. The best part? As they grow out, they still look intentional! Choose fine glitter for a subtle shimmer or chunky glitter for drama. Silver and gold work with everything, but don’t be afraid to try colored glitter too.
12. Colorful Geometric Patterns
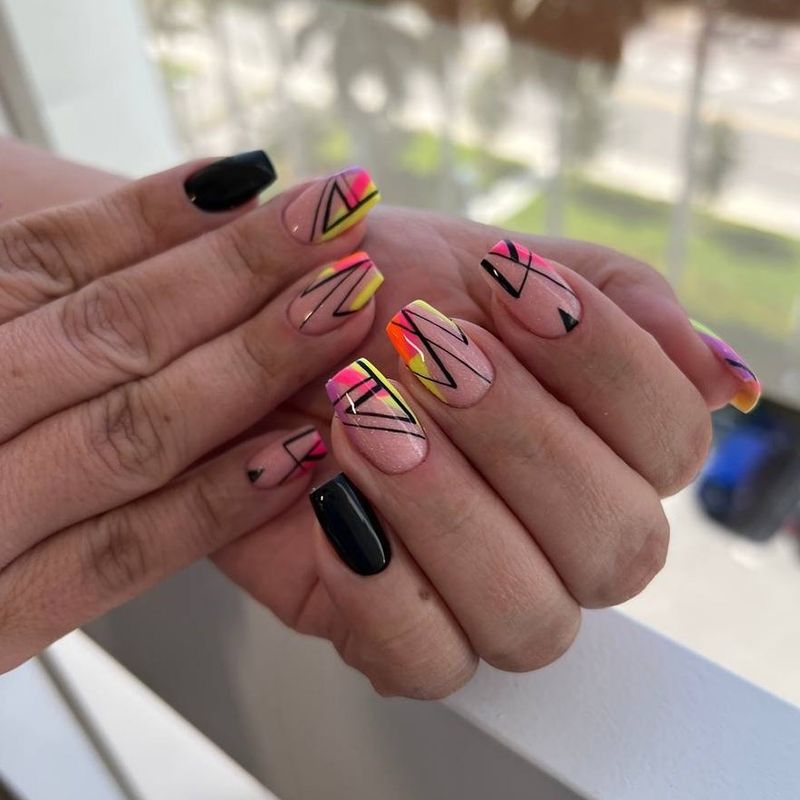
Math class meets nail art! Geometric patterns using bright colors create a modern, architectural look on your nails. I tried these after visiting a museum exhibit on modern art, and they became an instant favorite. Using striping tape is the key to creating clean lines and sharp angles. Place the tape in triangles, squares, or other geometric shapes, then fill in each section with different colors.
Remove the tape carefully before the polish dries completely. What I love most is how customizable these are. You can go minimal with just two or three shapes per nail, or create complex patterns that look like stained glass. They’re perfect for showing off your artistic side!
13. Confetti-Inspired Nails
Party vibes all day long! Confetti nails bring the celebration to your fingertips with tiny, colorful specks scattered across a clear or light-colored base. I created these for my birthday and couldn’t stop looking at them. The technique is simple—use a thin brush to create small dots and dashes in different colors and sizes. Placement should be random for that true confetti look.
For extra dimension, mix in some metallic shades among the bright colors. These nails always spark joy! They’re perfect for celebrations but also work as an everyday pick-me-up. The clear base keeps them from looking too busy, while the colorful specks add just enough fun.
14. Bold Graphic Art Nails
Comic book lovers, this one’s for you! Bold graphic art nails feature strong black outlines filled with bright colors, creating a pop art effect that turns heads. I wore these to a comic convention and they matched the energy perfectly. Start with a white base, then use a thin brush and black polish to create outlines—think speech bubbles, lightning bolts, or abstract shapes.
Fill in sections with bright colors, leaving some areas white for contrast. Finish with a glossy top coat to make the colors pop. These nails tell a story! Each finger can feature a different design, creating a mini comic strip across your hands. They’re definitely a conversation starter.
15. Watercolor Nails
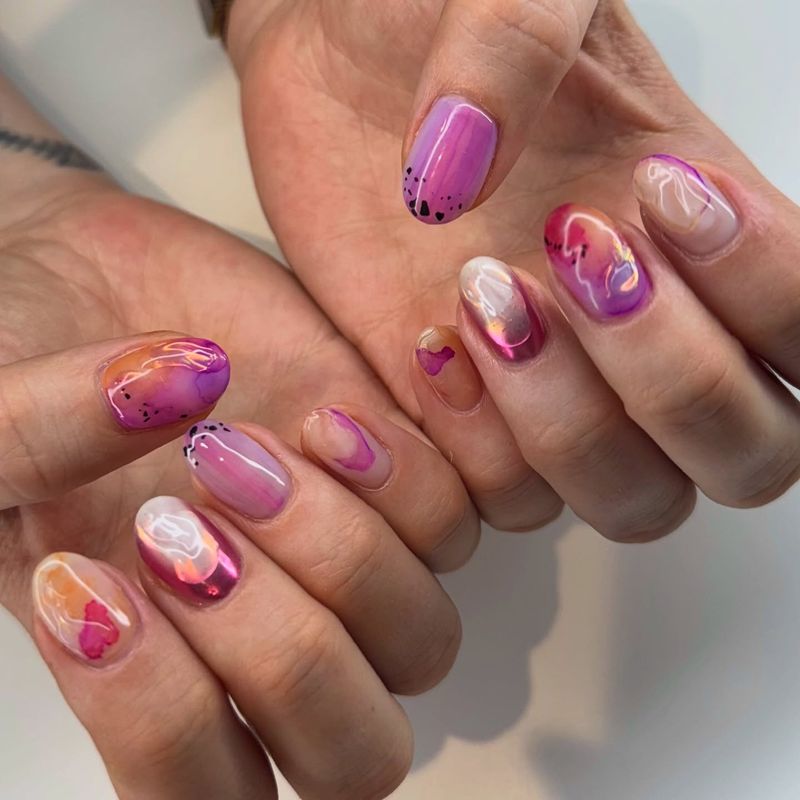
Soft, dreamy, and utterly romantic! Watercolor nails mimic the beautiful bleeding effect of watercolor paints. I created these for a spring garden party and they paired perfectly with my floral dress. The technique involves applying drops of diluted polish (mix with clear polish or alcohol) onto a wet white base. The colors will spread and blend naturally, creating that signature watercolor effect.
Use a small brush to guide the colors if needed, but embrace the organic blending. These nails have an artistic, ethereal quality that’s both eye-catching and elegant. Pastels work beautifully for a soft look, while bolder colors create more drama. Either way, no two nails will ever be exactly alike!
16. Pastel Checkerboard Nails
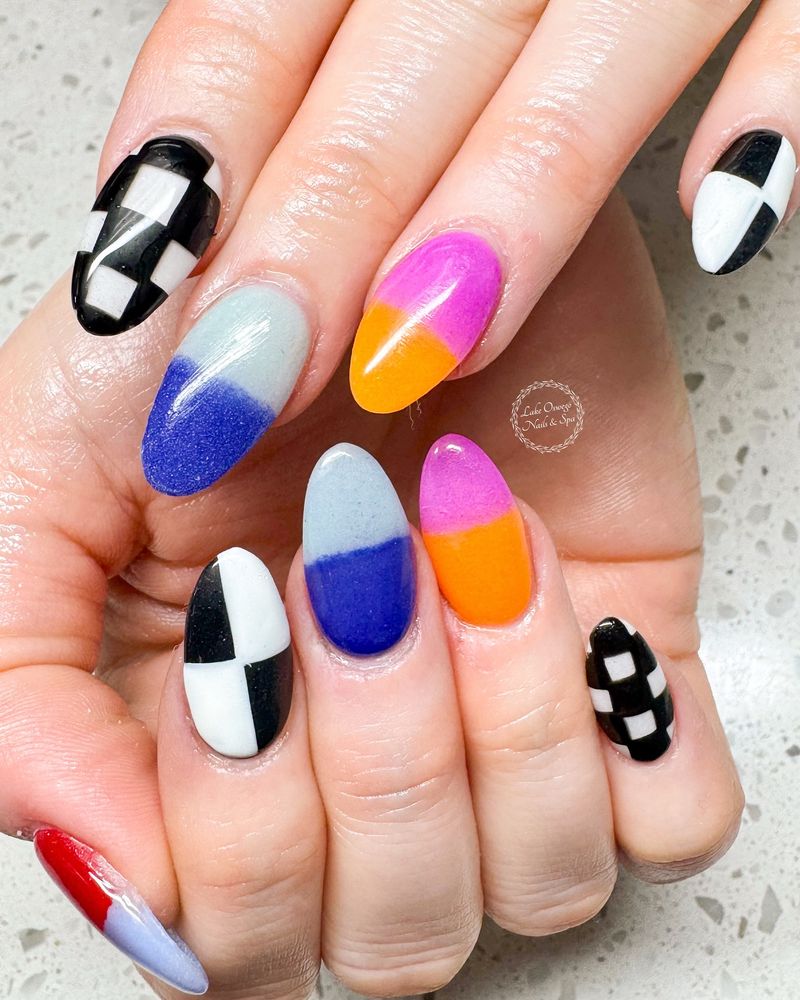
Chess boards got a sweet makeover! Pastel checkerboard nails combine the classic pattern with soft colors for a look that’s both structured and playful. I spotted this trend on social media and had to try it myself. Creating even squares takes patience. Start with a light base color, then use striping tape to create a grid. Fill in alternating squares with a contrasting pastel shade.
My favorite combos are lavender and mint, or baby blue and pale yellow. The finished look is unexpectedly versatile. It’s cute enough for casual outings but interesting enough for special events. For a modern twist, try the pattern on just one or two accent nails, keeping the rest solid.
17. Bright Negative Space Designs
Less is more with this modern approach! Negative space designs use the natural nail as part of the pattern, creating striking contrast with bright colors. I tried these when growing out a gel manicure and got so many compliments. The technique involves strategically painting only portions of the nail, leaving other areas bare. Use striping tape to create clean lines, geometric shapes, or asymmetrical patterns.
The contrast between the bright polish and your natural nail creates visual interest. These designs are perfect for busy people—they grow out gracefully since the bare nail is already part of the design! Plus, they work on shorter nails where other detailed art might not fit.
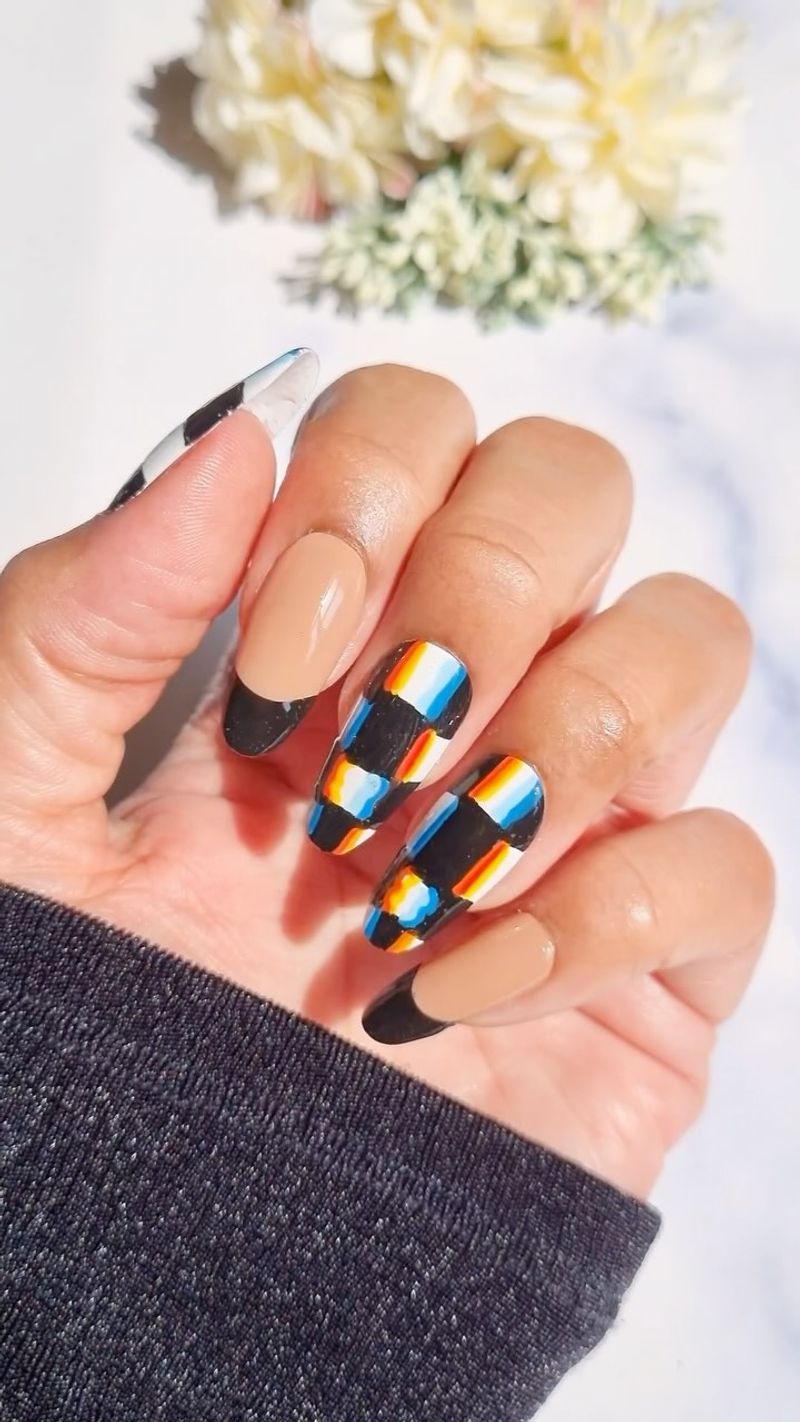
18. Rainbow Chrome Nails
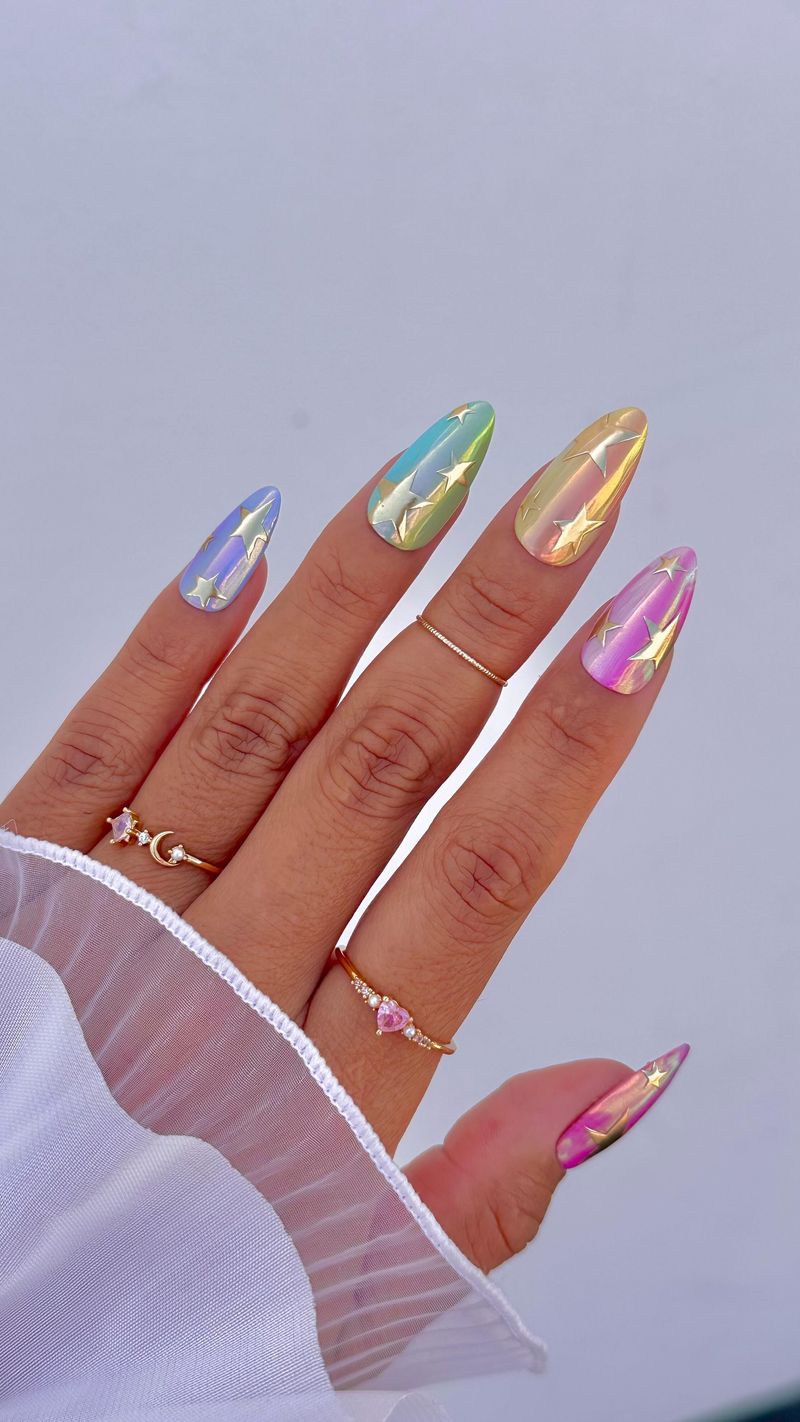
Pure magic on your fingertips! Rainbow chrome creates an otherworldly, color-shifting effect that changes as you move your hands. I splurged on these at a salon for a music festival, and they looked incredible in the sunlight. This effect requires special chrome powder applied over gel polish. As light hits the nails from different angles, the colors shift across the rainbow spectrum.
It’s like having tiny mirrors that reflect a rainbow on each nail. While this look typically needs professional application, at-home chrome powders are becoming more available. The effect is subtle enough for everyday wear but special enough to feel like wearable jewelry. They’re perfect for anyone who loves a futuristic, eye-catching look.
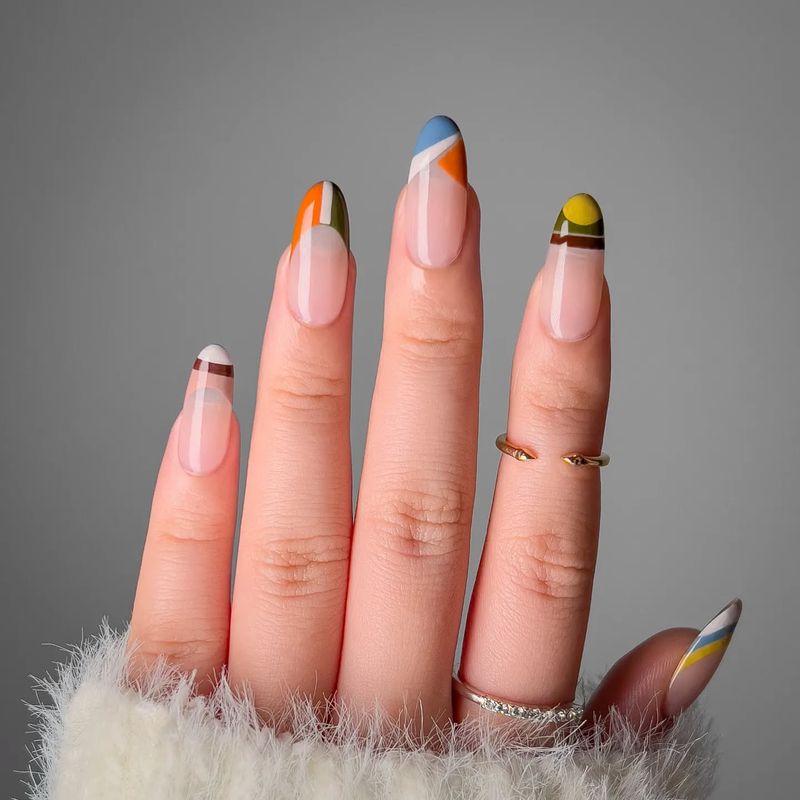
19. Multicolored French with Matte Base

French manicures got a major upgrade! This modern twist pairs a matte natural base with multicolored tips instead of the traditional white. I wore these to a job interview and my future boss actually commented on how creative yet professional they looked. The matte base gives a sophisticated canvas for the colorful tips to shine.
Choose complementary colors for a cohesive look, or go wild with contrasting shades on each nail. The tips can be thin and subtle or thicker for more impact. What makes this style special is the balance between playful and polished. The matte finish and clean lines keep it elegant, while the colorful tips add personality. It’s perfect for those who want to express creativity within professional boundaries.
20. Tropical Fruit Nail Art
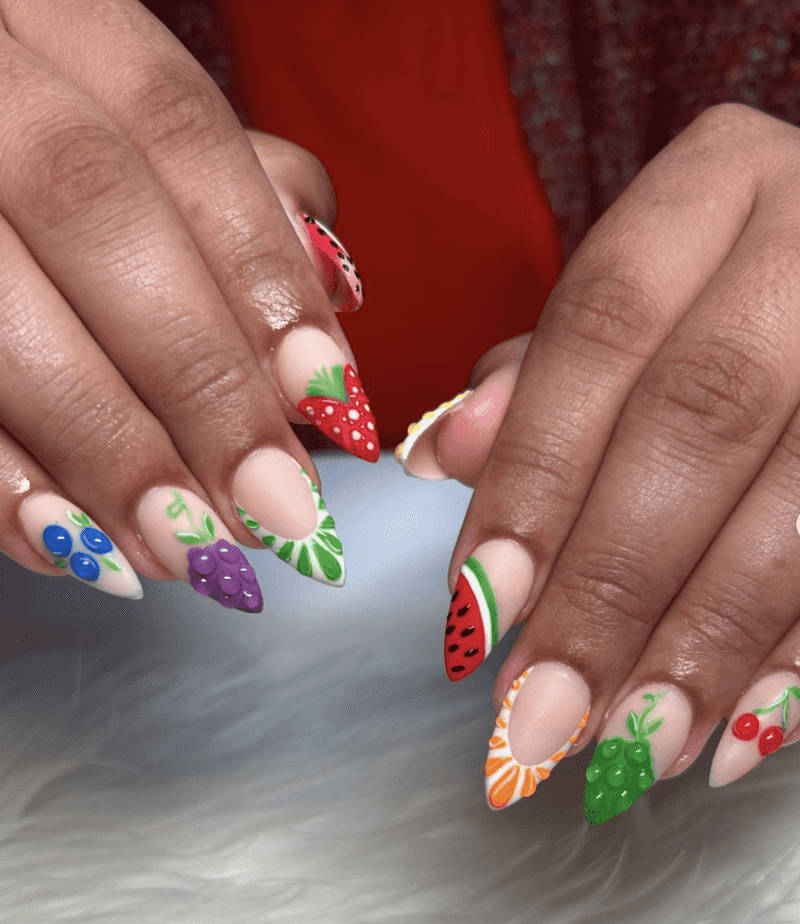
Vacation vibes year-round! Tropical fruit nails bring a slice of paradise to your fingertips with tiny watermelons, pineapples, oranges, and kiwis. I painted these before a beach trip and couldn’t stop smiling every time I looked at them. Each nail becomes a miniature fruit using simple shapes and bright colors. Watermelons are just green half-circles with pink centers and black seeds.
Pineapples are yellow diamonds with brown grid patterns. The detail level is up to you—they look cute even with basic shapes. These playful nails are perfect for summer but work anytime you need a mood boost. They’re especially fun for poolside parties or tropical-themed events. Pair with a bright base color for extra pop!
21. Playful Floral Color Mix
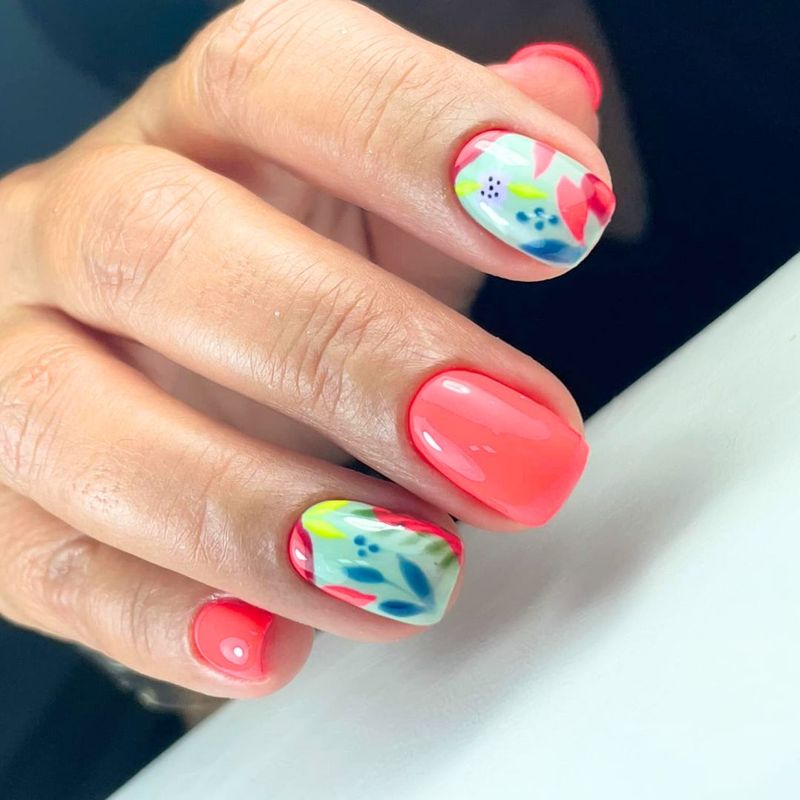
Garden-fresh fingers without the dirt! Floral nails in unexpected color combinations create a modern botanical look that’s both feminine and fun. I created these for a spring wedding and received endless compliments. The secret is using non-traditional flower colors—think blue roses, purple daisies, or orange tulips. Use a dotting tool to create the flower centers, then add petals with a thin brush.
Keep the background a neutral shade to let your colorful blooms stand out. Don’t worry about perfect flowers—slightly abstract shapes actually look more artistic! Mix different flower sizes and types across nails for a lush garden effect. These nails bring joy with every glance and pair beautifully with both casual and dressy outfits.
22. Colorful Zebra Stripes
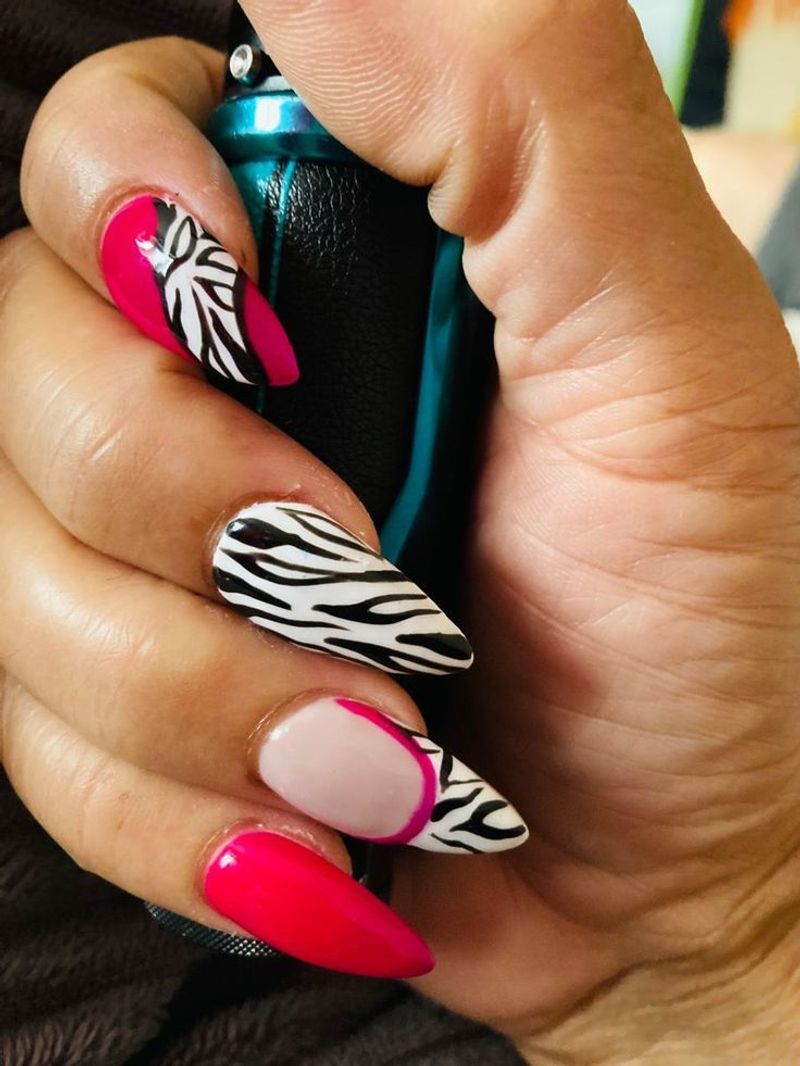
Wild meets wonderful! Zebra stripe nails get a colorful makeover when traditional black and white is replaced with bright color combinations. I tried these for a concert and they matched the energetic atmosphere perfectly. Creating zebra stripes is surprisingly easy—no perfect lines needed! Start with a light base color, then use a thin brush to create irregular, wavy stripes in a contrasting color.
The beauty of zebra print is its natural imperfection. My favorite combinations are purple stripes on yellow, blue on orange, or pink on green. The clash of colors creates an eye-catching effect that’s both playful and bold. These nails say you’re not afraid to stand out in the crowd!
23. Sunset Ombré Nails
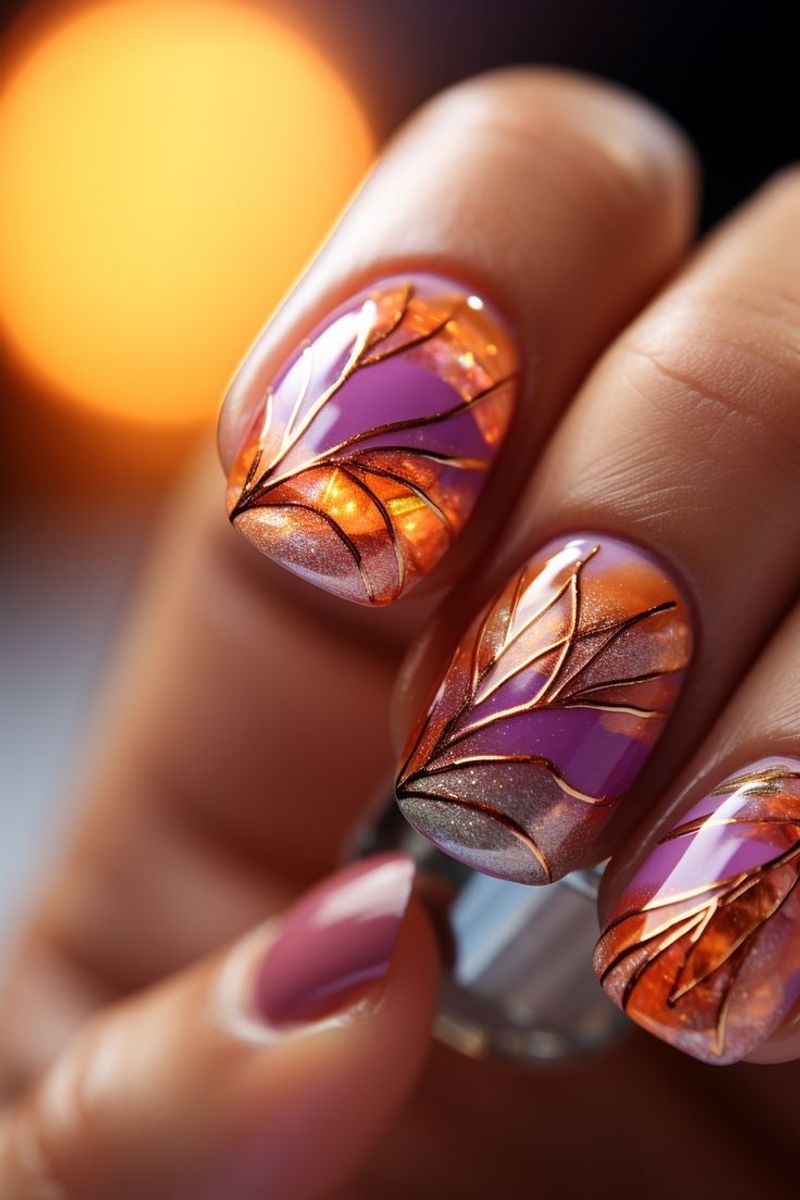
Capturing that perfect sunset moment! These nails blend warm oranges, pinks, and purples to recreate the magical colors of dusk. I wore these on vacation and they perfectly complemented beach photos. The key to a stunning sunset effect is gradual color transition. Start with yellow at the base, blend into orange, then pink, and finally purple at the tips.
A makeup sponge helps create that seamless gradient effect. Add a tiny black silhouette (like a palm tree or skyline) for extra drama. These nails evoke such a peaceful feeling—like carrying a little piece of vacation wherever you go. They’re perfect for summer but bring warmth to colder months too. Everyone needs a sunset at their fingertips!
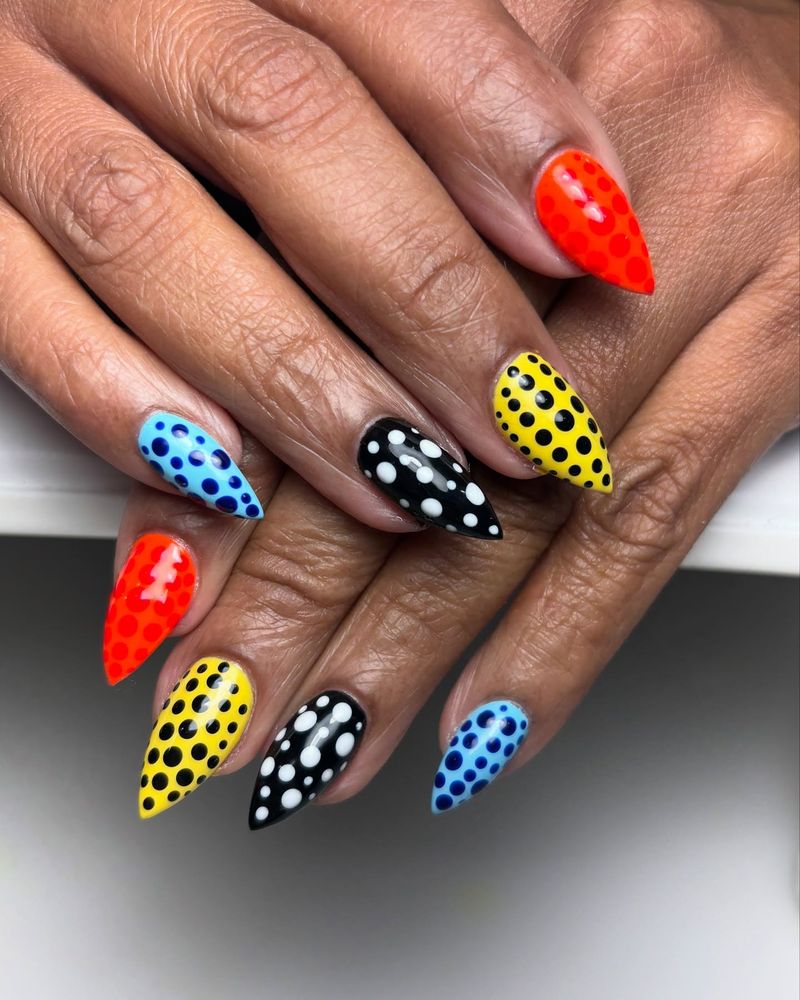
24. Multicolored Animal Print
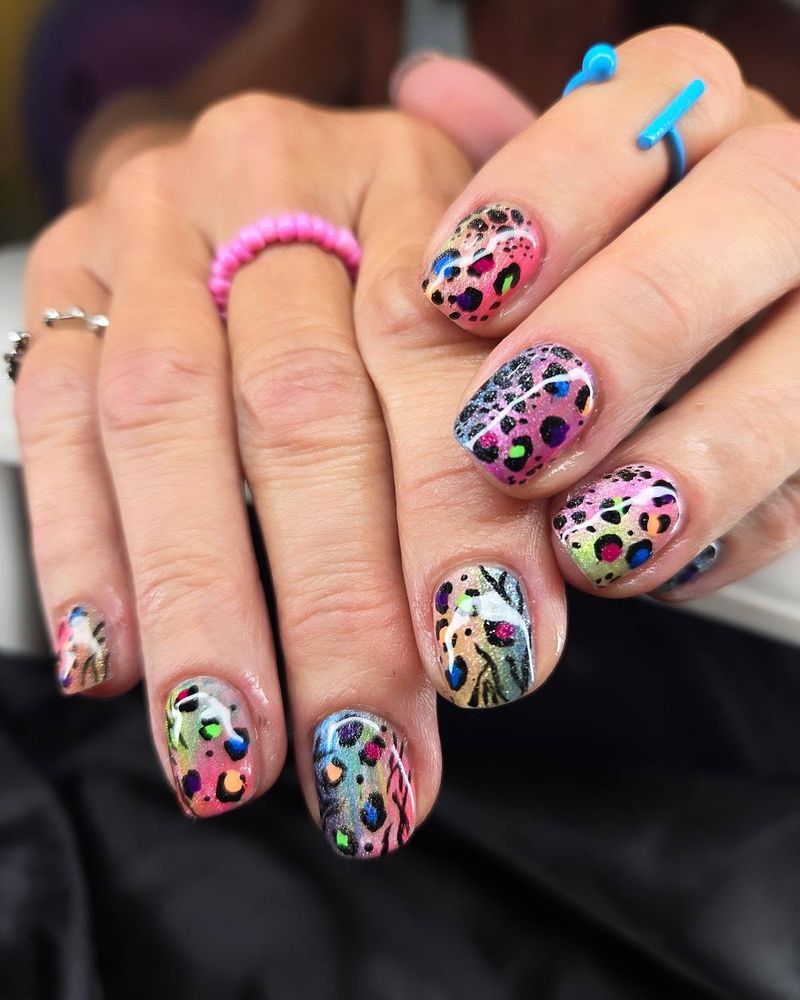
Traditional animal prints got a rainbow makeover! Instead of natural leopard or zebra colors, these nails feature spots and stripes in bright, unexpected hues. I created these for a friend’s bachelorette party and they matched our wild night perfectly. The technique is simple—paint a neutral base, then add animal print patterns using multiple colors instead of the traditional brown or black.
Leopard spots are just irregular circles with smaller dots around them. Zebra stripes are uneven wavy lines. These nails have attitude! They’re perfect for nights out, festivals, or anytime you want to channel your wild side with a modern twist. The combination of familiar patterns in surprising colors creates a look that’s both recognizable and fresh.
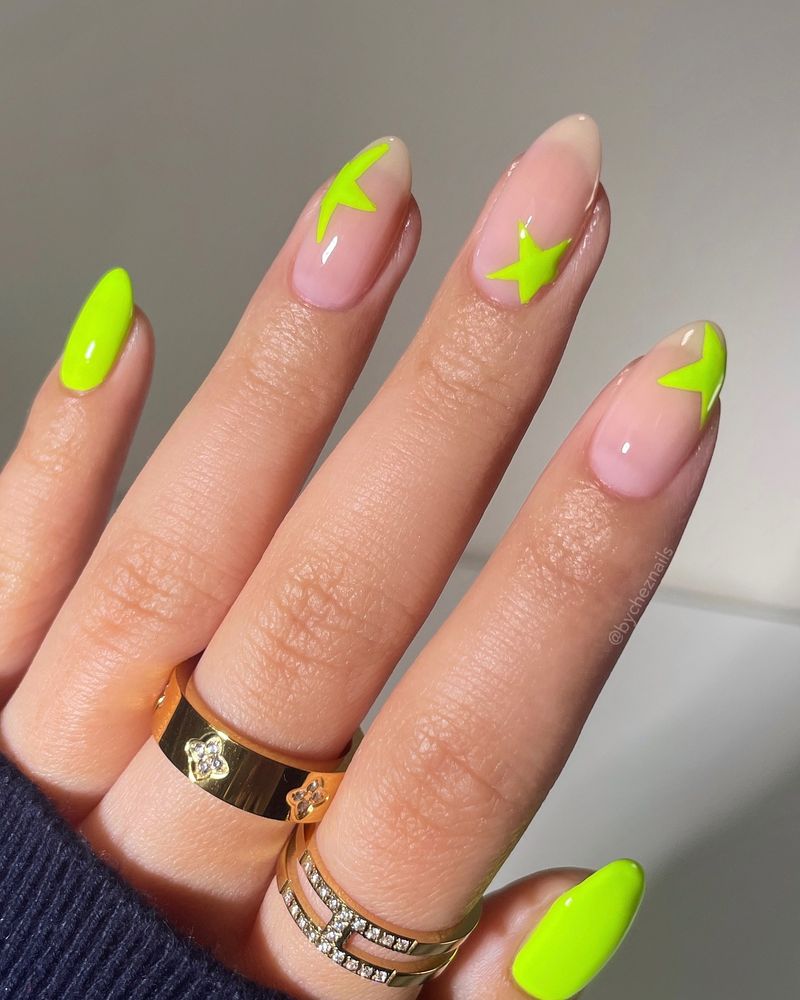
25. Rainbow Tip Almond Nails
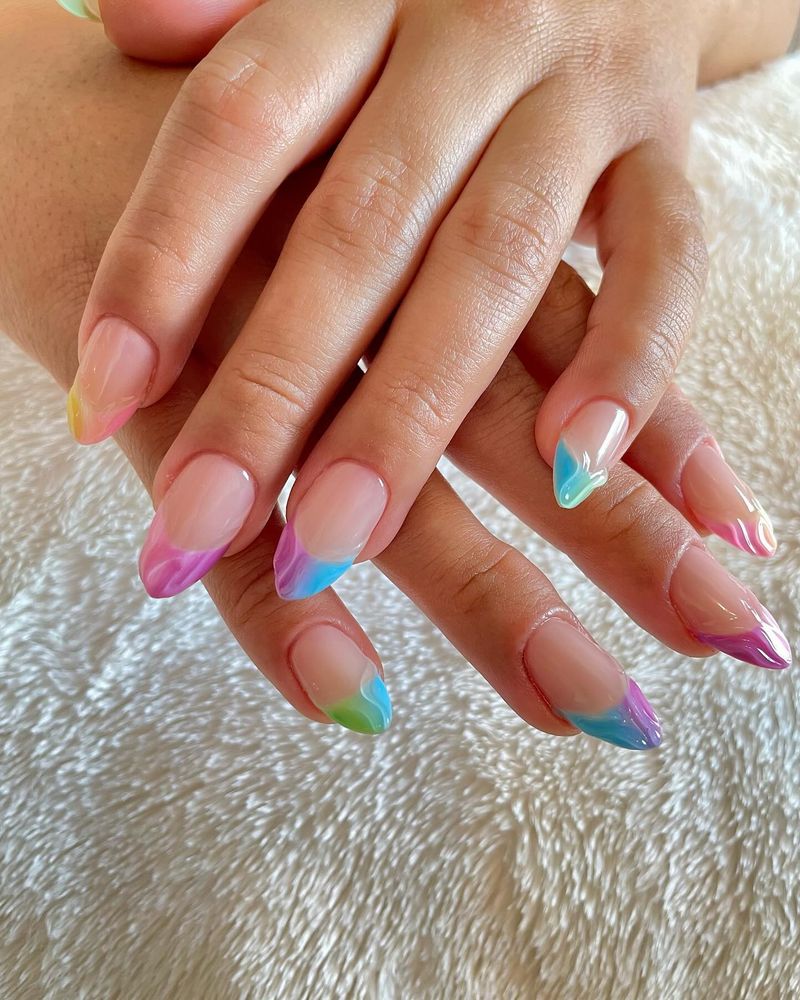
Elegance meets playfulness! Almond-shaped nails with rainbow tips combine sophisticated nail shape with colorful ends for a refined and fun look. I got these done for my birthday and felt like a million bucks. The elongated almond shape creates a flattering, feminine silhouette. Add a band of color at each tip—either a different shade on each nail following the rainbow order, or a mini-rainbow on each tip.
The contrast between the neutral base and colorful tips creates a beautiful frame for your hands. These nails elevate any outfit. The almond shape keeps them looking grown-up while the rainbow tips add just enough color to express personality. They’re perfect for those who want to be taken seriously while still showing creativity.