
17 Birthday Nail Ideas That Bring The Party To Your Fingertips
Birthday celebrations deserve something special from head to toe – and your nails shouldn’t miss out on the fun!
I’ve always believed that birthday manicures are like tiny canvases for self-expression during your special day.
Your fingertips can become mini party zones that capture the joy and excitement of celebrating another trip around the sun.
1. Glitter Gradient Tips
Nothing says “party time” quite like glitter that catches the light with every hand movement. I created this look last year for my sister’s birthday by applying a clear base coat and gradually building up glitter polish toward the tips.
The beauty of glitter gradients is their forgiving nature – no need for perfect application skills! Start with a neutral or pink base, then dab glitter polish at the tips, working your way down with decreasing intensity. For extra dimension, mix fine and chunky glitters.
This style works with any color combination, though silver and gold create that classic celebratory vibe. The growing intensity of sparkle mimics the building excitement of birthday festivities!
2. Confetti Dots Explosion
My friends went crazy for these nails at my birthday bash! I started with a white base and used a dotting tool to create tiny multi-colored spots that looked like actual confetti on my nails.
The trick is varying the dot sizes and colors – I used yellow, pink, blue, and green for a true party vibe. Some dots should overlap while others stand alone. Don’t worry about perfect spacing – random placement actually looks more authentic, like real confetti that’s just been tossed.
For extra pop, add a few metallic dots among the colorful ones. This design brings instant joy and makes your hands look ready to celebrate, even if you’re just picking up your morning coffee!
3. Cupcake Accent Nails
I’m not much of an artist, but even I managed to pull off these adorable cupcake nails for my birthday! I painted most nails a sweet pastel shade, then created detailed cupcakes on just two accent fingers.
For the cupcake base, I used a rounded brush to make a small dome shape. Then added frosting with a slightly lighter color on top, finishing with tiny sprinkle lines. The best part? Adding a minuscule red dot as the cherry on top!
My niece thought these were the coolest thing ever. If painting tiny desserts seems daunting, try using nail stickers instead – they give the same cute effect with half the effort. These nails definitely satisfied my sweet tooth without the calories!
4. Metallic Foil Accents
I discovered metallic foil nails last birthday and haven’t looked back since! They catch light in the most magical way – almost like having tiny mirrors on your fingertips.
The application process is surprisingly simple. I applied a sticky base coat, then pressed small pieces of nail foil onto each nail. The foil transfers to create an irregular, crackled metallic effect that looks professionally done but takes minutes.
Gold foil against black polish creates dramatic contrast, while silver on pink gives a softer, feminine vibe. For my birthday, I mixed gold, silver, and rose gold foils over a deep blue base – it looked like the night sky with shooting stars! This technique works with any color combination and always turns heads.
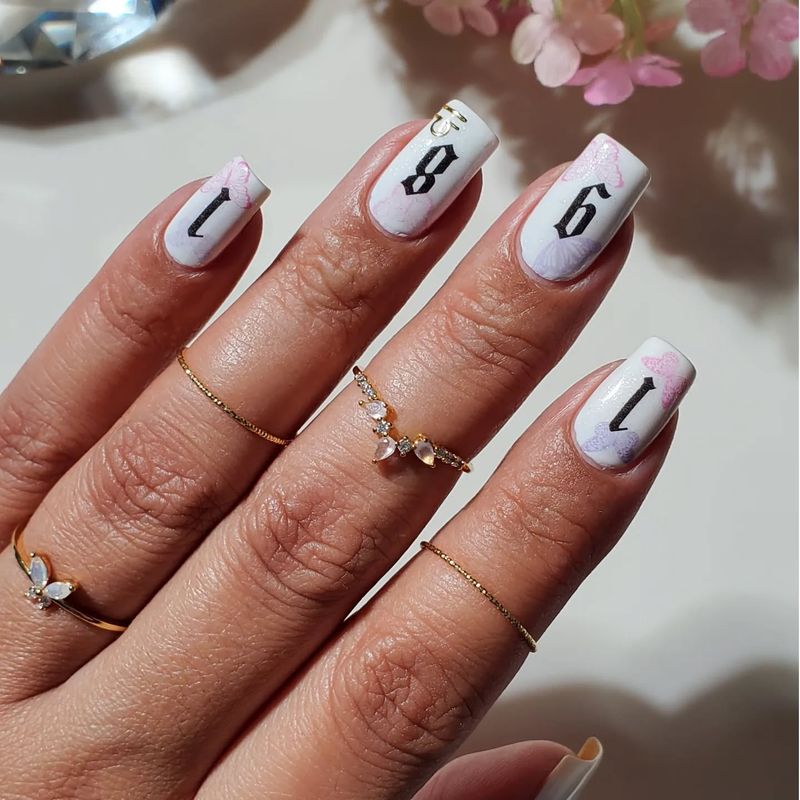
5. Number Accent Nail
Last year I flaunted my new age with pride by featuring the number on my ring finger nail! It became quite the conversation starter at my party – everyone noticed and commented on the personal touch.
Creating this look is straightforward. Paint most nails in your favorite shade (I chose a shimmery pink), then add a contrasting background color for your accent nail. Using a thin brush or nail pen, carefully draw your age number. Not steady-handed? Tiny number stickers work perfectly too!
For extra flair, outline the number with micro-beads or surround it with tiny stars. This design celebrates exactly who you are and what you’re commemorating. It’s personal, meaningful, and makes for great birthday selfies when posed near your cake!
6. Pastel Rainbow Stripes
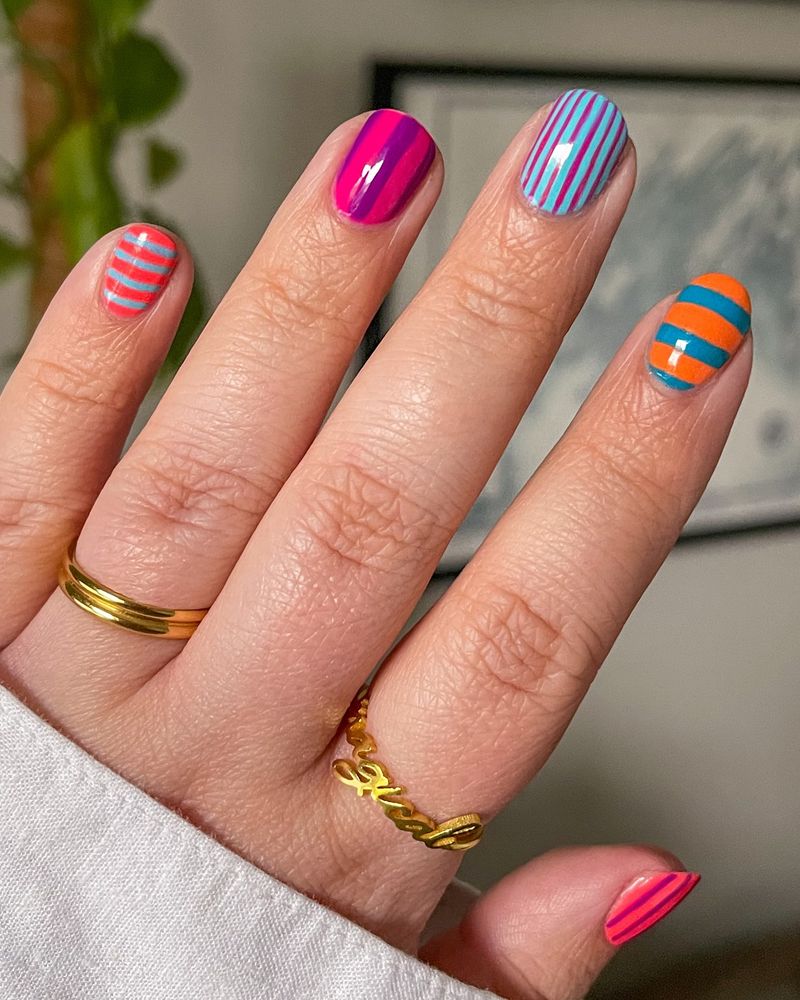
I wore these cheerful nails to my spring birthday brunch and received compliments all day! The soft pastel rainbow effect creates a happy vibe without being too flashy.
Creating these stripes doesn’t require perfect technique. I used a thin brush to paint horizontal lines in pastel yellow, pink, blue, lavender, and mint across each nail. The key is keeping the stripes thin and somewhat imperfect – it gives a hand-painted charm that looks intentional.
If you’re not confident with freehand stripes, try using striping tape as a guide. For a twist on this idea, try vertical stripes or a diagonal pattern. These nails pair beautifully with both casual birthday brunches and fancier evening celebrations while bringing a playful touch to your special day.
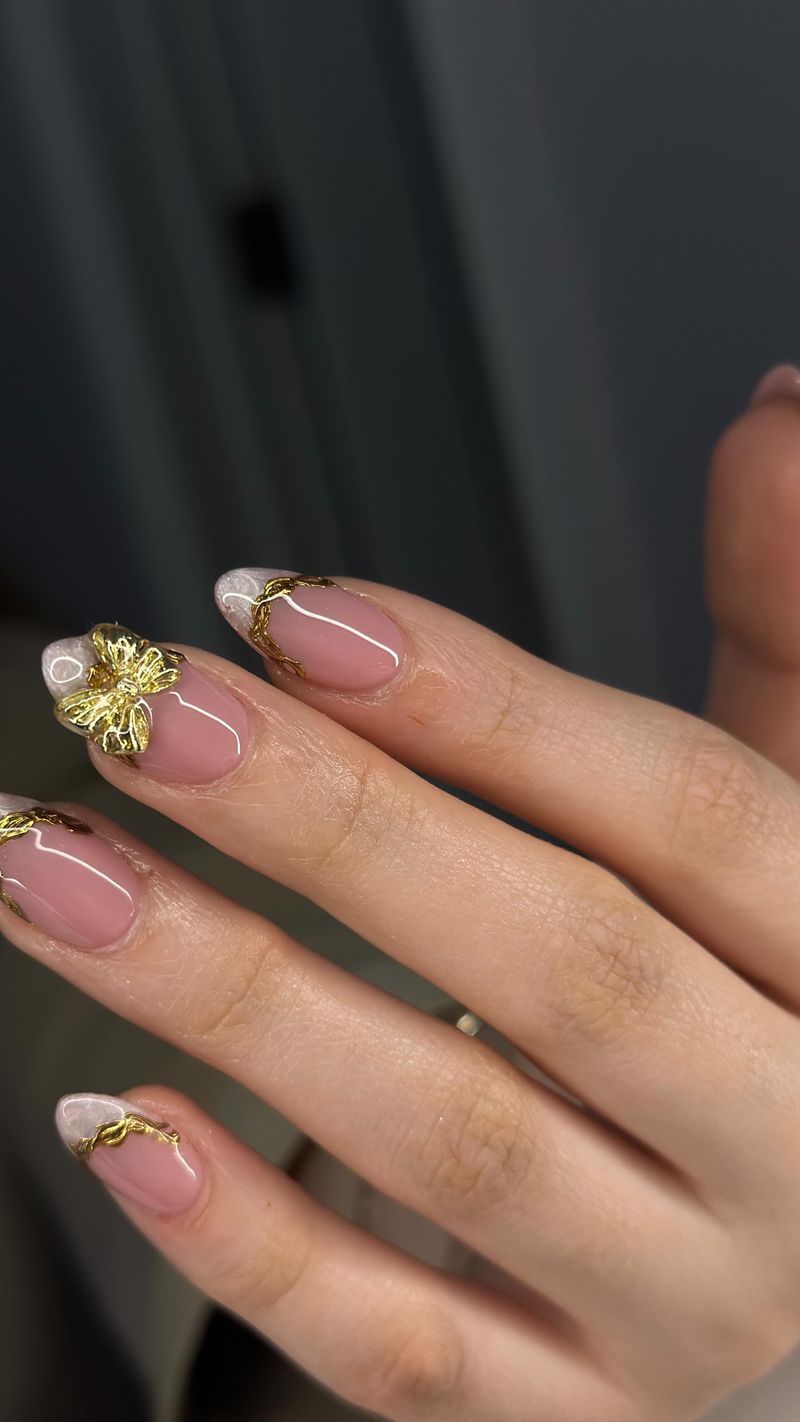
7. Jewel-Studded Tips
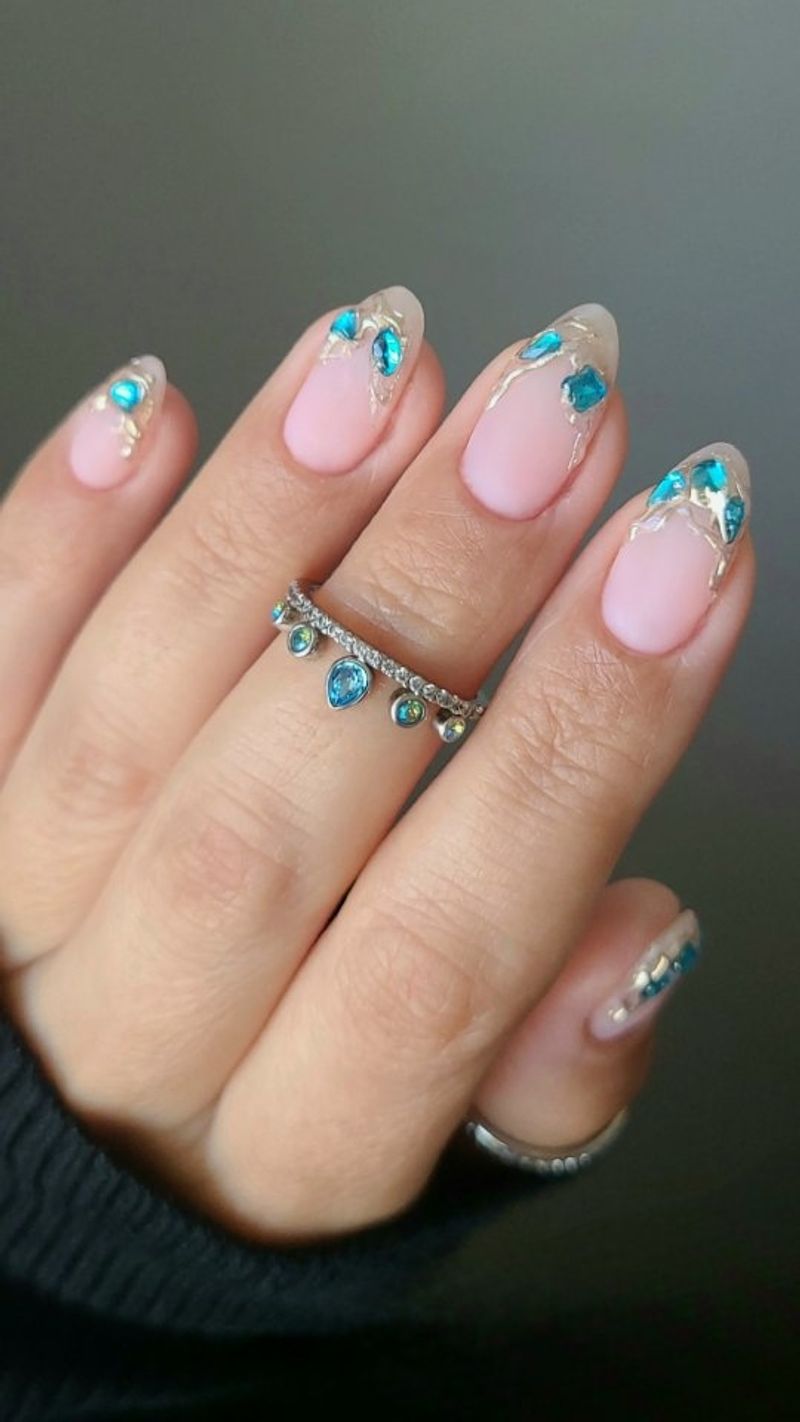
My birthday calls for extra sparkle, and these jewel-studded nails delivered major glamour! I started with a neutral base and placed tiny rhinestones along the tips for a bedazzled French manicure effect.
The secret to this look is nail glue – it holds much better than regular topcoat. I arranged small crystals in a gradient pattern, clustering them densely at the tips and spacing them out toward the middle. Clear crystals work with any outfit, but colored gems that match your party dress create a coordinated look.
Fair warning – these aren’t everyday nails! They’ll catch on sweaters and make typing interesting. But for a special birthday celebration? Totally worth it. They catch the light when holding your birthday drink and look amazing in photos.
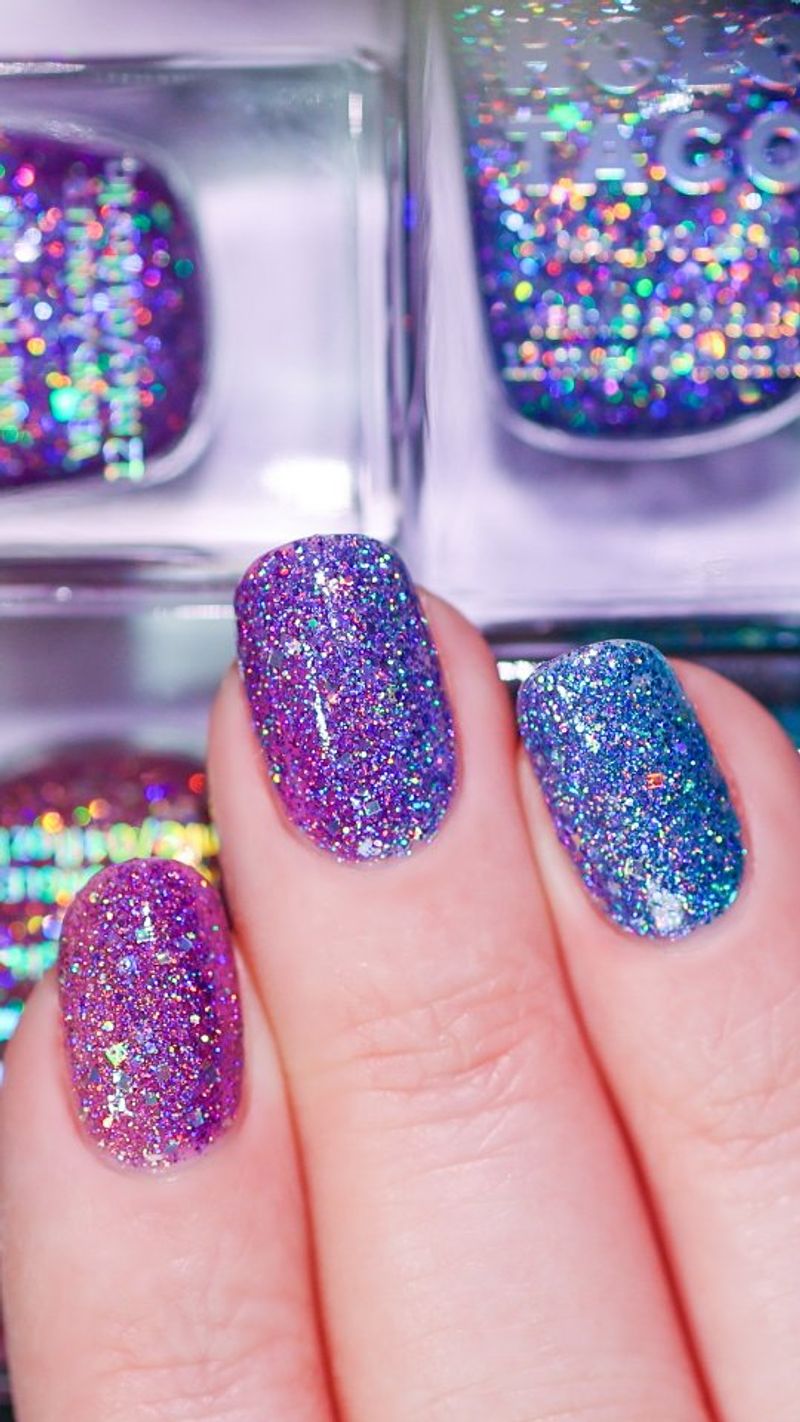
8. Holographic Polish Magic
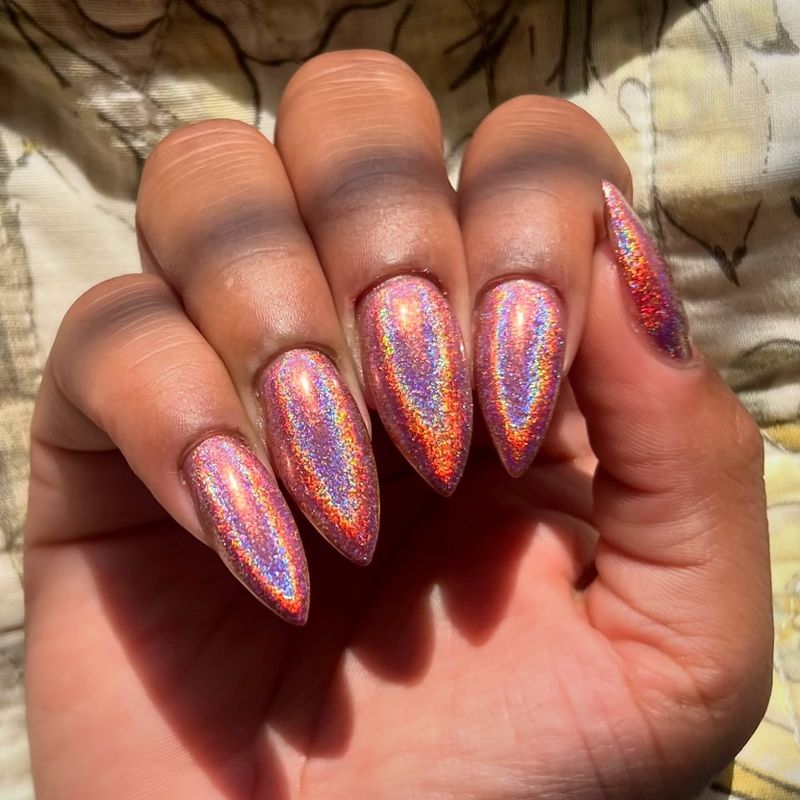
I’m obsessed with holographic polish for birthdays! It’s like having tiny rainbows dancing on your nails every time you move your hands.
The beauty of holo polish is its simplicity – just two coats creates dimensional color that shifts and changes under different lighting. I wore this to my dinner party last year, and watching the colors change under the restaurant’s mood lighting was endlessly entertaining. For best results, use a smoothing base coat first, as holo formulas can highlight nail ridges.
The effect is both subtle and eye-catching – appropriate for any age or celebration style. Want to amp it up? Add a holographic topcoat over your favorite color for a customized rainbow effect. These nails are conversation starters that bring a futuristic party vibe to your birthday look.
9. Neon Swirls Party
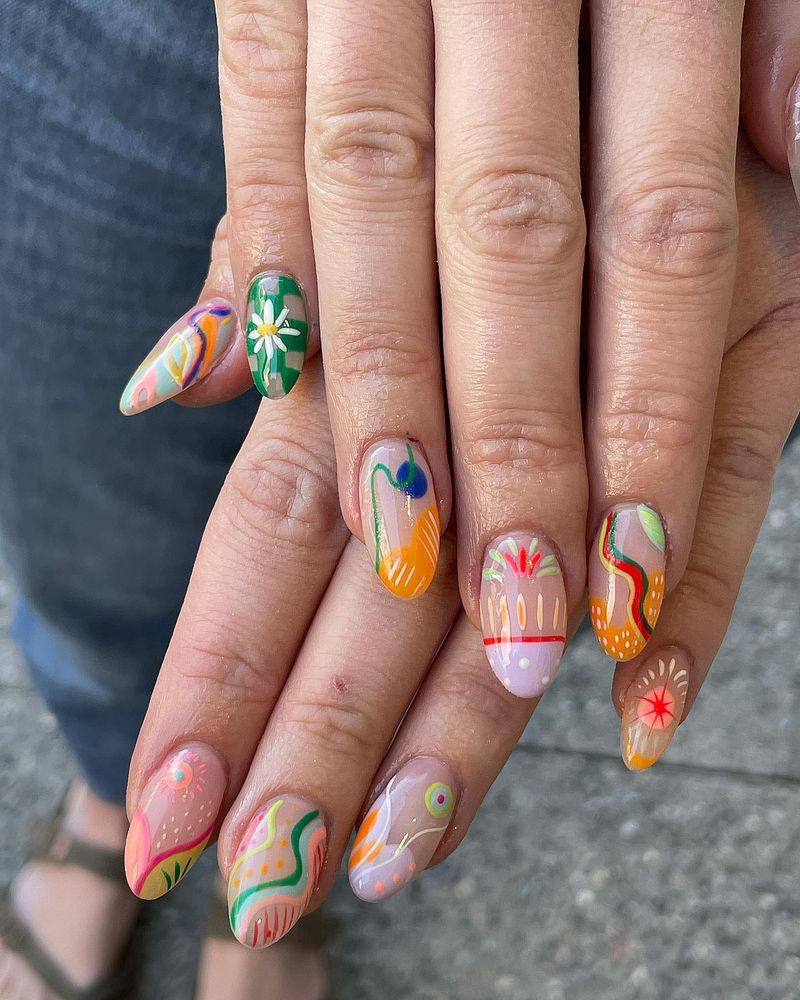
My 25th birthday called for something bold, so I went with these electric neon swirls that practically glowed under the club lights! The bright colors against a black base created an energetic vibe that matched my celebration perfectly.
I started with a black base coat, then used a thin brush to create freeform swirls in neon pink, green, and yellow. Don’t stress about perfection – the beauty of swirls is their organic, flowing nature. Each nail can have a different pattern, making this design uniquely yours.
For extra pop, I added a matte topcoat to the black background while leaving the neon swirls glossy. This created amazing dimension and texture. These nails scream “let’s celebrate” and bring serious party energy to your birthday festivities!
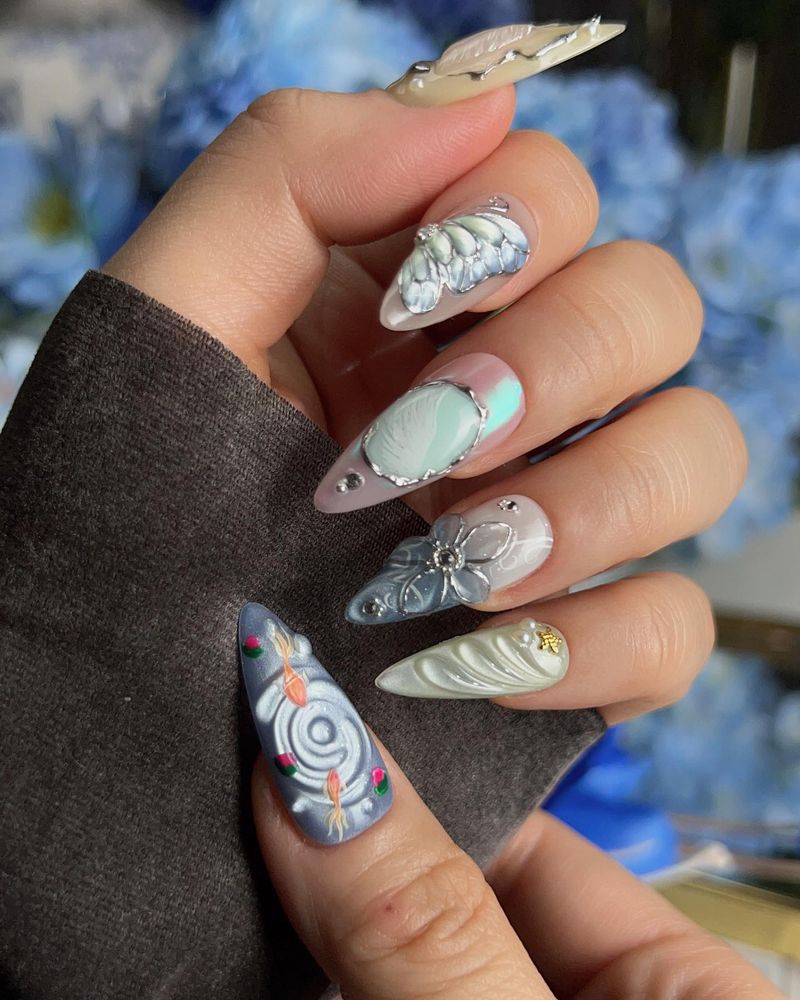
10. Sparkly Ombré Fade
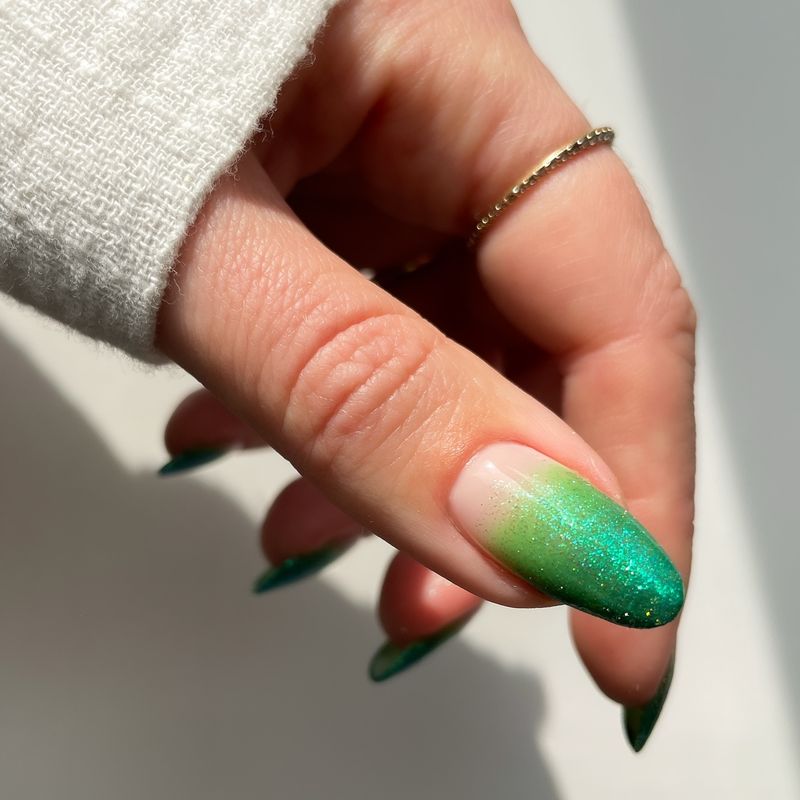
For my winter birthday, I wanted something that captured both elegance and festivity. This sparkly ombré design delivered with its sophisticated gradient that still packed plenty of party punch!
The technique involves sponging polish from dark to light (or vice versa) to create a seamless color transition. I chose a deep purple fading to lavender with fine silver glitter over the entire nail. The gradient effect is surprisingly forgiving for beginners – minor imperfections blend into the overall look.
My favorite part was how the design caught light differently along various parts of my nails. This versatile style works with any color combination – try red to pink for Valentine’s birthdays or blue to teal for summer celebrations. It’s a grown-up way to incorporate birthday sparkle without looking like a kid’s craft project!
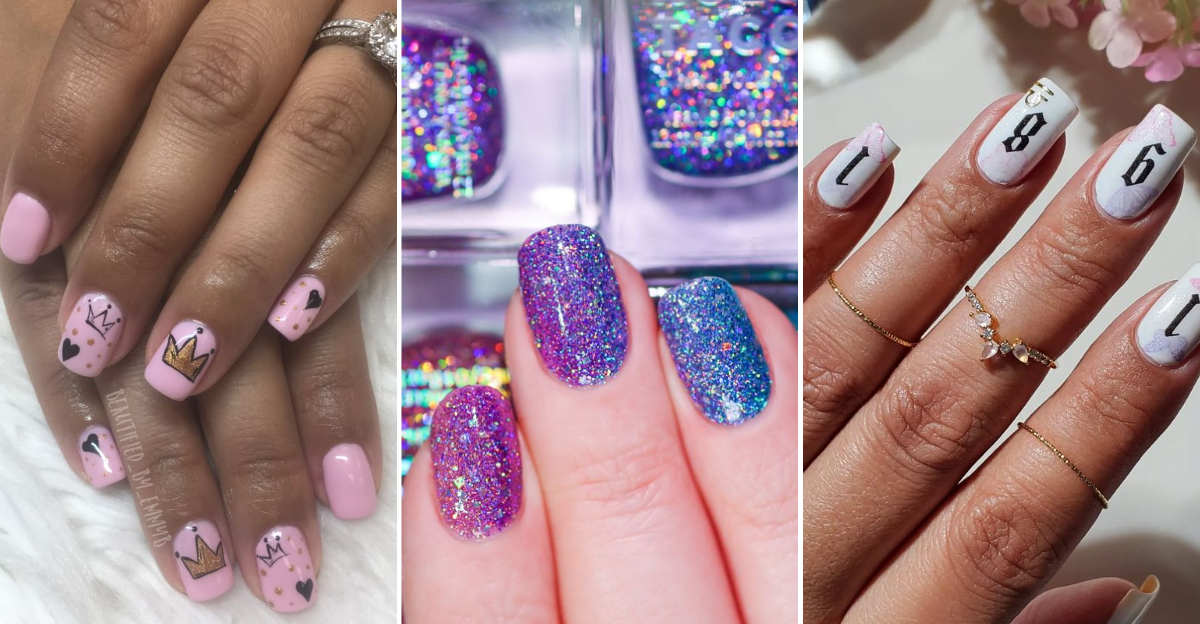
11. Crown Decal Royalty
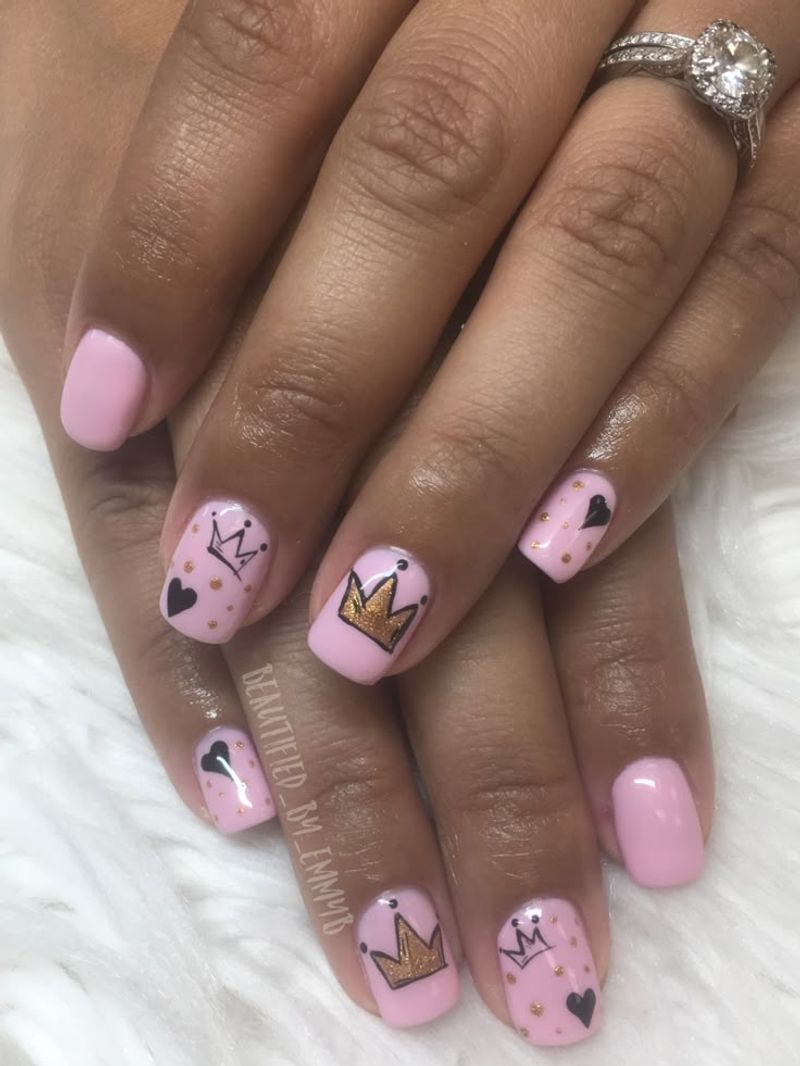
Because everyone deserves to feel like royalty on their birthday! I treated myself to these crown-decorated nails and felt like the queen of my celebration all day long.
The design features tiny gold crown decals placed over a luxurious background color. I chose deep burgundy, but navy, emerald, or black all create that regal vibe. For placement, I put a crown on each ring finger, though some prefer crowns on all nails for maximum impact.
Application is super simple – just tiny water-transfer decals pressed onto nearly-dry polish. A good topcoat seals everything in place. These nails subtly remind everyone whose special day it is without saying a word! They’re perfect for birthday dinners, parties, or anytime you want to feel a little extra special during your birthday week.
12. Birthday Candle Stripes
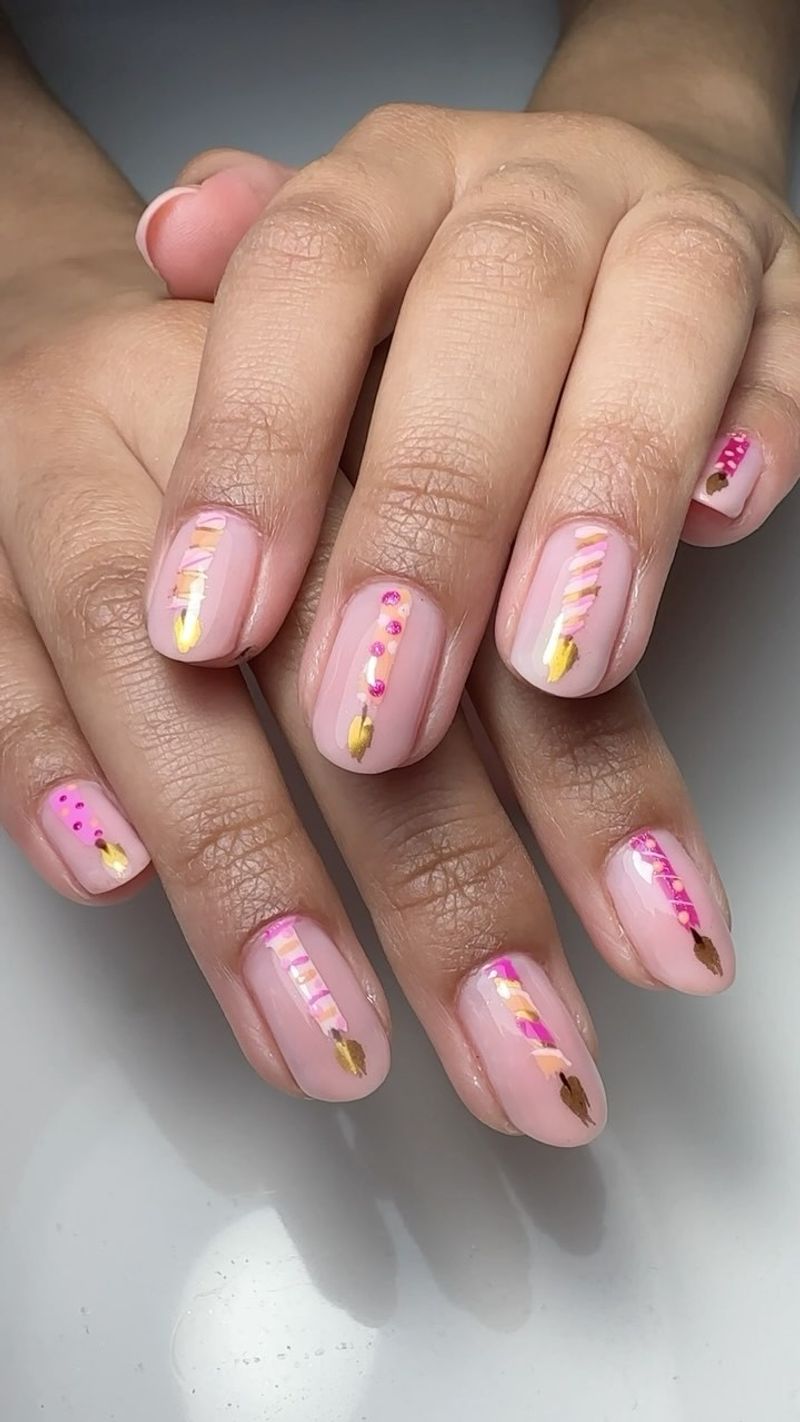
These playful nails brought childlike joy to my adult birthday! Each finger featured colorful vertical stripes resembling birthday candles, complete with tiny flame accents on top.
Creating this look is surprisingly doable at home. I painted a light background color, then used a thin brush to draw vertical lines in different colors. The magic happens when you add a small yellow/orange triangle at the top of each stripe to represent the flame!
For a twist, I made each nail a different candle color – blue, pink, purple, green, and orange. This design always sparks conversation and brings smiles. It’s whimsical without being childish and celebrates birthday traditions in a creative way. Plus, these nails photograph beautifully next to an actual birthday cake for that perfect Instagram moment!
13. Balloon Nail Art
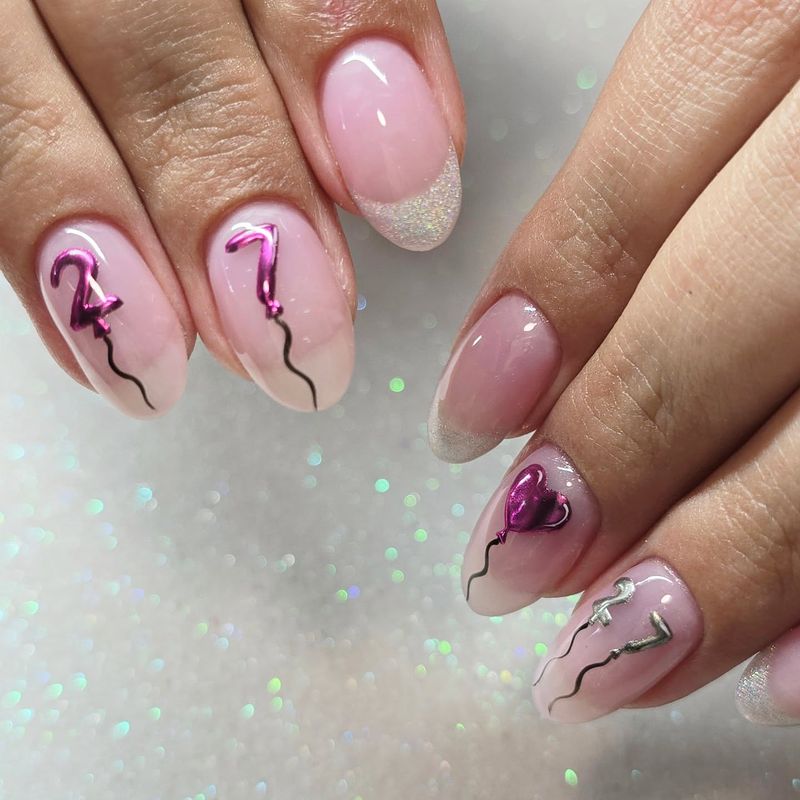
My birthday nails last year featured the ultimate celebration symbol – colorful balloons! Each nail showcased a tiny hand-painted balloon with strings extending toward my cuticles.
I used a dotting tool to create the balloon shapes in different colors – red, blue, yellow, and green against a soft sky-blue background. Adding thin lines as strings completed the floating effect. For dimension, I put a tiny dot of white polish on each balloon to create a reflection highlight.
Not confident in your painting skills? Balloon nail stickers work great too! This design always makes people smile and perfectly captures that birthday feeling of lightness and joy. It’s especially fitting if you’re planning a balloon-filled celebration or if balloons hold special birthday memories for you. These nails literally carry the party everywhere you go!
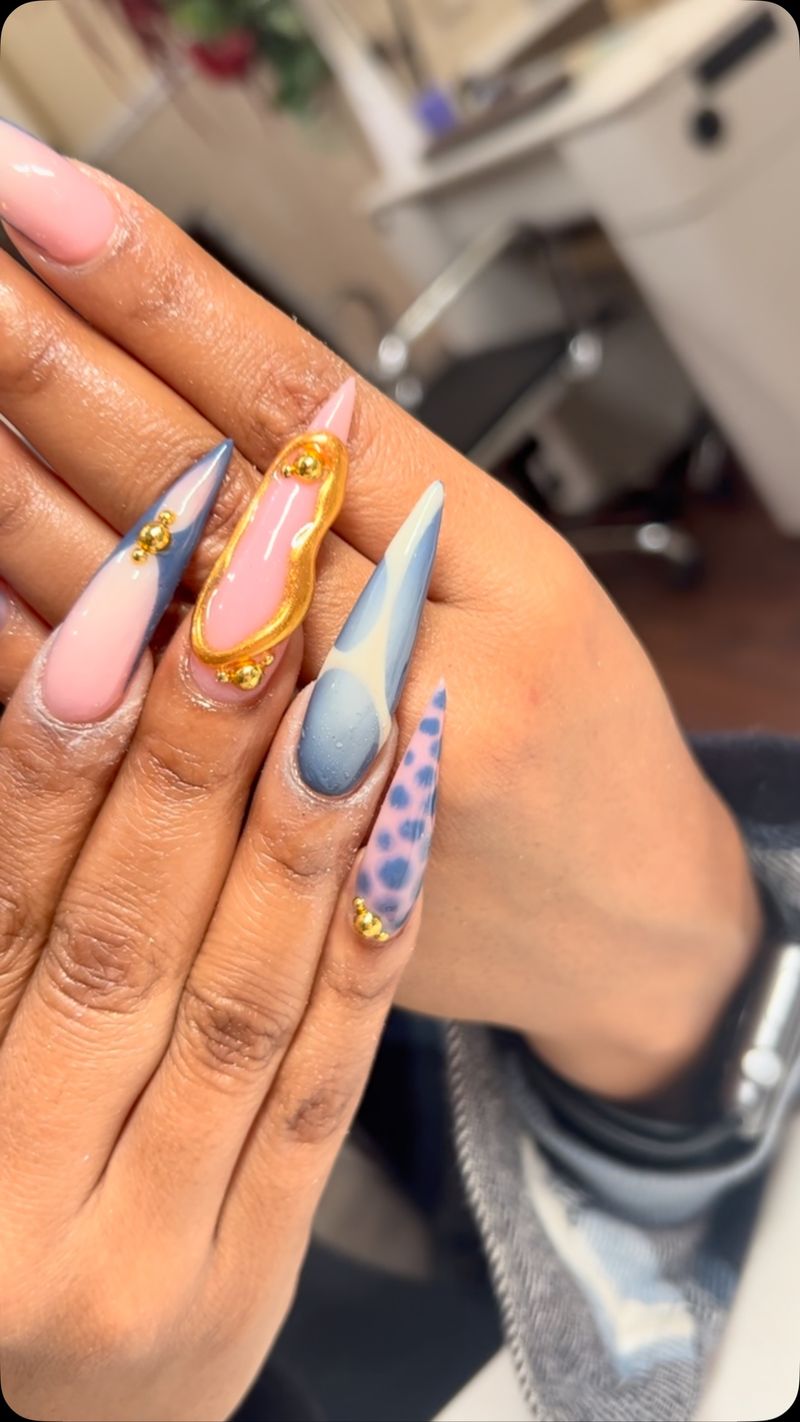
14. Chrome Hearts Affection
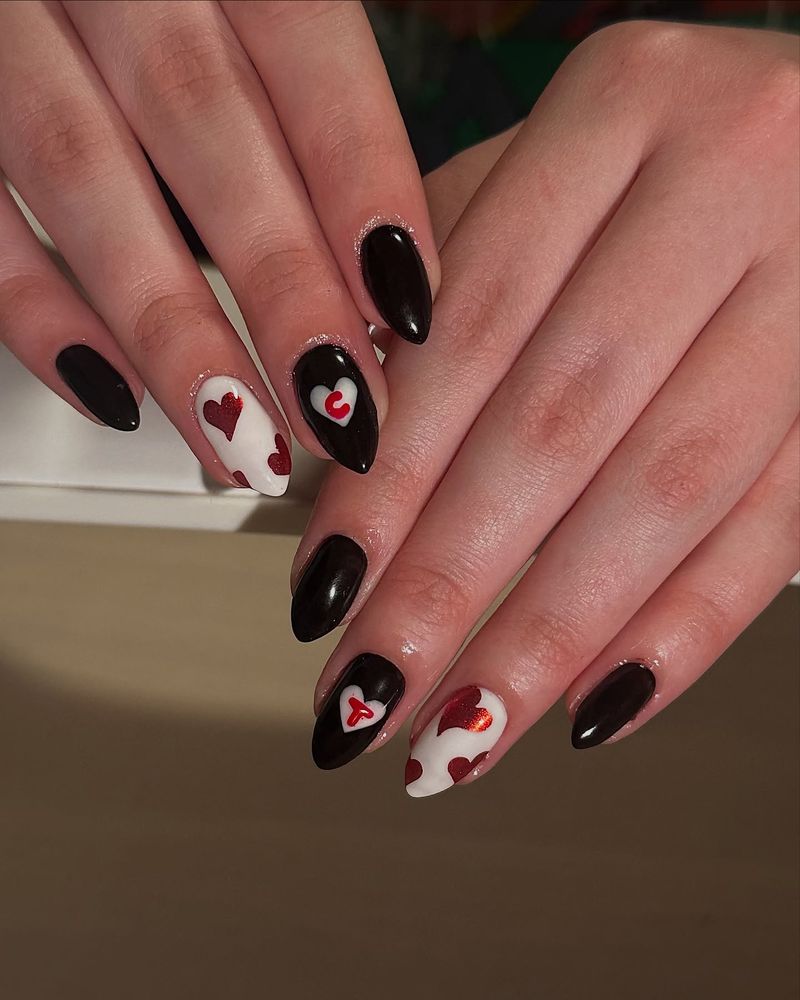
For my birthday last month, I wanted something that felt both edgy and romantic. These chrome heart accents delivered the perfect balance of tough and tender!
The design features metallic chrome hearts over a contrasting background. I chose matte black polish with silver chrome hearts, but red background with gold hearts creates a luxurious look too. The reflective chrome finish catches light dramatically, making even simple heart shapes look sophisticated.
You can create this look with chrome powder applied over heart-shaped stickers (remove them after applying the powder) or with chrome heart decals. Place just one heart on each accent nail for subtlety, or cover entire nails for maximum impact. These nails say “I’m celebrating my birthday my way” – they’re unexpected, eye-catching, and totally different from typical birthday designs.
15. Colorful French Tips
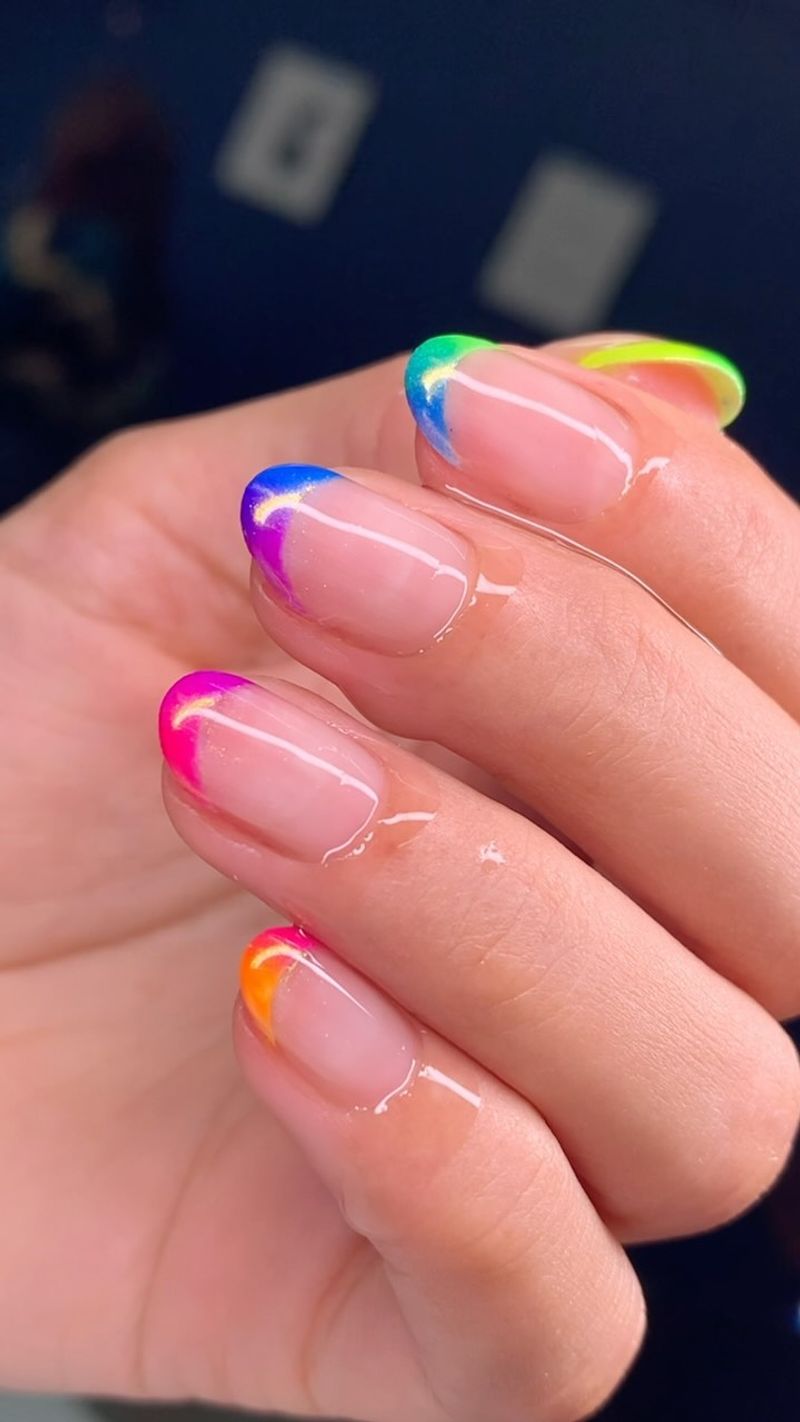
I gave the classic French manicure a birthday makeover with these multi-colored tips! Instead of traditional white, each nail got a different bright color at the tip – creating a playful but still sophisticated look.
The execution is simple: paint your base in a neutral shade (I used a sheer pink), then add different colored tips using small pieces of tape as guides. My color sequence included fuchsia, cobalt blue, emerald green, bright orange, and purple – arranged in rainbow order across both hands.
What makes this design special is its versatility. It’s professional enough for a birthday workday but festive enough for evening celebrations. The colorful tips add just enough flair without overwhelming your look. This style works on both natural and artificial nails, and at any length, though longer nails showcase the colored tips more dramatically.
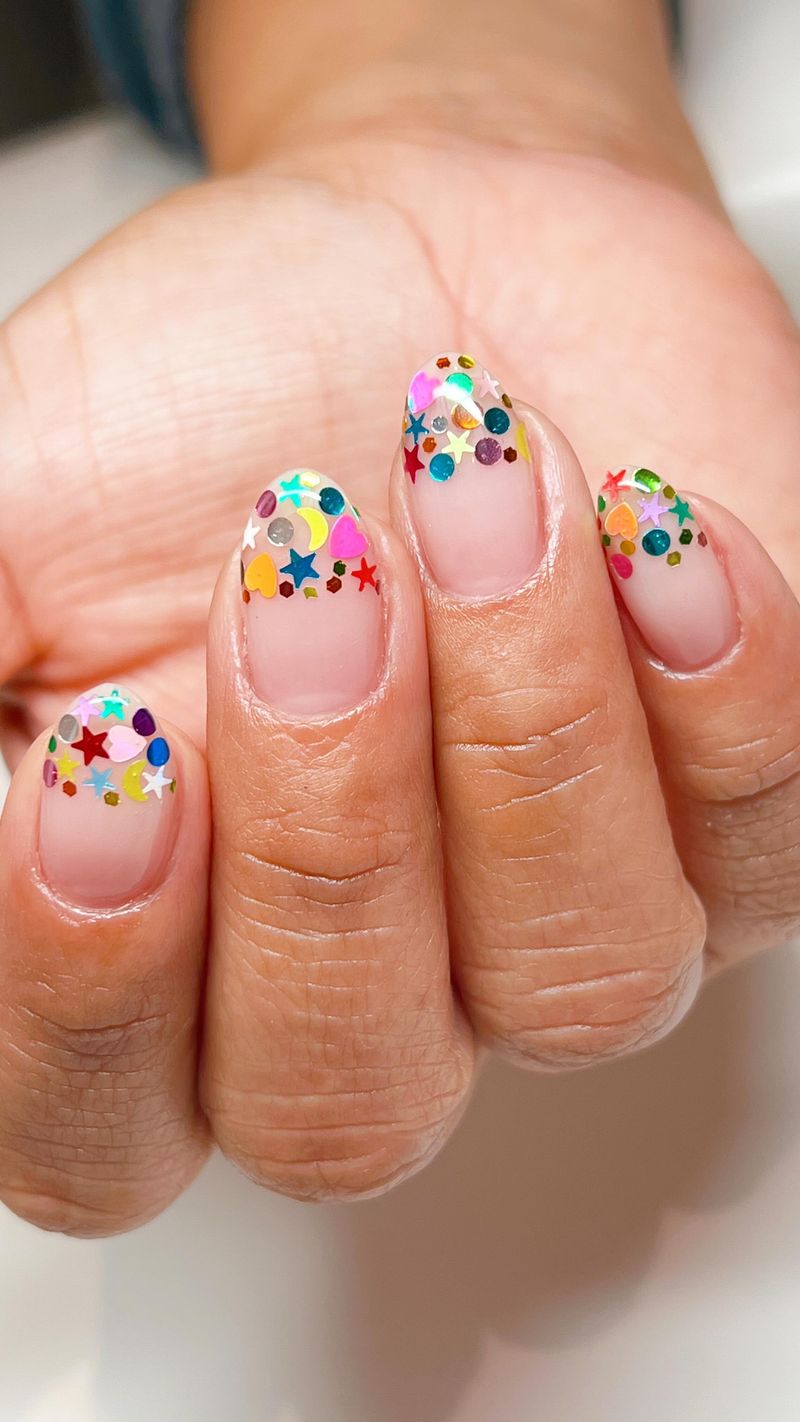
16. Star-Studded Designs
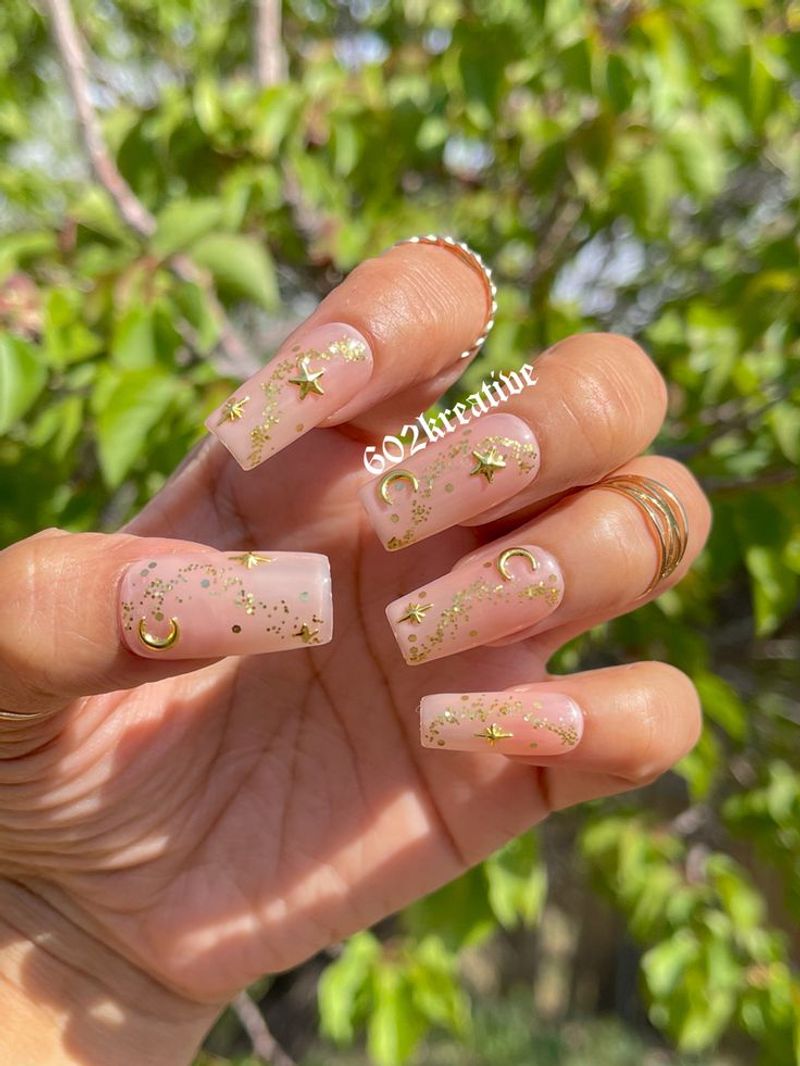
My birthday fell during a meteor shower last year, so these star-covered nails were the perfect cosmic celebration! The tiny stars scattered across my nails felt magical and special – exactly how birthdays should feel.
I created this look with a deep blue base (though black or purple work beautifully too) and added stars in various ways. Some nails got gold star stickers, others had hand-painted white stars, and my accent nail featured silver star-shaped glitter pieces.
Mixing star sizes creates depth and interest – I used tiny pinpoint stars alongside medium-sized ones. The random placement makes it look like a real night sky. These nails sparkle wonderfully under birthday candle light and make you feel like the star of your own show! They’re especially meaningful if you’re into astrology or were born under a lucky star.
17. Happy Birthday Lettering
Talk about making a statement! I splurged on these custom letter nails for my 30th and loved how they literally spelled out the celebration across my hands.
Each nail featured one letter from “HAPPY BDAY” with my thumbs displaying small party hat designs. The nail artist used a fine detail brush for the lettering against a pale pink background. The letters were done in black for maximum readability, with tiny gold accents around each one.
This design works best with longer nails that provide more space for lettering. Short on nail real estate? Focus the letters on just accent nails or abbreviate to “HBD” with party symbols on remaining nails. These conversation-starter nails make sure nobody forgets whose special day it is! They’re perfect for milestone birthdays when you really want to commemorate the occasion.